
User's Manual
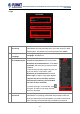
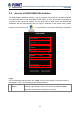
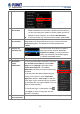
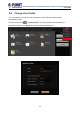
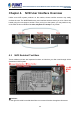
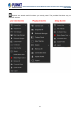
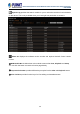
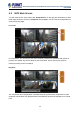
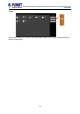
Table Of Contents
- Chapter 1. Product Description
- Chapter 2. Hardware Installation
- Chapter 3. Log in to the System
- Chapter 4. NVR User Interface Overview
- Chapter 5. Live View
- Chapter 6. Monitor the System
- 6.1 Read System Alerts and Channel Status
- 6.2 Live View Operations
- 6.2.1 Show Mini Live View Windows on a Map
- 6.2.2 Adjust Audio-in Volume
- 6.2.3 Send Audio Signal
- 6.2.4 Trigger Digital-out Device
- 6.2.5 Watch Instant Playback of a Channel
- 6.2.6 Manual Recording
- 6.2.7 Take a Snapshot of Live Image
- 6.2.8 Digital PTZ Operation
- 6.2.9 Optical PTZ Operation
- 6.2.10 Navigate a Fisheye Camera Channel
- Chapter 7. Playback
- 7.1 Playback UI Introduction
- 7.2 How to Do Playback
- 7.3 Search on Time Bar
- 7.4 Digital Zoom on Channel View
- 7.5 Explore Fisheye View
- 7.6 Search by Time
- 7.7 Search by Event Type
- 7.8 Search by Video Analytics
- 7.9 View Search Results
- 7.10 Take a Snapshot of the Playback View
- 7.11 Export the Recordings
- 7.12 Set the Export Video Settings
- Appendix A: Default Setting
- Appendix B: NVR Performance

64-Channel Windows-based Network Video Recorder with 8-bay Hard Disks
NVR-E6480
26
rview Chapter 4. NVR User Interface Ove
Unlike some NVR system products on the market, whose tree-like structure may easily
confuse the user. The NVR-E6480’s easy user interface structure saves you a lot of time and
hassle going from one page to another. Once you log in to the system, you may switch to any
of the main function modules: Live View, Playback and Setup on any screen.
4.1 NVR Resident Tool Bars
These resident tool bars are important functions or links that you often need through all the
operations in NVR system.
Tool Bar:
To the right of the title bar reside three links to most-used functions throughout all screens:
1