
User's Manual
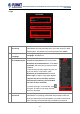
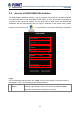
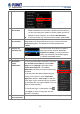
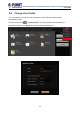
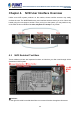
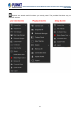
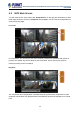
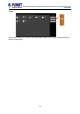
Table Of Contents
- Chapter 1. Product Description
- Chapter 2. Hardware Installation
- Chapter 3. Log in to the System
- Chapter 4. NVR User Interface Overview
- Chapter 5. Live View
- Chapter 6. Monitor the System
- 6.1 Read System Alerts and Channel Status
- 6.2 Live View Operations
- 6.2.1 Show Mini Live View Windows on a Map
- 6.2.2 Adjust Audio-in Volume
- 6.2.3 Send Audio Signal
- 6.2.4 Trigger Digital-out Device
- 6.2.5 Watch Instant Playback of a Channel
- 6.2.6 Manual Recording
- 6.2.7 Take a Snapshot of Live Image
- 6.2.8 Digital PTZ Operation
- 6.2.9 Optical PTZ Operation
- 6.2.10 Navigate a Fisheye Camera Channel
- Chapter 7. Playback
- 7.1 Playback UI Introduction
- 7.2 How to Do Playback
- 7.3 Search on Time Bar
- 7.4 Digital Zoom on Channel View
- 7.5 Explore Fisheye View
- 7.6 Search by Time
- 7.7 Search by Event Type
- 7.8 Search by Video Analytics
- 7.9 View Search Results
- 7.10 Take a Snapshot of the Playback View
- 7.11 Export the Recordings
- 7.12 Set the Export Video Settings
- Appendix A: Default Setting
- Appendix B: NVR Performance

64-Channel Windows-based Network Video Recorder with 8-bay Hard Disks
NVR-E6480
23
3.2 Access via NVR-E6480 Workstation
The NVR-E6480 workstation includes a set of programs that provide the interface between
users and NVR server. It may be installed in NVR server, or in the remote client computer that
connects to NVR server via network. For the local client of NVR server, the NVR-E6480
workstation will start automatically after you login to Windows; for the remote client, please
double-click the shortcut icon
on your desktop to execute this workstation application.
Login
Fill in the following fields and then click “Login” to log in to the system. The login process of
Workstation is very much the same as that of Web browser.
A. Choose a
Server
The NVR-E6480 workstation can remember multiple server sites
and their login settings. Click on the arrow next to Server Name,
and select a site from the dropdown list to log in.