
User's Manual
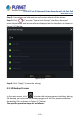
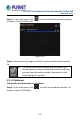
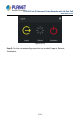

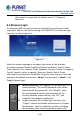
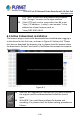
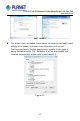
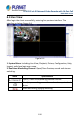

Table Of Contents
- Copyright
- Declaration
- Contents
- Chapter 1 Outlines and Features
- Chapter 2 NVR Appearance
- Chapter 3 Connecting NVR
- Chapter 4 NVR Startup
- Chapter 5 NVR Menu
- Chapter 6 Web Operation
- 6.1 Internet connection
- 6.2 Browser Login
- 6.3 Active X download, installation
- 6.4 Live View
- 6.5 Configuration
- 6.5.1 Local Config
- 6.5.2 Camera
- 6.5.3 Storage
- 6.5.3.1 Channel Recording
- Step 1: In the main interface, click "Configuration → Storage→ Channel Recording" to enter the recording setting interface, as shown in Figure 6-14 below.
- Figure 6-14
- Step 2: Set parameters, see the table below.
- Table 6-1
- Step 3: Click "Save" to complete configuration.
- Encode
- In the main interface, click "Configuration →Record →Encode" to enter the encoding setting interface, as shown in Figure 6-15 below. Here you can view and set the encoding parameter values for accessing the IPC. The relevant parameters and NVR-side se...
- Figure 6-15
- 6.5.3.2 Storage Manage
- HDD
- In the main interface, click "Configuration →Storage →Storage Manage" to enter the HDD interface, as shown in Figure 6-16 below. Here you can view the HDD information of the connected device and format the hard disk. The operation steps of formatting ...
- Figure 6-16
- Cloud Storage
- In the main interface, click "Configuration →System →Network →Cloud Storage" to enter Cloud Storage and IPEYE setting interface, as shown in Figure 6-17 below. Here you could enable and set the function of Cloud Storage and IPEYE, the specific setting...
- Figure 6-17
- 6.5.4 System
- 6.5.5 Maintain
- 6.6 Playback
- 6.7 Picture
- Chapter 7 Appendix

H.265 25-ch 4K Network Video Recorde with 16-Port PoE
NVR-2500 Series
195
the network is connected. For details, see 5.3.7.7 Network
Detection.
6.2 Browser Login
To make sure NVR connects to Internet successfully, open Browser, input
required IP address, the default setting is 192.168.0.20, and enter the login
interface, as below Figure 6-1.
Figure 6-1
Select the system language in the upper right corner of the interface
(currently supports Chinese Simplified, Chinese Traditional, English, Polish,
Czech, Russian, Thai, Hebrew, Arabic, Bulgarian, German, French, Portuguese,
Turkish, Spanish, Italian, Hungarian, Romance, Korean, Dutch, Greek,
Vietnamese, and Japanese, the default is English), enter the user name and
password, the default user name is "admin", the password is "admin", click
"Login" Remote login.
Modify Password: After logging in to the webpage, the
system prompts "The current password is too simple,
please modify the password!", click "Modify", enter
the new password, confirm the password, set the
security question, export the key, click "OK", and
complete the password modification.
Forgot password: On the Web login interface, click
"Forget", select a verification method such as "Answer
the question", select the question set when changing
the password, enter the corresponding answer, and