
User's Manual

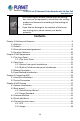
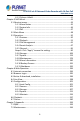
Table Of Contents
- Copyright
- Declaration
- Contents
- Chapter 1 Outlines and Features
- Chapter 2 NVR Appearance
- Chapter 3 Connecting NVR
- Chapter 4 NVR Startup
- Chapter 5 NVR Menu
- Chapter 6 Web Operation
- 6.1 Internet connection
- 6.2 Browser Login
- 6.3 Active X download, installation
- 6.4 Live View
- 6.5 Configuration
- 6.5.1 Local Config
- 6.5.2 Camera
- 6.5.3 Storage
- 6.5.3.1 Channel Recording
- Step 1: In the main interface, click "Configuration → Storage→ Channel Recording" to enter the recording setting interface, as shown in Figure 6-14 below.
- Figure 6-14
- Step 2: Set parameters, see the table below.
- Table 6-1
- Step 3: Click "Save" to complete configuration.
- Encode
- In the main interface, click "Configuration →Record →Encode" to enter the encoding setting interface, as shown in Figure 6-15 below. Here you can view and set the encoding parameter values for accessing the IPC. The relevant parameters and NVR-side se...
- Figure 6-15
- 6.5.3.2 Storage Manage
- HDD
- In the main interface, click "Configuration →Storage →Storage Manage" to enter the HDD interface, as shown in Figure 6-16 below. Here you can view the HDD information of the connected device and format the hard disk. The operation steps of formatting ...
- Figure 6-16
- Cloud Storage
- In the main interface, click "Configuration →System →Network →Cloud Storage" to enter Cloud Storage and IPEYE setting interface, as shown in Figure 6-17 below. Here you could enable and set the function of Cloud Storage and IPEYE, the specific setting...
- Figure 6-17
- 6.5.4 System
- 6.5.5 Maintain
- 6.6 Playback
- 6.7 Picture
- Chapter 7 Appendix

H.265 25-ch 4K Network Video Recorde with 16-Port PoE
NVR-2500 Series
10
1.3 Descriptive content agreement
In order to simplify the description in this manual, the following wordings are
made:
The "device" mentioned in this manual mainly refers to the NVR.
The "IP device" mentioned in this manual mainly refers to IP Camera.
The "channel" mentioned in this manual refers to the NVR's IP channel.
Click the "X" or "Cancel" button to return to the previous screen.
Click All Interfaces Default to restore the current factory default settings.
Click "Apply", "Confirm" and "Save" on all screens to save the current
settings.
Click "Copy" on all interfaces to enter the copy channel interface. Select
the channel to copy the current channel configuration to the selected
channel.
1.4 Function Features
NVR features are as follows:
H.264 video compressed format, supporting
4K/6M/5M/4M/3M/2M/1080P/720P/D1 resolution network camera
input.
G.711U, G711a, ADPCM_DVI4 audio compressed format.
Each channel supports three-stream encoding.
Windows-style user interface embedded real-time Linux3.0 operating
system.
Supports independent adjustment of coding parameters for each
channel, including coding type, resolution, frame rate, and bitrate.
Supports manual capture and image playback.
Supports preview, recording, play back, backup.
Supports Chinese Simplified, Chinese Traditional, English, Polish, Czech,
Russian, Thai, Hebrew, Arabic, Bulgarian, German, French, Portuguese,
Turkish, Spanish, Italian, Hungarian, Roman, Korean, Dutch, Greek,
Vietnamese and Japanese switches.
Some NVRs support fisheye correction, dual-screen preview, and PoE,
face detection, crossover detection, regional intrusion, and people
gathering detection.