8-/16-port Combo LCD KVM Switch IKVM/KVM-210 M Series 8-/16-port Combo LCD KVM 8-/16-port Combo IP LCD KVM IKVM/KVM-210 M Series -1-
8-/16-port Combo LCD KVM Switch IKVM/KVM-210 M Series Copyright Copyright 2017 by PLANET Technology Corp. All rights reserved. No part of this publication may be reproduced, transmitted, transcribed, stored in a retrieval system, or translated into any language or computer language, in any form or by any means, electronic, mechanical, magnetic, optical, chemical, manual or otherwise, without the prior written permission of PLANET.
8-/16-port Combo LCD KVM Switch IKVM/KVM-210 M Series (1) This device may not cause harmful interference, and (2) this device must accept any interference received, including interference that may cause undesired operation. Federal Communication Commission (FCC) Radiation Exposure Statement This equipment complies with FCC radiation exposure set forth for an uncontrolled environment.
8-/16-port Combo LCD KVM Switch IKVM/KVM-210 M Series Table of Contents Chapter 1. Product Introduction .......................................................................................................5 1.1 Package Contents ....................................................................................................................5 1.2 Overview ..................................................................................................................................6 1.
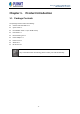
8-/16-port Combo LCD KVM Switch IKVM/KVM-210 M Series Chapter 1. Product Introduction 1.1 Package Contents The package should contain the following: Combo LCD KVM Switch x 1 Quick Guide x 1 IP installation Guide x 1 (For IKVM Series) KVM Cable x 1 Rack-mounting Kit x 1 Power Adapter x 1 Power Cord x 1 Stand Kit x 1 M6 Screw x 12 If any of the above items are missing, please contact your seller immediately.
8-/16-port Combo LCD KVM Switch IKVM/KVM-210 M Series 1.2 Overview Easy Switching, Efficient Management PLANET KVM-210-08M/16M Combo VGA LCD KVM Switch features an integrated 17" LED-backlit LCD panel allowing access to and control up to 8/16 computers from a single console (keyboard, mouse and monitor). Simply use the supplied Combo VGA cable set to link the KVM-210-08M/16M to the console ports of your KVM Switch, regardless of the connected port interface -- USB or PS/2.
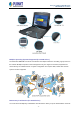
8-/16-port Combo LCD KVM Switch IKVM/KVM-210 M Series Multiple Operating Systems Supported (For IKVM Series) The IKVM-210-08M/16M is the most cost-effective and simple solution for controlling a group of PCs in the network. Multiple computers can be managed via only one single set of monitor, keyboard and mouse directly. No software drivers or system configuration are required. iMac, Power Mac and Sun systems are also supported.
-/16-port Combo LCD KVM Switch IKVM/KVM-210 M Series client, you could use these key combinations to control these local PCs with a different OS via the internet.
8-/16-port Combo LCD KVM Switch IKVM/KVM-210 M Series Powerful Mouse/Keyboard Support In the present computer applications, a mouse has become an indispensable device. The IKVM/KVM-210 Series fully supports all models of PS/2 mice on the market. The KVM also supports the PS/2 keyboard port of code set 1/2/3 and further allows you to use the KVM for all kinds of servers, computers or their combination.
8-/16-port Combo LCD KVM Switch IKVM/KVM-210 M Series 1.
8-/16-port Combo LCD KVM Switch IKVM/KVM-210 M Series 1.
8-/16-port Combo LCD KVM Switch IKVM/KVM-210 M Series Hotkeys on keyboard OSD (on screen display) Scan Interval 5~60 seconds Security User password and super password Environment & Certification Operating Temperature 0 ~ 50 degrees C Operating Humidity 0 ~ 90% Regulatory CE, FCC - 12 -
8-/16-port Combo LCD KVM Switch IKVM/KVM-210 M Series IKVM-210 M Series Specifications Product IKVM-210-08M IKVM-210-16M 8 D-sub ports (15-pin) 16 D-sub ports (15-pin) 64 by 2-tier star-type 256 by 2-tier star-type cascading cascading (KVM-210-08 x 8) (KVM-210-16 x 16) Hardware Number of Ports Maximum PC Ports Port Select Panel Keyboard PS/2 female + USB Type A female Mouse PS/2 female + USB Type A female Video 8 D-sub ports (15 female) Number Key 10 Reset 1 Enter 1 LED 8 (Red)
8-/16-port Combo LCD KVM Switch IKVM/KVM-210 M Series Management Supported Protocol TCP, IP, HTTP Client Software IPKVM Software Port select button PC Selection Hotkeys on keyboard OSD (on screen display) Scan Interval Security 5~60 seconds User password and super password DES, AES and 3DES Environment & Certification Operating Temperature 0 ~ 50 degrees C Operating Humidity 0 ~ 90% Regulatory CE, FCC - 14 -
8-/16-port Combo LCD KVM Switch IKVM/KVM-210 M Series Chapter 2. Hardware Interface 2.1 Physical Descriptions Control Platform No.
8-/16-port Combo LCD KVM Switch IKVM/KVM-210 M Series IKVM-210 M Series Rear Panels Interface Description The input power is 12V DC. Power Jack Use the power adapter included in the package; otherwise, it may damage the unit and result in danger. USB Port Plug external USB keyboard and mouse into this port. Computer Port Install the KVM cable connected to a PC here. Port Select Panel Interface Online Select RST Description If a corresponding LED number is on, it means the port is online.
8-/16-port Combo LCD KVM Switch IKVM/KVM-210 M Series IP Module Interface LAN Port Description One 10/100/1000BASE-T RJ45 auto-MDI/MDI-X port. Reboot Press and release to restart the system. Reset Press for 5 seconds to reset to default.
8-/16-port Combo LCD KVM Switch IKVM/KVM-210 M Series 2.2 Hardware Installation The LCD KVM provides a standard 19-inch rack for the installation of devices. Please use the rack installation accessories attached with the product package. First install the accessories to the device and then the device to the rack. Step 1. Screw the front flange to the rack first. Slide the bars with the rear flange towards the rack until the flanges make contact with the rack, then screw the rear flanges to the rack.
8-/16-port Combo LCD KVM Switch IKVM/KVM-210 M Series Step 3. Slide the rear attachment sliding brackets along the slide bars until they contact the rear of the switch. Step 4. Use the screws supplied with this package to attach the bars to the rear of the switch. Step 5. Connect a PC to a computer port of the KVM, for example, port 1.
8-/16-port Combo LCD KVM Switch IKVM/KVM-210 M Series Step 6. Attach the power supply to the KVM unit and plug the other end into an electrical receptacle. Now you will see the LED for Port 1 light up. Switch on your monitor from the Port Select button.
8-/16-port Combo LCD KVM Switch IKVM/KVM-210 M Series Chapter 3. Operations There are three ways to switch PC. Please see the operation instructions below for more understanding. 3.1 Manual Key You just need to press the Port Select Button on the front panel of the KVM. The Selection LED (Green) is on, indicating that you are switching to the corresponding port. 3.2 Switch Hotkey You can use the numeric keys to enter the direct switch.
8-/16-port Combo LCD KVM Switch IKVM/KVM-210 M Series Ctrl + Ctrl (Default setting) Scroll + Scroll Alt + Alt Shift + Shift Parameters Description This column lists the port numbers for all the CPU ports on the installation. PN The simplest method to access a particular computer is to move the highlight bar to it, and then press [Enter]. QV PC NAME If a port has been selected for Quick View scanning, an arrowhead symbol would display in this column to indicate so.
8-/16-port Combo LCD KVM Switch IKVM/KVM-210 M Series 3.3.1 GOTO GOTO allows you to switch directly to a port either by keying in the port’s name or its port number. NAME: Move highlight bar to “NAME”, press [Enter], input name of a port, and then press [Enter] to confirm. PN: Move highlight bar to “PN”, press [Enter], input port number, and then press [Enter] to switch. If the port number is invalid, it will remind the user to input again. 3.3.
8-/16-port Combo LCD KVM Switch IKVM/KVM-210 M Series 3.3.3 LIST The LIST function lets you broaden or narrow the scope of which port the OSD displays on the main screen. Parameters ALL QVIEW Description Lists all of the ports on the installation. Lists only the ports that have been selected as Quick View Ports. POWERED ON Lists only the ports that have their attached computers powered on.
8-/16-port Combo LCD KVM Switch IKVM/KVM-210 M Series 3.3.4 QV (Quick View) QV function can select port as Quick View. Move the highlight bar to a port and press [F4] to enable an icon of “up triangle” to appear. Press [F4] again and the icon disappears. 3.3.5 EDIT EDIT function creates or edits the name of a port. Press [F5] and a pink edit box will appear on the screen. Input name and then press [Enter] to enable the port to be named, appearing on the screen.
8-/16-port Combo LCD KVM Switch IKVM/KVM-210 M Series 3.3.6 SET SET function configures the OSD menu. Move the highlight bar to an option, and press [Enter] to enter a setting option. Parameters OSD ACTIVATING HOTKEY SWITCH HOTKEY CHANNEL DISPLAY MODE Description Select OSD activating hotkey. Select the switch hotkey to switch PC. Mode of small tip window. Choices and meanings are below: PN + NAME / PN / NAME Move the highlight bar to an option and press [Enter] to select it. Time the tip window last.
8-/16-port Combo LCD KVM Switch IKVM/KVM-210 M Series Parameters Description Set new password. The password permission is for administrator. SET SUPER First enter old password, then enter new password and confirm it. PASSWORD The new password is set. If error occurs, the screen will remind users. CLEAR THE NAME LIST RESTORE DEFAULT VALUE Clear the names of port list. You need to enter password to clear the names of port list. Restore settings to default value.
8-/16-port Combo LCD KVM Switch IKVM/KVM-210 M Series Chapter 4. IPKVM Software (For IKVM Series) PLANET IKVM Series provides an IPKVM utility to remotely control the server. 4.1 System Requirements The following are required for further management: CPU: Intel Dual Core 2.
8-/16-port Combo LCD KVM Switch IKVM/KVM-210 M Series Step 2. Once the Setup program starts running, please click the “Next” button for starting installation. Step 3. Click “Install” for starting installation.
8-/16-port Combo LCD KVM Switch IKVM/KVM-210 M Series Step 4. Click the “Finish” button for completing the IPKVM Setup. Please do not disable the Launch IPKVM. The IKVM needs registry to initiate the IPKVM software to enable to remotely control PC.
8-/16-port Combo LCD KVM Switch IKVM/KVM-210 M Series Chapter 5. Web-based Management (For IKVM Series) This section provides instructions about how to use the web interface to configure and control the PC remotely. 5.1 Mouse settings A different OS has a different mouse setting. Please refer to the steps below to set the mouse setting of PC before logging to Web.
8-/16-port Combo LCD KVM Switch IKVM/KVM-210 M Series iv. Set the mouse motion speed setting to exactly the middle speed. v. Disable the "Enhanced pointer precision" option. vi. Click OK. Windows 2000 Settings To configure KVM target servers running Microsoft Windows 2000 operating system: i. Choose Start > Control Panel > Mouse. ii. Click the Motion tab. iii. Set the acceleration to None. iv. Set the mouse motion speed setting to exactly the middle speed. v. Click OK.
8-/16-port Combo LCD KVM Switch IKVM/KVM-210 M Series ii. Save the file. iii. Reboot the system in order for the changes to take effect. Linux Settings (for Standard Mouse Mode) To configure KVM target servers running Linux (graphical user interface): i. Red Hat 5 users, choose Main Menu > Preferences > Mouse, Red Hat 4 users, choose System > Preferences > Mouse. The Mouse Preferences dialog appears. ii. Click on the Motion tab. iii.
8-/16-port Combo LCD KVM Switch IKVM/KVM-210 M Series iii. Choose Mouse Style Manager. The Style Manager - Mouse dialog appears. iv. Set the Acceleration slider to 1.0. v. Set the Threshold slider to 1.0. vi. Click OK. IBM AIX 5.3 Settings Follow these steps to configure KVM target servers running IBM. AIX. 5.3. To configure the mouse i. Go to Launcher ii. Choose Style Manager. iii. Click Mouse. The Style Manager - Mouse dialog appears. iv. Use the sliders to set the Mouse acceleration to 1.
8-/16-port Combo LCD KVM Switch IKVM/KVM-210 M Series 5.2 Network connection Step 1. Connect manager PC to RJ45 LAN port to enable to remotely manage a PC. The default IP address of the IKVM-210 Series is 192.168.0.10, then the manager PC should be set to 192.168.0.x (where x is a number between 1 and 254, except 10), and the default subnet mask is 255.255.255.0. Default DHCP Client N/A Default IP Address 192.168.0.
8-/16-port Combo LCD KVM Switch IKVM/KVM-210 M Series Step 3. If you cannot login the web, please use PLANET Smart Discovery Lite to search IKVM Series. 5.3 Web Management 5.3.1 Console The Console is the redirected screen, keyboard and mouse of the remote host system that IP-KVM controls.
8-/16-port Combo LCD KVM Switch IKVM/KVM-210 M Series Parameters Client Description Open the remote console to control PC. When you click “Client” and link the IPKVM.exe, then open the remote console. Please see the picture below for more understanding.
8-/16-port Combo LCD KVM Switch IKVM/KVM-210 M Series Parameters Description Press the Full Screen to make display in full screen. Full Screen After login, system will automatically calibrate mouse. If it fails, please click Align Mouse on the left to operate manually. A different OS has a different mouse setting. Please refer to Align Mouse the user manual for setting the mouse first. Adjusting display area of screen. Video Config The mouse can appear or hide by clicking it.
8-/16-port Combo LCD KVM Switch IKVM/KVM-210 M Series Parameters Super Administrator Description With all the permissions of setting operation Can edit the Console option setting of authorization Can add, delete, modify the user rights of the user operation; you can Administrator edit the level of user-related settings Can do the relevant inquiries of Log part.
8-/16-port Combo LCD KVM Switch IKVM/KVM-210 M Series Parameters MAC Encrypt Description Display the Ethernet MAC address of the device. Note that user cannot change it. DES, AES and 3DES. This address is a unique number that identifies a computer or device IP on the WAN or LAN. These numbers are usually shown in groups separated by periods, for example, 192.168.0.10. Subnets allow network traffic between hosts to be separated based on the network's configuration.
8-/16-port Combo LCD KVM Switch IKVM/KVM-210 M Series 5.3.5 System Parameters Version Device Daytime Set Device Daytime Restart Update Firmware Description This information shows the software version in the device. Displays the date and time of the device. Click this option to set time and date manually. The device is restarted without changing any of the settings. To update the firmware online, click “Browse…” to select the firmware. Then click “Update” to proceed.
8-/16-port Combo LCD KVM Switch IKVM/KVM-210 M Series Appendix A: Frequently Asked Questions Q1. [KVM-210-08/KVM-210-16] What should we do if the keyboard/mouse has no response? Step 1. Reinstall the keyboard/mouse by unplugging the keyboard/mouse from the control end and then plugging it back. Step 2. Reboot the PC. Step 3. In the Auto Scan mode, press [Esc] to exit. Step 4. If this issue continues, please hold the reset button for about 5 seconds to load default. Step 5.
8-/16-port Combo LCD KVM Switch IKVM/KVM-210 M Series Replace the VGA cable with the one that is appropriately short. Q5. [IKVM-210-08/IKVM-210-16] Why does the remote console cannot display the screen at Full HD? Please check the settings below to solve this issue: 1) Please check whether the cable from the switch to the computer is properly connected. 2) IKVM will detect the video resolution of LCD at console port.