
User's Manual
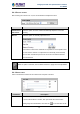
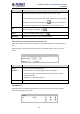
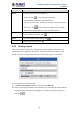
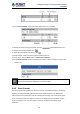
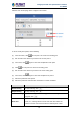
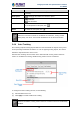
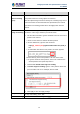

Table Of Contents
- Chapter 1. Product Introduction
- Chapter 2. Hardware Interface
- 2.1 Physical Descriptions
- 2.2 Hardware Installation
- 2.3 Initial Utility Installation
- 2.4 Using UPnP of Windows XP or 7
- 2.5 Setting Up ActiveX for the Camera
- Chapter 3. Web-based Management
- Appendix A. The Dimensional Diagram of the Stand
- Appendix B. The Dimensional Diagram of the Camera
- Appendix C. Ping IP Address
- Appendix D. Configuring Port Forwarding Manually
- Appendix E. Waterproofing the Cable Connections
- Appendix F. Joystick Compatibility
- Appendix G. Connecting Audio Devices
- Appendix H. Connecting Digital Input/ Digital Output Devices
- Appendix I. How to Replace the Fuse
- Appendix J. Troubleshooting & Frequently Asked Questions

2 Mega-pixel PoE Plus Speed Dome IP Camera
ICA-E6260
56
Parameters
Description
(seconds).
Scan Speed
: The bigger the number, the faster the speed.
Scan Direction
: Clockwise
: Anti-clockwise
Set
To set the position as the point, click .
Delete
To delete the scan point, click .
If both Tour and Scan Controls are enabled at the same time, Touring Control
takes priority over Scan. Tour must be disabled first to use the Scan function.
3.4.4 Auto Tracking
Auto Tracking captures moving objects within the view and follows the objects as they move
around providing unattended surveillance. In case of opposing moving objects, the camera
follows the objects which are more in focus.
Note that Auto Tracking cannot function at the same time with Touring Control and Scan
Control. To enable Auto Tracking, disable Touring Control or Scan Control first.
To configure the Auto Tracking function, do the following:
(1) Select Enabled on the box.
(2) Click Apply to confirm enable Auto Tracking.
If this box is Enabled, Touring Control and Scan Control functions are automatically
disabled.