
User's Manual
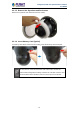
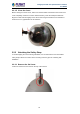
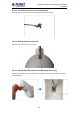
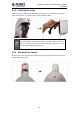
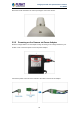
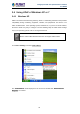
Table Of Contents
- Chapter 1. Product Introduction
- Chapter 2. Hardware Interface
- 2.1 Physical Descriptions
- 2.2 Hardware Installation
- 2.3 Initial Utility Installation
- 2.4 Using UPnP of Windows XP or 7
- 2.5 Setting Up ActiveX for the Camera
- Chapter 3. Web-based Management
- Appendix A. The Dimensional Diagram of the Stand
- Appendix B. The Dimensional Diagram of the Camera
- Appendix C. Ping IP Address
- Appendix D. Configuring Port Forwarding Manually
- Appendix E. Waterproofing the Cable Connections
- Appendix F. Joystick Compatibility
- Appendix G. Connecting Audio Devices
- Appendix H. Connecting Digital Input/ Digital Output Devices
- Appendix I. How to Replace the Fuse
- Appendix J. Troubleshooting & Frequently Asked Questions

2 Mega-pixel PoE Plus Speed Dome IP Camera
ICA-E6260
24
2.2.3 Inserting the Cable
Insert the camera cables through the mounting accessory (e.g., PTZ wall mount, straight
tube, extension tube, etc.) and through a hole in the wall or ceiling.
The camera itself is waterproof, but takes note that the cable connections
are not. If the cable connections are exposed outdoors, make sure to shield
or adapt proper waterproofing methods.
2.2.4 Mounting the Camera
Align the gap on the camera to the tab inside the mounting solution and insert the camera
through the mounting tube.