
User's Manual
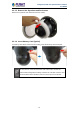
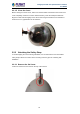
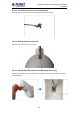
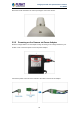
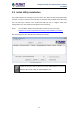
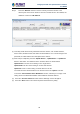
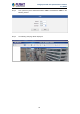
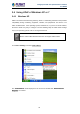
Table Of Contents
- Chapter 1. Product Introduction
- Chapter 2. Hardware Interface
- 2.1 Physical Descriptions
- 2.2 Hardware Installation
- 2.3 Initial Utility Installation
- 2.4 Using UPnP of Windows XP or 7
- 2.5 Setting Up ActiveX for the Camera
- Chapter 3. Web-based Management
- Appendix A. The Dimensional Diagram of the Stand
- Appendix B. The Dimensional Diagram of the Camera
- Appendix C. Ping IP Address
- Appendix D. Configuring Port Forwarding Manually
- Appendix E. Waterproofing the Cable Connections
- Appendix F. Joystick Compatibility
- Appendix G. Connecting Audio Devices
- Appendix H. Connecting Digital Input/ Digital Output Devices
- Appendix I. How to Replace the Fuse
- Appendix J. Troubleshooting & Frequently Asked Questions

2 Mega-pixel PoE Plus Speed Dome IP Camera
ICA-E6260
22
2.2.1.5 Close the Cover
Before closing the camera cover, make sure that the rubber band sticks to the inside of the
cover completely. Crooked or uneven rubber band may cause the waterproof defective.
Align the screw holes and tightly secure the screws using the bundled hex screwdriver to
ensure there's no gap between the lid and base.
2.2.2 Attaching the Safety Strap
To avoid dropping the camera during installation, it is recommended to use the bundled
safety strap to attach the camera to the mounting accessory prior to continuing with
installation.
2.2.2.1 Remove the Set Screw
Locate and remove the set screw on the top of the camera.