
User's Manual
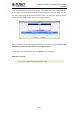
Table Of Contents
- Chapter 1. Product Introduction
- Chapter 2. Hardware Interface
- 2.1 Physical Descriptions
- 2.2 Hardware Installation
- 2.3 Initial Utility Installation
- 2.4 Using UPnP of Windows XP or 7
- 2.5 Setting Up ActiveX for the Camera
- Chapter 3. Web-based Management
- Appendix A. The Dimensional Diagram of the Stand
- Appendix B. The Dimensional Diagram of the Camera
- Appendix C. Ping IP Address
- Appendix D. Configuring Port Forwarding Manually
- Appendix E. Waterproofing the Cable Connections
- Appendix F. Joystick Compatibility
- Appendix G. Connecting Audio Devices
- Appendix H. Connecting Digital Input/ Digital Output Devices
- Appendix I. How to Replace the Fuse
- Appendix J. Troubleshooting & Frequently Asked Questions

2 Mega-pixel PoE Plus Speed Dome IP Camera
ICA-E6260
108
A good example is a “panic button”, which always stays in inactive mode “0” until the button is
pressed; when the button is pressed, its active level becomes “1” which means the DI is
triggered. Active level “1” returns back to “0” (inactive mode) after the specified Interval. The
Interval is the duration of time when the trigger remains in active mode which is also the
minimum time interval between the previous trigger and the next. For example, if the interval
is set to “5 seconds”, the DI will not respond if the “panic button” is pressed within 3 seconds
after the previous trigger. To issue another trigger, press the button after 5 seconds from the
previous trigger.
DO: To configure the digital output device, define the active level and response interval. The
default Active Level is “1”, which means the DO will turn to active mode and respond once
triggered. The duration of its response will last according to the set Interval. A good example
is an alarm siren, wherein the siren will start sounding only when it is triggered by an event or
another device like a DI. The siren will stop sounding once the set interval time elapsed.
After changing any of the items above, press Apply to save the changes. The Reset button
undoes the changes that had just been made but not yet applied or saved.
Sound Detection
Sound detection is available on cameras with Audio in capability and is shown on the user
interface only if the Audio In function is enabled in Audio setup menu. Sound detection is
used to trigger the camera or another camera to perform specific actions or a digital output
device, such as alarms or lights, etc. to respond.
Check the Enabled box to enable Sound Detection.
The Trigger Interval refers to the time interval of the first detected sound to the next
detected sound. For example, if trigger interval is set at 5 (seconds), the next sound
detection is triggered only after 5 seconds. If the next sound is detected 3 seconds after the
first sound, the trigger is not activated.
To set the range or loudness of sound, set the Trigger Threshold. This helps define which