
User's Manual
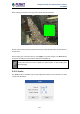
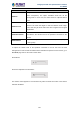
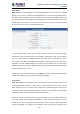
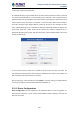
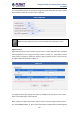
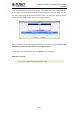
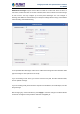
Table Of Contents
- Chapter 1. Product Introduction
- Chapter 2. Hardware Interface
- 2.1 Physical Descriptions
- 2.2 Hardware Installation
- 2.3 Initial Utility Installation
- 2.4 Using UPnP of Windows XP or 7
- 2.5 Setting Up ActiveX for the Camera
- Chapter 3. Web-based Management
- Appendix A. The Dimensional Diagram of the Stand
- Appendix B. The Dimensional Diagram of the Camera
- Appendix C. Ping IP Address
- Appendix D. Configuring Port Forwarding Manually
- Appendix E. Waterproofing the Cable Connections
- Appendix F. Joystick Compatibility
- Appendix G. Connecting Audio Devices
- Appendix H. Connecting Digital Input/ Digital Output Devices
- Appendix I. How to Replace the Fuse
- Appendix J. Troubleshooting & Frequently Asked Questions

2 Mega-pixel PoE Plus Speed Dome IP Camera
ICA-E6260
102
Parameters
Description
Audio In
The option “Enabled” would activate incoming audio (either line in or
built-in microphone). The option “Disabled” would turn off the
coming audio. In such case, the video stream is captured without
audio.
Audio In Level
Choose “High” when the target is farther away from the camera and
choose “Low” when the target is near the camera. Under “High”
mode, there may be more audio noise due to higher level of signal
amplification.
Audio Out Volume
The audio out volume level can be adjusted in the scale of 0-100. It
will influence the volume level of the speakers connected to the
camera.
Audio Format
Choose the compression format of audio: PCM, G.711A (A-law) or
G.711U (µ-law).
To adjust the volume level of the speakers connected to the PC that runs the web
management in order to hear the audio from the camera’s microphone or line-in device, go to
Live View page and use the audio controls there:
Audio Muted:
Audio level adjusted to the maximum:
This volume control appears in user interface only when the Audio-in function of the camera
has been “Enabled”.