
User's Manual

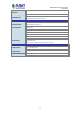
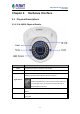
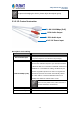
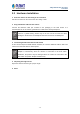

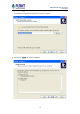
Table Of Contents
- Chapter 1. Product Introduction
- Chapter 2. Hardware Interface
- Chapter 3. Web-based Management
- Device Time Setting
- Adjust
- Manual Setting:
- Click this option to set time and date manually.
- Synchronize with NTP:
- Click this option if you want to synchronize the device’s date and time with those of time server called NTP server (Network Time Protocol).
- Time Zone
- Set the time difference from Greenwich Mean Time in the area where the device is installed.
- Timing Address
- Enter the NTP server IP address.
- Appendix A: Ping IP Address
- Appendix B: Bandwidth and Video Size Estimation
- Appendix C: DDNS Application
- Appendix D: Configuring Port Forwarding Manually
- Appendix E: Power Line Frequency
- Appendix F: Troubleshooting & Frequently Asked Questions

1080p IR Bullet PoE IP Camera
ICA-4460V
- 16 -
2.2 Hardware Installation
1. Place the Camera on the ceiling or fix it onto wall
Use three screws to fix the camera onto the ceiling or wall.
2. Plug an Ethernet cable into the camera
Connect the Ethernet cable (not included in the package) to the LAN socket. It is
recommended to use an exterior-grade Ethernet cable that is already waterproof.
3. Connecting the Ethernet cable to PoE switch
As the camera adopts the IEEE 802.3af standard, the camera’s Ethernet cable is able to be
connected to this PoE switch to obtain power.
The camera can be powered on by a PoE switch or DC adapter. However, the DC
adapter is unnecessary when the camera is connected to the
PoE switch.
Otherwise, the product may be damaged when the camera is connected to the
PoE switch and power adapter simultaneously.
4. Adjusting the angle of lens:
Adjust the camera’s stand to get a proper angle.
5. Done
There is a yellow warning sticker only on the rear end of the all-in-one cable,
stating the small area is not waterproof while the rest of them are waterproof.