USB ADSL Modem ADU-2100 User’s Manual
Copyright Copyright (C) 2003 PLANET Technology Corp. All rights reserved. The products and programs described in this User’s Manual are licensed products of PLANET Technology, This User’s Manual contains proprietary information protected by copyright, and this User’s Manual and all accompanying hardware, software, and documentation are copyrighted.
Revision User’s Manual for PLANET USB ADSL Modem Model: ADU-2100A / ADU-2100B Rev: 1.0 (JUL. 2003) Part No.: EM-ADU2100V1.
TABLE OF CONTENTS CHAPTER 1 INTRODUCTION................................................... 1 FEATURES...............................................................................................................1 DATA REQUIREMENT ................................................................................................1 ADSL LAN mode user .................................................................................................. 1 ADSL WAN (PPPoE/PPPoA) mode user .............................
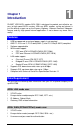
Chapter 1 Introduction 1 PLANET USB ADSL modem ADU-2100 is designed to provide cost-effective access to high-speed ADSL services. With our ADSL modem, surfing on Internet is just like driving a sport car on the Express Highway. Video on Demand, Videoconference and any high-speed Internet applications is not a dream any more. But a reality! Features l l l l l l l l USB bus-powered; an external power supply is not required ANSI T1.413 issue 2, ITU G.dmt(G.992.1), and ITU G.lite(G.992.
System Requirement l l l l Mainboard with USB support Pentium II CPU and above or compatible RAM: 64M or above Windows 98, Windows 2000, Windows ME, Windows XP, Windows 2003 Server 2
Chapter 2 Installation 2 Please refer to the following steps to complete ADU-2100 installation. Hardware Installation 1. Turn on your PC 2. Insert the rectangular end of a USB cable into the USB port of your PC. Then, insert the square end of the USB cable into the USB port of the ADU 2100. 3. PC will automatically detect this modem as “USB Net Card”. 4. Insert bundled USB driver CD into the proper drive and follow instruction to install ADU 2100.
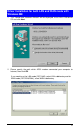
3. Choose Specify a location. Then click Next. If you need to set for LAN mode (RFC1483), select LAN subdirectory and for WAN mode (RFC2516/2364), select WAN subdirectory.
4. The Add New Hardware Wizard will appear and indicate the PLANET ADU-2100 USB ADSL Interface has been recognized and will install a new driver. Click Next 5. Click Finish to complete the installation.
Driver Installation for both LAN and WAN mode with Windows ME 1. The “Found New Hardware Wizard” will be displayed. Insert ADU-2100 driver CD and click Next. 2. Please specify the path which ADSL modem connected your computer to Internet, then click OK. If you need to set for LAN mode (RFC1483), select LAN subdirectory and for WAN mode (RFC2516/2364), select WAN subdirectory.
3. Click Finish to complete ADU-2100 driver installation. Driver Installation for both LAN and WAN mode with Windows 2000 1. The “Add New Hardware Wizard” will be displayed and click Next.
2. Choose the “Search for a suitable driver for my device (recommended)”, and click Next. 3. Next you will be prompted for software drivers. Select Specify a location. 4. Insert the ADSL Driver CD into your systems CD-ROM drive, Select Driver Directory LAN or WAN, then click OK. If you need to set for LAN mode (RFC1483), select LAN subdirectory and for WAN mode (RFC2516/2364), select WAN subdirectory.
5. The Found New Hardware Wizard will then find the ADSL USB MODEM, click Next.
6. The “Digital Signature Not Found” window will pop-up, Click Yes. 7. Click Finish to complete the installation.
Driver Installation for both LAN and WAN mode with Windows XP 1. The “Add New Hardware Wizard” will be displayed. Choose Install from a list or specific location (Advanced) and click Next. 2. Insert the ADSL Driver CD into your systems CD-ROM drive, Select Driver Directory LAN or WAN, then click Next. If you need to set for LAN mode (RFC1483), select LAN subdirectory and for WAN mode (RFC2516/2364), select WAN subdirectory.
3. The Hardware Installation window appears. You will be asked; Do you want to continue installation? Click Continue Anyway. . 3. At the conclusion of the ADSL modem driver installation, the Found New Hardware Wizard window appears and displays your newly installed PLANET ADU-2100 USB ADSL Interface, then click Finish.
Driver Installation for both LAN and WAN mode with Windows 2003 Server 1. The Found New Hardware Wizard will appear. Select Install from a list or specific location (Advanced), and click Next. 2. Insert the ADSL Driver CD into your systems CD-ROM drive, Select Driver Directory LAN or WAN, then click OK. If you need to set for LAN mode (RFC1483), select LAN subdirectory and for WAN mode (RFC2516/2364), select WAN subdirectory.
3. The Hardware Installation window appears. You will be asked; Do you want to continue installation? Click Continue Anyway. 4.
Chapter 3 ADSL Configuration 3 ADSL LAN Configuration 1. Conexant Access Runner ADSL icon should be added in the control panel or on the desktop. 2. Click the Conexant Access Runner ADSL icon, it will be displayed the status of the modem.
3. Press Alt + P on the keyboard, the right figure appears. 4. Under the Protocol Setup please set the value of VCI, VPI and Encapsulation. 5. Click My Computer on the desktop\ Control Panel\Network\Configuration -> select TCP/IP -> click properties to configure TCP/IP configuration.
6 IP Address setting: select Specify an address, then enter the value of IP Address and Subnet Mask obtained from ISP. 7. Gateway setting: enter the data from your ISP and click Add.
8. DNS Configuration setting: Select Enable DNS, enter Host name and add DNS Server Search Order. Click Add and OK. 9. Reboot computer to activate the modifications if necessary. NOTE: TCP/IP configuration listed above is a sample for ADU-2100 installation on Windows 98 machine. It is strongly recommended to refer user’s manual of operating system or consult network administrator to ensure correctness of TCP/IP configuration.
ADSL WAN configuration 1. After driver installation, Conexant Access Runner ADSL and AccessRunner DSL icon should be added in the control panel and on the desktop. 2. Click the Conexant Access Runner ADSL icon, it will be displayed the status of the modem. 3. Press Alt + P on the keyboard, the control panel appears. 4. Under the Protocol Setup please set the value of VCI, VPI and Encapsulation, then click OK.
5. Click the Access Runner DSL icon on the desktop -> enter User name, Password and Phone number (don’t care; recommend “0000”) from your ISP. 6. Click Connect. Now, you can surfer the Internet.