802.11g Wireless USB 2.0 Adapter WL-U356M User Manual Version: 1.
Copyright Copyright © 2007 by PLANET Technology Corp. All rights reserved. No part of this publication may be reproduced, transmitted, transcribed, stored in a retrieval system, or translated into any language or computer language, in any form or by any means, electronic, mechanical, magnetic, optical, chemical, manual or otherwise, without the prior written permission of PLANET.
This equipment complies with FCC radiation exposure set forth for an uncontrolled environment. In order to avoid the possibility of exceeding the FCC radio frequency exposure limits, human proximity to the antenna shall not be less than 20 cm (8 inches) during normal operation.
PLANET WL-U356M TABBLE OF CONTENTS Chapter 1 Introduction ...................................................................................................5 1.1 Features ............................................................................................................5 1.2 Specification ....................................................................................................6 1.3 Package Contents ........................................................................................
Chapter 1 Introduction Complying with the IEEE802.11b/g standard, the WL-U356M provides simple, reliable, and high-speed wireless connectivity for both desktop and laptop users. The WL-U356M is capable of offering up to 54Mbps at 2.4GHz frequency bands. Support of WPA (Wi-Fi Protected Access) with AES encryption keeps your wireless communications away from unauthorized access and ensures secure data transfer. Backward compatible with 802.
5. Access to database for mobile workers Doctors, nurses, retailers, white-collar workers who need access to database while roaming in the hospital, retail store or office. 6. SOHO (Small Office and Home Office) users SOHO users who are in need of easy-to-install and wide coverage networking. 1.2 Specification Standards IEEE 802.11b/g Modulation 802.11b: CCK (11 Mbps), DQPSK (2 Mbps), DBPSK (1 Mbps); 802.
If any of the above items is missing, contact your supplier for support. 1.4 Minimum System Requirements Before installation, please check the following requirements with your equipment. Pentium Based (above) IBM-compatible PC system with one vacancy USB2.0/1.1 port CD-ROM drive Windows 98SE/Me/2000/XP Operating System At least 10MBytes of free disk space for utility and driver installation 1.6 Installation Considerations Beware of the walls and ceilings.
Chapter 2 Designing Your Wireless Network The PLANET WL-U356M supports up to 54 Mbps connections. This card is fully compliant with the specifications defined in IEEE802.11g standard. It is designed to complement USB port computers and supports Windows 98SE/Me/2000/XP 2.1 PLANET WL-U368M The status LED indicators of the PLANET WL-U356M are described in the following. z Lnk/Act ON (Green): Indicates a valid connection z Lnk/Act Flashing: Indicates the Adapter is transmitting or receiving data.
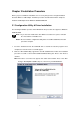
Chapter 3 Installation Procedure Before you proceed with the installation, it is necessary that you have enough information about the Wireless USB Adapter. Follow the procedure described below in this chapter to install the USB adapter under Windows 98SE/Me/2000/XP. 3.1 Configuration Utility & Driver Installation The following installation operates under Window XP. The procedure also applies to Windows 98SE/Me/2000.
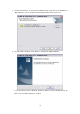
3. You may click “Browse” to specify the Destination Folder you prefer for the installation of utility. Otherwise, you can keep the default setting and click “Next” to proceed. 4. Once the utility is installed, select “Finish” to complete the utility installation. If your operating system is Windows XP/Server 2003, the below window will pop up. Please select “Continue Anyway” to continue.
If your operating system is Windows 2000, the below window will pop up. Please choose “Yes” to go on. 5. Please insert WL-U356M into a vacant USB port on the computer. Note: For Windows 2000, please directly skip to step 7. If your operating system is Windows 98SE, Windows will automatically detect and install the device and ask you to insert the system installation CD to complete the entire procedure.
6. Windows will automatically detect the device. Choose “Install the software automatically (Recommended)”. Then click “Next” to continue. 7. A screen will appear to inform you that the USB adapter has not passed Windows Logo testing (WHQL). Click “Continue Anyway” to proceed. 8. Please click “Finish” to complete the driver installation.
3.2 Configuration your wireless adapter Note. When you install a wireless card to Windows XP / Server 2003, Wireless Zero Configuration will take over the configuration. You have to disable it before using the WL-U356M configuration utility. If your operating system is Windows 98SE/Me/2000, please directly skip to step 4. 1. 2. Click this icon in the system tray to open Wireless Zero Configuration. In the “Wireless Network Connection” window, click “Advanced.
3. Uncheck “Use Windows to configure my wireless network settings” and click “OK” to save. 4. Double-click the utility icon in the desktop, then you will see the WL-U356M utility.
Chapter 4 Configuration Utility The Configuration Utility is a powerful application that helps you configure the WL-U356M and monitor the link status and statistics during the communication process. When the WL-U356M is installed, the configuration utility will be displayed automatically.
Figure 4-2 4.1 Network Status The Network Status tab displays signal strength and link information, Internet Protocol (TCP/IP). Figure 4-3 Link Information Status: The status of the wireless network connection. z Network SSID: The unique name of the wireless network. z Network Type: The mode of the wireless network currently in use. z Network BSSID: The MAC address of the wireless network’s access point. z Security: The status of the encryption security feature.
z DHCP Option: The status of the DHCP client. z IP Address: The IP Address of the Adapter. z Subnet Mask: The Subnet Mask of the Adapter. z Default Gateway: The Default Gateway address of the Adapter. 4.2 Profile Manager Figure 4-4 On the Profile Manager tab, click the Create button to create a new profile. 4.2.1 Infrastructure Mode When the Network Info screen appears, enter a name for the new profile. Enter the Network SSID.
Figure 4-5 Choose the Authorization Modes and Encryption Method in the drop-down box. Figure 4-5 Click the Configure WEP Keys button to continue.
Enter Key Value for the Key1, click OK to continue. Figure 4-7 Click Next to continue.
Figure 4-9 4.2.2 Ad-Hoc Mode When the Network Info screen appears, enter a name for the new profile. Enter the Network SSID. Choose the Ad-Hoc Mode in the Network Type drop-down box if you want multiple wireless computers to communicate directly with each other. Figure 4-10 Select the correct operating channel for your network form the Prefer Channel drop-down menu. Click the Next button. Figure 4-11 Choose the Authorization Modes and Encryption Method in the drop-down box.
Figure 4-12 Click the Configure WEP Keys button to continue. Figure 4-13 Enter Key Value for the Key1, click OK to continue.
Click Next to continue.
4.2.3 Profile Setting Figure 4-17 Parameter Description Network Info tab This tab enable you to view and to change setting the network information including Profile Name, Network SSID, Network Type, Wireless Mode. Security tab This tab enable you to view and change setting the security information including Authentication Mode, Encryption.
Create, click “Save” button to save your configure. 4.3 Site Survey The Site Survey tab, displays a list of infrastructure and ad-hoc networks available for connection. Figure 4-18 Filter button – It can filter Network SSID, Network BSSID and Select Channel. Network SSID and Network BSSID can filter any one or only one. Select Channel can filter all channel, only one channel or channel of in a certain range.
Figure 4-19 Refresh button – It enable you to displays a new list of infrastructure and ad-hoc networks available for connection Associate button -- The section of the window displays the Available Networks. Highlight the network to which you wish to connect. Figure 4-20 Choose the Authorization Modes and Encryption Method in the drop-down box. If the wireless network uses a Passphrase, enter the Passphrase in the Passphrase field.
Parameter Description Authentication Mode This setting has to be consistent with the wireless network that the device intends to connect. Open System – No authentication is needed among the wireless network. Shared Key – Only wireless devices using a shared key (WEP Key identified) are allowed to connecting each other. 802.1x – You can also enable IEEE 802.1x setting to use the authentication server or certification server to authenticate client users.
The difference between WPA and WPA2 is that WPA2 provides data encryption via the AES. In contrast, WPA uses Temporal Key Integrity Protocol (TKIP). Encryption Method Security Off – Disable the encryption mode. WEP – Enable the WEP Data Encryption. When the item is selected, you have to continue setting the WEP Encryption keys. TKIP – TKIP (Temporal Key Integrity Protocol) changes the temporal key every 10,000 packets (a packet is a kind of message transmitted over a network.
4.4 Statistics The Statistic tab enables you to view the statistic information of the connection including signal strength, transmit, receive and protocol. Figure 4-21 4.5 Advance The Advance tab enables you to configure more advanced setting, for example: power save mode, preamble and etc.
Figure 4-22 Parameter Description Power Save Mode The power saving function is only available when the network type is in infrastructure. Continuous Access – The device will always set in active mode. Max Power Save – Enable the device in the power saving mode when it is idle. Preamble The preamble defines the length of the CRC block of communication among wireless devices. This option is only active in the Ad-Hoc network.
When the wireless mode is “802.11 b”, the maximum data rate is 11Mbps(11b) so that there are only “Auto/1/2/5.5/11Mbps” options you can select. Fragment Threshold The value defines the maximum size of packets; any packet size larger that the value will be fragmented. If you have decreased this value and experience high packet error rates, you can increase it again, but it will likely decrease overall network performance. Select a setting within a range of 256 to 2346 bytes. Minor change is recommended.
4.6 Admin The Admin tab screen lets you import or export profiles. Figure 4-23 z Export Profile To save the profile(s) in a different location, click the Export Profile button. On the screen that appear , direct Windows to the appropriate folder and click the SAVE button. Figure 4-24 z Import Profile Click the Import Profile button to import a profile that has been saved in another location. From the screen that appears, select the appropriate file, and click the Open button.
Figure 4-25 4.7 About The About tab enables you to view the information of the PLANET WL-U356M including MAC Address, Regulatory Domain, Firmware Version and etc.
Chapter 5 Troubleshooting This chapter provides solutions to problems that may occur during the installation and operation of the PLANET WL-U356M. Read the descriptions below to solve your problems. 1. The PLANET WL-U356M does not work properly. . Reinsert the PLANET WL-U356M into your PC’s USB port. . Right click on My Computer and select Properties. Select the device manager and click on the Network Adapter. You will find the Adapter if it is installed successfully.
to establish a BSS at the same time, which can result in multiple singular BSSs being established, rather than a single BSS with multiple clients associated to it. . Check that the Network Connection for the wireless client is configured properly. . If Security is enabled, make sure that the correct encryption keys are entered on both the Adapter and the access point.