
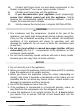
Instructions


17
Depending on model
56
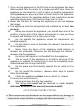
3.
The accessories of your appliance can be protected from damage due to
transportation (adhesive tapes etc.). Remove such tapes very carefully.
Remove remains of such tapes with a damp cloth using lukewarm water and a
mild detergent (see also chapter CLEANING AND MAINTENANCE). Never
remove any components of the back of the appliance!
4.
Install the appliance in a suitable position with an adequate distance from
sources of heat and cold.
5.
If installation near a heat source is unavoidable, use a suitable insulation plate
or keep the following minimum distances to the heat source:
To electric cookers
at least 30 mm
To radiators or ovens
at least 300 mm
To another refrigerators
at least 20 mm
6.
Check that the appliance and the power cord are not damaged.
7.
Install the appliance in a dry and well-ventilated place.
8.
Protect the appliance from direct sunlight.
9.
The door(s) must open completely and without hindrance.
10.
Install the appliance on a level, dry and solid floor. Check the correct
installation with a bubble level.
11.
Connect the appliance to the mains properly.
12.
The rating plate is inside the appliance or at the back.
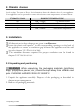
3.2
Space and ventilation requirements
Observe the required minimum distances for proper ventilation (s. chapter
3.2.1
WALL SPACERS and chapter 3.2.2 VENTILATION).
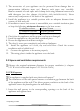
3.2.1
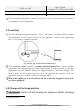
Wall spacers
The appliance is supplied with two plastic wall spacers
17
The installation of the wall spacers ensures a ventilation gap between the back
of the appliance and the wall. This allows proper ventilation as the back of the
appliance cannot be placed against the wall directly.
1.
Insert the wall spacers in the corresponding openings on the back of the
appliance and tighten them.