v
J J MI'S , PF28-03 Pita> Frialator '1..20-086-01 Rev00 Rev.
~ NonCES There are three different types of noti~s that you should be familiar with, a NO11CE, CAunON, and WARNING. A NO11CE is a specialnote usedto call attention to a particularly important point CAunON is used to point out a procedureor operation which may causeequipmentdamage. The WARNING notice is the most important of the three becauseit warns of an operationthat may cause personalinjury. Pleasefamiliarize yourself with your new rooter before operating it and heed the notices throughout this manual.
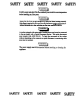
~ SAFETY SAFETY SAFETY SAFETY SAFETY The fryer is equipped with an oil proof, electrical supply oord with a three prong safety plug. This is to protect operatorsfrom electrical shock hazard in the event of an equipment malfunction. DO NOT cut or remove the grounding (dlird) prong from this plug. ~==I There is an open flame inside the fryer. The unit may get hot enough to set nearby materials on file. Keep the areaaround the fryer free from combus- tibles.
SAFETY S~FETY S:AFETY SAFETY S:AFETY It will be easierandsaferif thefilter assemblyhasoooledto room temperature before handling any filter parts. Ensure that the fryer can get enough air to keep the flame burning oorrectly. If the flame is starvedfor air it can give off a dangerouscarbonmonoxide gas. CarbonMonoxideis a clearodorlessgasthat cancausesuffocation.
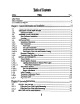
Tableof Contents Title Section Safety - Notice Tableof Contents Ust of TablesandFigures 1.1 1.2 1.2.1 1.3 1.3.1 1.3.2 1.4 1.4.1 1.4.2 1.4.2.1 1.4.2.2 1.4.2.3 1.4.2.4 1.4.3 1.4.4 1.5 1.5.1 1.5.2 1.5.2.1 1.5.2.1.1 1.5.3 1.5.3.1 1.5.3.2 1.5.4 1.5.5 1.5.6 1.5.7 i-ii ill WInCH FRYERDO I HAVE? CHECKINGYOUR NEW FRYER Cleck Your Order ASSEMBLY AND LEVEUNG HeatDeflectorIn..
Tableof Contents(Continued) Section ntle Page 2.3 2.3.1 2.3.2 2.3.3 2.4 2.4.1 2.4.2 2.S OPERA11NGINSTRUcnONS Fryer Start-Up Fryer Shutdown PowerFailure ... ... " ..,.. SHORTENINGFILTER PROCEDURES .,.,." GeneralFilter Hints Filter Procedures. DAn.,Y CLEANING 3.1 3.2 3.3 3.4 3.4.1 3.4.2 Fll..TER MEDIA REPLACEMENT WEEKLY FRYER CLEANING (BOIL OUT) f1..UEINSPEC'fION TROUBLESHOOTING Fryer Troubleshooting Filter Troubleshooting... ii ,..",.,...,..." ... 2-2 2-2 2-3 2-3 2-4 2-5 2-6 2-7 ,.., ... ...
List of Tablesand Figures 1-1 Fryer Model Information 1-2 Ventilation andFire SafetyReferences Title Figure 1-1 1-2 1-3 1-4 1-5 InsideView of Fryer Pilot Assembly,FlameAdjustment GasVaJveShowingLocationof PressureRegulatorand Pilot Adjusters Main BurnerConditions Air Collar 2-1 Fryer mustratingFilter Components 3-1 Filter Module iii 1-1 1-6 Page 1-9 1-9 1-10 1-11 1-12
iv
Chapter 1: GeneralInformation and Installation The frying systemyou have selectedfor your establishmentis the Pita> Frialator Model SF14 UFM series.This model oombinesthe oonvenienceof built-in filtration andthe compactnessof underfryer filtration into one easyto useunit. This fryer will give you many yearsof reliable service if you follow the simple operation and maintenanceproceduresin this manual.
1.2 CHECKING YOUR NEW FRYER Your new fryer and it's filter havebeen carefully packedinto one crate. Every effort basbeenmade to ensurethat your fryer will be delivered to you in perfectcondition. As you unpackyour new fryer, inspect each of the pieces for damage. If something is damaged,DO NOT sign the bill of lading. Contact the shipper immediately, the shipper is only responsiblefor 15 days after delivery.
a. Removethe two self-drilling saews from the top, back area of the cooker. b. Position the heat deflector so that the angledportion of the deflector is facing toward the front of the fryer. Securethe heat deflector to the back of the unit using the sheetmetal saews previously removed. ~:=I DO NOT obstruct the flow of combustioD/ventilationor air openings around the fryer. Adequatecl~ around the fryer is necessaryfor servicing and proper burner operation.
Non-Combustible Construction 6" 6" N/A Combustible Construction Back Sides 6" 6"N/A In addition to the clearancesrequired for proper fryer operation, there must be at least 23 inches of Your fryer will give you peak performancewhen the gas supply line is of sufficient size to provide thecorrect gasflow. The gas line must be installed to meet the local building codesor National Fuel GasCode (NFPA 54-1984) and ANSI Z223.1-1988 Latest Edition. In Canada,install the fryer in aax>rdancewith CAN/CGA-B149.
1.4.2.2 Gas Line Connection - Connect the fryer to the gas supply line with a oonnector that amplies with the Standardfor Connectorsfor Movable GasAppliances (ANSI Z21.69-1987). If you are installing a fryer with castersuse a quick disoonnectrefer to the Quick Disconnect installation instruction, 1.4.2.3. Connect the gas line to the fryer using a pipe joint sealantthat is resistantto liquefied petroleum.
~=:I The fryer is equippedwith an oil proof, threeprong (grounding) plug for your protection againstelectrical shock hazardin theeventof equipmentmalfunction. DO NOT cut or removethe grounding (third) prong from this plug. This plug must be plugged into a properly groundedthree prong receptacle. The fryer has one power supply for the fryer controls and the filter module. The fryer must be groundedin accordancewith local code; if there is not a local code,comply with NBC ANSI/NFP A No. 70-1990.
Excessive ventilation causesdrafts, which will interfere with the proper operation of the pilot and theburner. Leaveat least18inchesof openspacebetweenthe fryer's flue vent opening andthe intake of the exhaust hood. CAU'I10N Ensurethat your ventilation systemdoesnot causea down draft at the fryer's flue opening. Down draftswill not allow the fryer to exhaustproperly and will causeoverheatingwhich may causepermanentdamage. Damagecausedby down drafts will not be covered under equipment warranty.
CAtmON Before going any further, fill the fryer with WATER. Water is usedfor the installation adjustments becausethe temperaturewill never exceed 212°F (100°C) therebyallowing plenty of adjustmenttime. Never let thewater level go below the OIL LEVEL mark on the rear of the tank. G;:a There is an open Bameinside the fryer. The unit may get hot enoughto set near by materials on fire. Keep the area around the fryer free from 1.5.2.
g. The main burner (4) will light and be controlled by the thermostat. The pilot burner will remain lit regardlessof the switch position. 1.5.2.1.1 Pilot Flame Adiustment - The pilot flame should be adjusted to prod~ the ~r millivolt output from the pilot sensingdevi~. Millivolt output for the thermopile shouldbe between 300 and 500 millivolts. Figure 1-2 shows the pilot assemblywith examples of the incorrect and correct pilot size.
a. This test requires a DC millivolt meter set to a scale of O-l(XK)mv. b. Locatethe thermopile wires coming from the thermostat!HighLimit box going to the gas shut off valve. The wire insulation size decreasesnear the gas valve connections. Co Connectthe negative(-)testprobeto pilot bracket. d. Connectthe positive (+) testprobeto oneof the High Limit terminal e. Removethe pilot flame adjustmentcover. PRESSURE REGULATORLOCATION (UNDER CAP SCREW) PILOT ADJUSTER LOCATION (UNDER CAP SCREW) g.
For the burners to work the gas supply valve must be open and the main power switch must be on. The main burner receivesgasfrom the main gassupply through thethermostatically oontrolled valve. When the therDlostatis turned up the gas control valve opens and the pilot will ignite the burners. After the burner system is operating, perfOrDlthe burner adjustmentsin the following procedure. Figure 1-5 illustrates the different oonditions possible for the main burner.
1.5.3.1 Gas Une Rgrements - A properly installed gas supply system will deliver 7.0 %2.0. W.Co natural gas(12.0 %2.0.W.c.LP) to all appliancesoonnectedto the line, operatingat full demand. Adjustthe 1.5.3.2 Burner Adjustment -The burnersmust be burner flame using the following procedure. a. Ensurethat the gas oontrol valve is in the OFF position. Remove the manifold pressure tap plug and connect an accuratepressuregauge(rangeof 0-16" w.c. in 0.1" increments) or manometer. b. light the pilot burner (~ 1.
g. Now that the pressureis set for properoperation, set the main burner flame. Unlock the air collars by loosening the set screwfor the collars. Turn the gas control valve to ON and turn thermostatto light the main burners. h. Adjusttheshapeandsizeby raising with well definedinnercones. provided. 1.5.4 INITIAL CLEANING When the fryer is shipped,many of its parts arecoveredwith a thin coat of oil for protection. Before the fryer is ready for cooking it must be cleaned.
loSoS Thermostat Calibration Check NOnCE Thermostat calibration requires that the temperature of the fryer be raised aboveboiling. Therefore, you will needto drain the water from the fryer and fill it with oil. Before removing the water, perform the initial cleaning of the fryer. Oeaning the fryer now will preventyou from having to drain the oil and refill with water later. Filling thefryer with oil is describedin 2.1. To perform the calibration checkdetailedbelow you will needa digital thermometer. b.
d. Setthe thermostatdial to 32S°F. e. Remove the thermometerdial by pulling the knob straight out. DO NOT rotate the dial. f. Hold the outsideof the shaft soit doesnot move. Use the tip of a small, flat tip screwdriver to scrapeaway the sealing compoundfrom the adjustment screw. g. Turn the adjustmentscrew clockwise to lower the temperaturesetting and counterclockwise to raise the temperature. One quarter turn changesthe temperatureapproximately 25°F. h.
1-16
Chapter 2: This chapterdescribeshow to operateyour fryer to obtainthebestperformance.Includedin this chapterarefilling, operating,andcleaninginstructionsfor gasfryers. 2.1 FIUJNG THE FRYER Both liquid and solid shortening can be used in the fryer. If solid shortening is used, it is recommendedthat you usethemelt cycle feature(optional) to melt the shortening. You canmelt solid shortening without the melt option, but you must carefully follow the instruction in section 2.2.2. 2.1.
2.2 MEL11NGSOLID SHORTENING NonCE The melting procedurebelow requiresthe manualcycling of the fryer. Watch carefully for smoke. If smoke is noticed, die shortening is scorching. To prevent this, decreasethe time you leave the burners on. a. Rotatethethennostatto causethemain burnersto light andremainlit for 4 seconds. b. Rotate the thermostat back to off for 30 seconds. c. Continue cycling the main burnersuntil most of the solid shortening is liquefied and the temperaturereaches150°F.
knob is located behind the front doors or on the front oontrol panel. c. The main burnerswill light and cycle at the thennostat setting. 2.3.2 Fryer Shut-Down There are two shutdownmodesof fryer operation,STAND BY andCOMPLETE. The standbymode removesthe ability for the fryer's main burnersto cycle. Complete shutdown turns off the gassupply to the fryer. Shut down the fryer by: STANDBY COMPlEI'E Turn the thennostatto OFF.
2.4 SHORTENING FILTER PROCEDURES This sectiondescribesthe proceduresusedto filter fryers using the solo filter unit. Figure 2-1 shows the locations of the componentsusedin thefilterproc:ess. The filter accessoriesandtoolsyoushould have to perform normal filtering operationsare described on page 2-5. Frequent filtering of your shortening will prolong the shortening's usable life. Daily shortening filtering is strongly recommended .
Return Valve pump on, allows the shorteningto returnto the design,this sooopis usedto removethe debris fryer tank. from thefilter pan. Drain Valve BLACK - Drain theoil from the Cleaner- Usedduringfryer boil-out cleaning. fryer tanksto thefilter pan. oil from the filter unit to thefryer. Simplypush to left ODfitting to connect. Pull to right to PreooatFUterAId . CoarseDiatomaceousearth used to enhance the filter ability of the filter disa>nnect. media.
4. When the time it takesto refill the fryer after filtering exceeds3:00 minutes, scrape the filter bag or paper. If scrapingdoesnot bring the refill time back down changethe fi1ter paperasdescribedin 3.1. S. The mter pump is protectedfrom dogging by a specialscreenin the pickup tube. Cean this screeneachtime a new mter is installed (seeChapter 3, 3.4.2) 6. If you havefilter systemproblemsreferto section3.4.2. 7.
d. Slowly open the drain valve by using the black knobbed extension rod. If necessaryuse the clean-out rod to clear the crumbs from the drain. Use the long handled brush to clean the sides of the tank as the oil drains. e. Open the red handled return valve to the tank you are filtering. When the tank is empty closethe drain valve and turn on the filter pump. As the tank fills, brush the inside of the tank to remove crumbs. f. When bubbles are seencoming out of the oil return spout, turn off the pump.
2-8
Chapter 3: Owner Maintenanceand Adjustments This chapterprovidesyou with the informationandproceduresnecessaryto performbasicfryer mainteDan~and adjustments.If after performingmaintenan~on your fryer it doesnot perform properly,contactyour The power supply appliance. 3.1 ~TER [==- before be disconnected or cleaningthe MEDIA REPLACEMENT the proceduresnecessaryto replacethe filter This section the filter system'scomponentsand media.
c: , @ Figure3-1 Filter Module (1) Fdter Pan - Holds the oil from the fry tank. (5) Flexible Coupling. Flexible coupling allows for easymovementwhen connectingand discon(2) Pick-Up Tube - ConnedSfilter envelope necting the pickup tube from the fryer. assemblyto piping. Inoorporatesa strainerto protect filter pump from grit in the event of (6) Casters . Allows for easy movement of the envelopefailure. pan. (3) FOter Assembly CoDDector - An insulated handlecoversthe filter pan assembly connection.
d. Lift up on the filter paperassemblyand removefrom the filter pan. Unscrew the suction tube from the filter papersupport rack. Removethe clip screenand slide the filter paper support rack assemblyout of the filter bag. e. All of the filter pick up assembly ~ 0 000 f. g. parts can be washedin a dish washer or a pot sink. Hush out the suction tube assembly with hot water. The pick up tube screen keeps grit and solid material from binding thepump.
3.2 WEEKLY FRYER CLEANING (BOIL OUT) The fryer shouldbe thoroughlycleanedoncea week. This cleaningshouldinclude a complete drainingof the fryer and a boil out. This would alsobe a goodtinle to replacethe filter paperif necessary . a. You will needa containerlargeenoughto hold thevolumeof thetank. This container shouldalsobe ableto withstandboiling watertemperatures. CAU110N Completely shut down the fryer when the oil is to be replacedby water, and when the heating portion of the cleaning is complete.
3.4 TROUBLESBOO11NG This section is provided to aid you in the event of fryer or filter troubles. If thesetroubleshooting procedures do not correct your problem contact a qualified technician or the factory. The troubleshootingprocedures arein a flowchartformat. 3.4.1 Fryer Troubleshooting Refer to this section to correct common problems that may be encounteredin equipment operation.
3.4.2 Filter Troubleshooting Refer to this section to correct common problems that may be encounteredduring filter operation.
~ YES ~*-. YES b*8 ~ ~ ..~. ~ "-8 ~ ~ .. PI8I1» MIdI ON. ~..~~ ~"~\I8Iv."'I.n~~ .-u ~~ be ~ lie ~ dI8dWg8 ~10~12~ e .. ... .. ~ bI' ~ .. t.-8~ ..-1.JIDe' ~ ... - 8'8. Sold8tut81~ ~ ~ oWtie ~ be di8dwge ... ~10~12""" YES b*8 mq 1118 ~ 8WId1 ON. If tie .. hM been ,. ...- ~ tyer .. ".~...b'45 b8b8 ~. tC) ~ .. de8ed v8V8 ... ... "'_1d8d ra~~. ~ ~ ..va ~.~~-, ~~..~. ~.. ~b*8~.~ --~~.. ~..~.. -~ «*aJI: ~.
3-8
v ~ I ..