Solstice Service Manual High Efficiency Gas Fryers SG/SSH Series L22-345 R0
Pitco Solstice and Solstice Supreme High Efficiency Gas Fryers Notice In the event of problems or questions about your order, contact the Pitco Frialator factory at (603) 225-6684. In the event of problems or questions about your equipment, contact the Pitco Frialator Authorized Service and Parts representative (ASAP) covering your area, or contact Pitco at the numbers listed above. MAILING ADDRESS Pitco Frialator P.O.
Pitco Solstice and Solstice Supreme High Efficiency Gas Fryers Table of Contents Theory of Operation .................................................................................................... 6 Fryer Components Operation.............................................................................................................. 7 Heating System ................................................................................................................................... 7 Safety System......
Pitco Solstice and Solstice Supreme High Efficiency Gas Fryers mV Model.................................................................................................................. 50 Accessing Fryer for Servicing ............................................................................................................ 51 Cleaning the Gas Valve Vent Tube ................................................................................................... 51 Checking the Burner Manifold Gas Pressure ..
Pitco Solstice and Solstice Supreme High Efficiency Gas Fryers Digital Solid State Control................................................................................................................ 83 Primary Solid State Control .............................................................................................................. 83 Backup Solid State Control............................................................................................................... 84 Optional Basket Lift..
Pitco Solstice and Solstice Supreme High Efficiency Gas Fryers Theory of Operation SG/SSH Series Service Manual 6
Pitco Solstice and Solstice Supreme High Efficiency Gas Fryers Fryer Components Operation The SG and SSH fryer components function in specific order of operation. Knowing and understanding the sequence of fryer and components operation enables you to diagnose equipment failure more accurately. Heating System The unit is connected to line voltage: If Fuse F1 on the relay board is good: The A.C. indicator is illuminated. The controller is supplied with 24 VAC.
Pitco Solstice and Solstice Supreme High Efficiency Gas Fryers Safety System When the roll out switch or hi-limit trips, it interrupts the 24 VAC supply to the ignition module. When the controller calls for heat, it does not receive a 24 VAC HFB. With approximately 90 seconds of HFB loss, the controller indicates an ignition failure or heat failure. After the roll out switch hi-limit is reset, turn the controller off and then back on for the unit to heat.
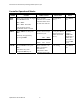
Pitco Solstice and Solstice Supreme High Efficiency Gas Fryers Controller Operational Modes MODE BOIL OUT TEMPERATURE SET POINT ENTRY INDICATION With control initially off, toggle the ON/OFF switch: Power and HD indicators are on. HFB indicator flashes at 0.5 seconds rate until exit. Fixed at 200°F (93°C) Press OFF to exit. Same as below except fixed heat cycle. No set point. HD is suppressed if Vat is greater than 250°F (121°C).
Pitco Solstice and Solstice Supreme High Efficiency Gas Fryers Serial Numbers SG/SSH Series Service Manual 10
Pitco Solstice and Solstice Supreme High Efficiency Gas Fryers 24V Model SG/SSH Series Service Manual 11
Pitco Solstice and Solstice Supreme High Efficiency Gas Fryers Accessing Fryer for Servicing 1. Press off button on control panel. 4. Unplug all power cords. 2. Slide button to solid state. 5. Shut off the main gas supply line to the unit. 3. Shut off the individual gas supply line. 6. Pull back collar to remove the quick disconnect gas line.
Pitco Solstice and Solstice Supreme High Efficiency Gas Fryers Cleaning the Gas Valve Vent Tube 1. Bend the gas valve vent tube to allow for removal. 3. Clean the tube (not shown) and reinstall. NOTE: 2. Loosen nut at the base of the vent tube with a 3/8 inch open-ended wrench and then remove. SG/SSH Series Service Manual 13 Make sure the vent tube is not reinstalled in an upright position and there are no kinks in the tube.
Pitco Solstice and Solstice Supreme High Efficiency Gas Fryers Checking the Burner Manifold Gas Pressure Taking a Supply Gas Pressure Reading 1. Unscrew and remove the gas supply plug with a 3/16 inch hex wrench. 4. Connect the manometer. 2. Finger tighten the test fitting into the test port. SG/SSH Series Service Manual 3. Finish tightening the test fitting using a 7/16 inch open-ended wrench.
Pitco Solstice and Solstice Supreme High Efficiency Gas Fryers 5. Turn on the main gas supply line. 10. Apply Teflon paste to gas supply plug. 6. Check the supply gas pressure with the manometer and compare the reading to the supply gas pressure table to determine what the incoming gas pressure should be. 11. Reinstall gas supply plug with a 3/16 inch hex wrench. Supply Pressure Table NOTE: NAT LP 7 to 9 11 to 13 You cannot adjust the supply gas pressure at the unit.
Pitco Solstice and Solstice Supreme High Efficiency Gas Fryers Removing Solid State Thermostat (If Necessary) 1. Remove the two (2) screws, which hold the solid state thermostat, with a 5/16 inch socket. SG/SSH Series Service Manual 16 2. Disconnect solid state thermostat control harness.
Pitco Solstice and Solstice Supreme High Efficiency Gas Fryers Taking a Manifold Gas Pressure Reading 1. Unscrew and remove the gas manifold plug with a 3/16 inch hex wrench. 3. Finish tightening the test fitting using a 7/16 inch open-ended wrench. 2. Finger tighten the test fitting into the test port. 4. Connect the manometer. 5. If necessary, reconnect the solid state thermostat (reverse steps for “Removing Solid Stats Thermostat” on page 16.
Pitco Solstice and Solstice Supreme High Efficiency Gas Fryers Adjusting Manifold Gas Pressure 1. Check the manifold gas pressure with the manometer and compare the reading to the manifold gas pressure table. 3. Insert flathead screwdriver into the cap and turn counter-clockwise to increase the gas pressure or clockwise to decrease the gas pressure. Manifold Gas Pressure Table NAT LP 4.0” 10” 2. Insert a flathead screwdriver into the cap and turn counter-clockwise to remove it. 4.
Pitco Solstice and Solstice Supreme High Efficiency Gas Fryers Calibrating Solid State Thermostat 1. Remove the cap of the knob with a flat head screwdriver. 2. With a 5/16 inch socket, loosen the collet. 3. Rotate the knob to point at actual temperature. 4. Tighten collet and replace knob cap.
Pitco Solstice and Solstice Supreme High Efficiency Gas Fryers Replacing the Controllers and Wiring Harness Removing the Controller Front Panel Bezel 1. Remove the two (2) screws on the controller panel using a Phillips screwdriver. 3. Disconnect the controller wiring harness. 4. Remove the four (4) screws on the back side of the bezel using a 3/8 inch nut driver. 2. Pull out the controller panel front bezel.
Pitco Solstice and Solstice Supreme High Efficiency Gas Fryers Removing the Solid State Wiring Harness 3. Disconnect the probe connection (J/P43). 1. Remove the two (2) screws in the front panel bottom holder using a 5/16 inch socket. 4. Disconnect B6746601 from J/P33 on the relay board. 2. Remove the two (2) screws in the cable retainer bracket using a 5/16 inch socket.
Pitco Solstice and Solstice Supreme High Efficiency Gas Fryers 6. Remove the controller wiring harness. 5. Loosen the controller box screws using a 5/16 inch socket. 7. Replace with a new controller wiring harness following steps 1 through 6 in reverse.
Pitco Solstice and Solstice Supreme High Efficiency Gas Fryers Replacing the Relay Board and Paper 1. Remove the front panel. See “Removing the Controller Front Panel Bezel” on page 20. 5. Remove the existing insulator and replace with a new insulator. 2. Disconnect all connections. NOTE: 3. Remove the four (4) screws, which hold down the relay board, using a small flathead screwdriver. 6. Reconnect all connections and reinstall the front panel. 4. Remove the relay board and flip it over.
Pitco Solstice and Solstice Supreme High Efficiency Gas Fryers Replacing the Ignition Module 1. Remove one (1) screw, which hold the ignition module, using a 5/16 inch socket. 4. Remove the ignition wire. 5. Remove the two (2) screws, which hold the module on the plate, using a Phillips screwdriver. 2. Pull the module box and bracket toward the front of the unit, and then to the right. 3. Disconnect the plug. 6. Remove the harness pins using needle-nose pliers. 7. Follow steps 1 through 6 in reverse.
Pitco Solstice and Solstice Supreme High Efficiency Gas Fryers Replacing the Spinal Tap 1. Remove the two (2) screws in the front of the unit, which hold the entrance box assembly, using a 5/16 inch socket. 4. Remove the two (2) screws, which hold the spinal harness, using a /16 socket. 5. Remove the entrance box assembly. 2. Cut the zip ties from the cord retainers. 6. Remove the front panel assembly. See “Replacing the Controllers and Wiring Harness” on page 20. 3.
Pitco Solstice and Solstice Supreme High Efficiency Gas Fryers 8. Disconnect the connection from the valve. 11. Remove one (1) screw using a 5/16 inch socket. 9. Remove the bolt from the pilot, which holds the ignition ground, using a 5/16 inch open-ended wrench. 12. Slide metal retaining bracket off. 13. Remove the spinal tap wiring harness from the grommet. 10. Once the entrance box is out, disconnect the spinal tap connection.
Pitco Solstice and Solstice Supreme High Efficiency Gas Fryers 14. Disconnect J4, J5, J7, J8 plugs using needlenose pliers. Top View of Plugs J4 15. Make sure to connect the new plugs into the correct connector location. J7 J8 16. Follow steps 1 through 15 in reverse to reinstall the entrance box and new spinal tap wiring harness.
Pitco Solstice and Solstice Supreme High Efficiency Gas Fryers Replacing an Igniter/Pilot Assembly 1. Remove the two (2) screws, which hold the pilot and runner tube orifice bracket, using a 5/16 inch socket. 4. Remove the two (2) screws, which hold the pilot, using a 5/16 inch socket. 5. Remove the ignition wire. 2. Remove the two (2) screws, which hold the runner tube, using a 5/16 inch socket. 6. Cut the zip ties, which hold the ignition wire to the pilot tubing. 3.
Pitco Solstice and Solstice Supreme High Efficiency Gas Fryers 7. Remove the flexible line for the pilot tubing at the gas valve using a 1/2 inch open-ended wrench. 10. Remove the burner. 11. Remove the pilot assembly. 8. Remove the two (2) screws at the bottom of the left and right burner using a 5/16 inch socket. 12. Remove the nut, which holds the pilot tubing, using a 1/2 inch open-ended wrench. 9. Remove one (1) screw, which holds the flame jumper shield, using a 5/16 inch socket. 13.
Pitco Solstice and Solstice Supreme High Efficiency Gas Fryers Replacing the Self‐Cleaning Burner Solenoid 1. Remove the SCB flex tube fitting using a 1/2 inch open-ended wrench. 3. Disconnect the terminals using needle-nose pliers. 2. Remove the SCB valve inlet fitting using a 1/2 inch open-ended wrench. 4. Remove the two (2) elbows using a 1/2 inch open-ended wrench. 5. Follow steps 1 through 4 in reverse to reinstall SCB valve.
Pitco Solstice and Solstice Supreme High Efficiency Gas Fryers Replacing the Gas Valve 1. Remove the pilot tubing from the gas valve using a 7/16 inch open-ended wrench. 3. Holding the elbow with a wrench, remove the swivel nut on the bottom gas valve fitting using a 1-1/16 inch open-ended wrench. 2. Disconnect the wiring connection from gas valve. NOTE: 4. Holding the elbow with a wrench, remove the swivel nut on the top gas valve fitting using a 15/16 inch open-ended wrench.
Pitco Solstice and Solstice Supreme High Efficiency Gas Fryers 6. Remove the fittings and plate from the gas valve using a 7/16 inch open-ended wrench. SG/SSH Series Service Manual 32 7. Install the heat shield, vent tube, and fittings. 8. Reinstall a new gas valve by following steps 1 through 6 in reverse.
Pitco Solstice and Solstice Supreme High Efficiency Gas Fryers Replacing the Transformer Box 1. Cut the zip ties on the transformer box power supply cords. 4. Remove the two (2) screws, which hold the transformer box, using a 5/16 inch socket. 2. Remove transformer box power supply cords. 5. Remove the transformer box by pushing the box towards the front of the unit. 3. Disconnect the spinal tap wiring harness from the transformer box. SG/SSH Series Service Manual 6.
Pitco Solstice and Solstice Supreme High Efficiency Gas Fryers 7. Remove all the wires on transformer box using needle-nose pliers. See “Simplified Wiring Diagrams” starting on page 89. 8. Remove the two (2) screws, which hold the transformer, using a Phillips screwdriver. 9. Remove the transformer. 10. Follow steps 1 through 8 in reverse to reinstall a new transformer.
Pitco Solstice and Solstice Supreme High Efficiency Gas Fryers Replacing the DVI Switch 3. Replace the DVI switch ensuring a 1/4 inch gap between the actuator and the magnet. 1. Remove the two (2) screws, which hold the proximity sensor on the drain handle, using a flathead screwdriver. 4. Follow steps 1 through 3 in reverse to reinstall a new DVI. 2. Remove the two (2) screws, which hold the actuator, using a flathead screwdriver.
Pitco Solstice and Solstice Supreme High Efficiency Gas Fryers Replacing the Burner Assembly Replacing the Burner(s) 1. Drop the gas valve out of the way by holding the elbow with a wrench and removing the swivel nut on the top gas valve fitting using a 15/16 inch open-ended wrench. 4. Remove the pilot assembly. See “Replacing an Igniter/Pilot Assembly” on page 28. 2. Remove the nut, which holds the drain valve handle, using an 11/16 inch socket. NOTE: 5.
Pitco Solstice and Solstice Supreme High Efficiency Gas Fryers 6. Remove the screws, which hold the flame jumper shields, using a 5/16 inch socket. 10. Remove the right burner(s) by sliding them off the SCB runner tube. 7. Remove the flame jumper shields on both sides of the burner. 11. Remove the SCB runner tube. 8. Remove the two (2) screws, which hold the SCB runner tube, using a 5/16 inch socket. 9. Remove the two (2) screws, which hold each burner, using a 5/16 inch socket.
Pitco Solstice and Solstice Supreme High Efficiency Gas Fryers Replacing the Burner Assembly 4. Remove the two (2) screws, which hold the high-limit bracket, using a 5/16 inch socket. 1. See “Replacing the Burner(s)” on page 36. 2. Remove the burner shield. NOTE: 5. Remove the ten (10) screws (5 screws on the top and 5 screws on the bottom), which hold the burner rack, using a 5/16 inch socket. When reinstalling, the burner shield opening should face toward the pilot. 3.
Pitco Solstice and Solstice Supreme High Efficiency Gas Fryers 6. Remove the two (2) screws, which hold the drain lock switch, using a flathead screwdriver. 8. If necessary, replace the insulation on the back of the burner rack. 7. Remove the burner rack by pulling it toward the front of the unit. 9. Reinstall a new burner assembly by following steps 1 through 7 in reverse.
Pitco Solstice and Solstice Supreme High Efficiency Gas Fryers Replacing the Frypot 4. Loosen the collet using a spanner wrench. 1. Remove the controller front panel, gas valve, pilot assembly, and burner assembly. 2. Remove the baffle by pulling it out. NOTE: For SSH models only. 5. Remove the collet. 3. Remove the drain manifold flange nut using a 9/16 inch close-ended wrench. 6. Slide piping away from flange.
Pitco Solstice and Solstice Supreme High Efficiency Gas Fryers 11. Remove the six (6) screws, which hold the back of the splash back, using a 5/16 inch socket. 7. Remove the flange elbow. 8. Remove the control box and wiring harness for each fryer that shares a common top deck. 12. Score the silicon sealer between the front of the splash backs using a flathead screwdriver or utility knife. 9. Remove the four (4) screws per fryer, which hold the top deck down, using a 5/16 inch socket. 13.
Pitco Solstice and Solstice Supreme High Efficiency Gas Fryers 14. Remove the splash back by lifting up. 16. Remove the channel strip by pulling up. 17. Score the silicon sealer between the tanks using a flathead screwdriver or utility knife. 15. Remove the six (6) screws, which hold the tank to the cabinet, using a 5/16 inch socket. 18. Remove high-limit and temperature probes. See “Replacing the Hi-Limit Thermostat” on page 58. 19.
Pitco Solstice and Solstice Supreme High Efficiency Gas Fryers 23. Remove the four (4) screws, which hold the flue, using a 5/16 inch socket and 3/8 inch closeended wrench. 20. Lift up and pull out the tank. 24. Remove the return valve using two adjustable wrenches. NOTE: Lifting the tank requires two (2) technicians. 21. Set tank on floor. 22. Remove the drain line using a pipe wrench. SG/SSH Series Service Manual 25. Follow steps 1 through 24 in reverse to reinstall a new frypot.
Pitco Solstice and Solstice Supreme High Efficiency Gas Fryers Replacing the Basket Lift Components Removing the Basket Lift Cover 1. Remove the six (6) screws, which hold the back of the basket lift cover, using a 5/16 inch socket. 2. Lift up the back and remove. Replacing the Transformer 1. Remove the two (2) screws, which hold the transformer, using a 5/16 inch socket. 2. Remove all wires on transformer box using needle-nose pliers. See “Wiring Diagram – Basket Lifts” on page 91. 3.
Pitco Solstice and Solstice Supreme High Efficiency Gas Fryers Replacing the Basket Lift Driver Board 1. Remove all wires on basket lift driver board using needle-nose pliers. 4. Remove the actuator power connection using needle-nose pliers. 2. Remove the sensor connection using needlenose pliers. 5. Remove the four (4) screws, which hold the basket lift driver board, using a Phillips screwdriver. 3. Remove the control signal connection using needle-nose pliers. SG/SSH Series Service Manual 6.
Pitco Solstice and Solstice Supreme High Efficiency Gas Fryers Adjusting the Magnetic Sensor 1. Make sure the sensor is approximately 3/4 inch from top of the motor to bottom of the sensor. 2. Make sure the sensor is approximately 7 3/4 inch from top of the motor to bottom of the sensor. Replacing the Basket Lift Actuator 1. Cut all zip ties on the basket lift driver board. SG/SSH Series Service Manual 2. Disconnect the transformer from the driver board. See “Wiring Diagram – Basket Lifts” on page 91.
Pitco Solstice and Solstice Supreme High Efficiency Gas Fryers 3. Disconnect the upper and lower limit connections on the basket lift driver board. 5. Remove the top retaining bushing by unscrewing. 4. Remove the two (2) bolts, which hold the actuator, using a 3/16 inch Allen key. 6. Slide the bushing off the shaft. 7. Disconnect the motor connector from the driver board.
Pitco Solstice and Solstice Supreme High Efficiency Gas Fryers 8. Rotate up the actuator collar. 9. Remove the actuator collar. 10. Follow steps 1 through 9 in reverse to reinstall a new basket lift actuator.
Pitco Solstice and Solstice Supreme High Efficiency Gas Fryers Gas Conversion 1. Remove the pilot assembly. See “Replacing an Igniter/Pilot Assembly” on page 28. 6. Replace and adjust the gas valve regulator. 2. Remove the nut, which holds the pilot tube, using a 1/2 inch open-ended wrench. 3. Replace bullet orifice with one provide in the gas conversion kit. 4. Change the main burner orifice tips. 5. Change the SCB orifice tip. 7. Adjust the burner manifold pressure.
Pitco Solstice and Solstice Supreme High Efficiency Gas Fryers mV Model SG/SSH Series Service Manual 50
Pitco Solstice and Solstice Supreme High Efficiency Gas Fryers Accessing Fryer for Servicing 2. Shut off the individual gas supply line. 1. Shut off the main gas supply line. Cleaning the Gas Valve Vent Tube See “Cleaning the Gas Valve Vent Tube” on page 13. Checking the Burner Manifold Gas Pressure Taking an Incoming Supply Gas Pressure Reading 1. Unscrew and remove the gas supply plug with a 3/16 inch hex wrench. 5. Turn on the main gas supply line. 2.
Pitco Solstice and Solstice Supreme High Efficiency Gas Fryers 6. Check the supply gas pressure with the manometer and compare the reading to the Supply Gas Pressure table on page 52 to determine what the incoming gas pressure should be. 7. When adjustment is complete: a. Shut off the main gas supply line b. Disconnect manometer. c. Remove the test fitting. Supply Pressure Table NOTE: d. Apply Teflon paste to gas supply plug. NAT LP 7 to 9 11 to 13 e.
Pitco Solstice and Solstice Supreme High Efficiency Gas Fryers Adjusting Manifold Gas Pressure 1. Check the manifold gas pressure with the manometer and compare the reading to the Manifold Gas Pressure table. 3. Insert flathead screwdriver into cap and turn counter-clockwise to increase the gas pressure or clockwise to decrease the gas pressure. Manifold Gas Pressure Table NAT LP 4.0” 10” 2. Insert a flathead screwdriver into the cap and turn counter-clockwise to remove it. 4.
Pitco Solstice and Solstice Supreme High Efficiency Gas Fryers Measuring Thermopile Taking a Millivolt Reading 2. Touch the thermopile leads with the multimeter probes as shown. 1. Make sure the multimeter is set to mV. Adjusting the Thermopile 1. Compare the multimeter reading to the Thermopile mV table.
Pitco Solstice and Solstice Supreme High Efficiency Gas Fryers Replacing the Thermostat 1. Remove the two (2) bolt clamp screws that hold down the temperature probes using a Phillips screwdriver. 3. Remove the thermostat knob. 4. Remove the two (2) screws that hold the thermostat using a Phillips screwdriver. Hi-Limit Thermostat 2. Remove the two (2) screws on the thermostat using a 5/16 inch socket. SG/SSH Series Service Manual 5. Pull out the thermostat.
Pitco Solstice and Solstice Supreme High Efficiency Gas Fryers 9. Apply Teflon paste to the fitting. 6. Remove the two (2) screws that hold the wires using a flathead screwdriver. 10. Remove and replace the temperature bulb. 7. Remove the capillary nut using a 5/16 inch close-ended wrench. 11. Finger tighten the fitting. 8. Remove the grand nut using a 9/16 inch openended wrench.
Pitco Solstice and Solstice Supreme High Efficiency Gas Fryers NOTES: 12. Make sure the temperature bulb(s) are in the correct location. Hi limit and thermostat capillaries should not be in contact with the heat tubes. Make sure the bulbs are centered in the bolt clamp before tightening the screws. Make sure the thermostat bulb is mounted on the welded side of the tapping pad. 14. Follow steps 2 through 11 in reverse. 15. Calibrate the thermostat. 13.
Pitco Solstice and Solstice Supreme High Efficiency Gas Fryers Replacing the Hi‐Limit Thermostat 1. Remove the two (2) bolt clamp screws on the hilimit probes using a Phillips screwdriver. 2. Remove the two (2) screws, which hold the high-limit thermostat, using a Phillips screwdriver. 3. Remove the two (2) screws, which hold the wires, using a flathead screwdriver. 4. Replace the high-limit thermostat by following steps 1 through 3 in reverse.
Pitco Solstice and Solstice Supreme High Efficiency Gas Fryers Filter System SG/SSH Series Service Manual 59
Pitco Solstice and Solstice Supreme High Efficiency Gas Fryers Replacing the Return Valve IMPORTANT: Oil must be removed from the tank before replacing the return valve. 1. Remove all connections from the 3-way return valve using a 1/16 inch wrench. 2. Remove the cotter pin on return valve using needle-nose pliers. 3. Replace the return valve by following steps 1 through 2 in reverse, replacing the cotter pin if necessary.
Pitco Solstice and Solstice Supreme High Efficiency Gas Fryers Replacing the Flush Hose Assembly and Valve 1. Remove the lower connection at the 3-way return valve in the back of the unit using a 15/16 inch wrench. 4. Remove two (2) screws holding the flush hose assembly using a 5/16 socket. 5. Remove the flush hose assembly. 2. Remove the male quick disconnect using a 15/16 inch wrench. 6. Remove the four (4) screws from the magnets using a flathead screwdriver. 3. Unplug the proximity switch.
Pitco Solstice and Solstice Supreme High Efficiency Gas Fryers 9. Lift bracket out and slide forward. 7. Remove the two (2) screws from the valve mounting brackets using a 5/16 socket. 10. Bend down tabs of the stem nut washer using a needle-nose plier. 8. Slide the bracket to the back of the assembly. 11. Remove the nut using a 7/16 inch wrench.
Pitco Solstice and Solstice Supreme High Efficiency Gas Fryers 14. Remove the piping using a 15/16 inch wrench on the valve and an adjustable wrench on the piping. 12. Remove the handle. 13. Remove the mounting bracket. 15. Replace the flush hose assembly and valve by following steps 1 through 14 in reverse.
Pitco Solstice and Solstice Supreme High Efficiency Gas Fryers Replacing the Heat Tape NOTE: See “Simplified Wiring Diagrams” starting on page 89. 2. Wrap the new heat tape the same way as it was before. 1. Disconnect plug from pump box.
Pitco Solstice and Solstice Supreme High Efficiency Gas Fryers Replacing the Waste Oil and Components Removing Rear Mounting Bracket 3. Remove two (2) screws with a 5/16 socket wrench. 1. Remove six (6) screws using a 5/16 socket wrench. 2. Disconnect from the filter return line using a 1-1/16 inch wrench.
Pitco Solstice and Solstice Supreme High Efficiency Gas Fryers Removing the Check Valve 2. Remove the second nipple using two adjustable wrenches. 1. Remove the 3/8 inch nipple using an adjustable wrench.
Pitco Solstice and Solstice Supreme High Efficiency Gas Fryers 6. Lift off the mounting bracket. 3. Remove the valve nut using a 9/16 inch openended wrench. 7. Remove the valve using two adjustable wrenches. 4. Remove the valve lever. 5. Remove the two (2) screws using a Phillips screwdriver. 8. Follow steps 1 through 7 in reverse to reinstall.
Pitco Solstice and Solstice Supreme High Efficiency Gas Fryers Replacing the Filter Pump and Motor Removing the Filter Pump and Motor 1. Loosen the pump inlet tube using a crescent wrench. 3. Pull out pump inlet tube. 4. Remove filter pan cover (not shown). 5. Disconnect the connections and power supply cords from the filter pump. 2. Unscrew and remove the inlet valve of the filter pump system. 6. Remove the lower connection at the 3-way return valve using a 15/16 inch wrench.
Pitco Solstice and Solstice Supreme High Efficiency Gas Fryers 7. Remove one (1) screw, which holds the bracket, using a 5/16 inch socket. 10. Lower the filter pump to the floor and then pull it out. 8. Remove the bracket. 11. Remove the three (3) bolts on the bottom of the filter pump base using a 1/2 inch open-ended wrench. NOTE: The filter pump will fall to the floor once the pins are pulled out. It is recommended that you brace the pump and motor before pulling out the pins. 9.
Pitco Solstice and Solstice Supreme High Efficiency Gas Fryers 14. Reinstall a new filter pump by following steps 1 through 13 in reverse. 13. Remove existing piping from old filter pump using two adjustable wrenches. Replacing Seal Kit 3. Replace the seal. 1. Remove the four (4) bolts on filter pump using 7/16 inch open-ended wrench. 4. Reinstall the filter pump head to the motor by following steps 1 through 2 in reverse. 2. Remove the filter pump head.
Pitco Solstice and Solstice Supreme High Efficiency Gas Fryers Removing the Filter Pump from the Motor 2. Remove the filter pump head from the motor. 1. Remove the two (2) bolts holding the filter pump head to the motor using a 1/2 inch openended wrench. 3. Reinstall the filter pump head to the motor by following steps 1 through 2 in reverse.
Pitco Solstice and Solstice Supreme High Efficiency Gas Fryers Replacing the Return Switch 5. Remove the two (2) screws, which hold the mounting bracket, using a 5/16 inch socket 1. Disconnect all the wires from the gas valve, pilot, and SCB valve. 2. Drop the gas valve from the manifold. 3. Remove the two (2) screws, which hold the return valve handle, using a 5/16 inch socket. 6. Remove the mounting bracket. 4. Remove the return valve handle bracket. 7.
Pitco Solstice and Solstice Supreme High Efficiency Gas Fryers 10. Remove the cotter pin on return valve using needle-nose pliers. 8. Turn the mounting bracket over and remove the two (2) screws, which hold the actuator, using a flathead screwdriver. 11. Pull the red return handle out of the fryer. 9. Remove all connections from the 3-way return valve using a 1/16 inch wrench. 12. Remove the two (2) screws, which hold the magnet on the handle, using a flathead screwdriver. 13.
Pitco Solstice and Solstice Supreme High Efficiency Gas Fryers Replacing the Drain Line or Gasket 1. Remove one (1) screw on the drain line using a 7/16 inch wrench. 3. Slide off the drain manifold gasket. 4. Slide out the drain line. 2. Lift off the drain manifold clamp. SG/SSH Series Service Manual 5. Reinstall the new drain line by following steps 1 through 4 in reverse to.
Pitco Solstice and Solstice Supreme High Efficiency Gas Fryers Replacing the Pump Relay and Circuit Breaker Replacing the Circuit Breaker 1. Disconnect the connections and power supply cords from the filter pump. 4. Remove all wires on the circuit breaker using needle-nose pliers. 2. Remove the pump box. 5. Squeeze the tabs on the circuit breaker and push it out. 3. Remove the circuit breaker from the pump box. 6. Reinstall the new circuit breaker by following steps 1 through 5 in reverse.
Pitco Solstice and Solstice Supreme High Efficiency Gas Fryers Replacing the Pump Relay 1. Remove the two (2) screws, which hold the pump relay, using a Phillips screwdriver. 2. Remove all wires on the pump relay using needle-nose pliers. See “Simplified Wiring Diagrams on page 89. 3. Remove the pump relay. 4. Reinstall the new pump relay by following steps 1 through 2 in reverse.
Pitco Solstice and Solstice Supreme High Efficiency Gas Fryers Troubleshooting and Problem Isolation SG/SSH Series Service Manual 77
Pitco Solstice and Solstice Supreme High Efficiency Gas Fryers Troubleshooting and Problem Isolation Interpretation of Solid State Controller Lights SG/SSH Series Service Manual 78
Pitco Solstice and Solstice Supreme High Efficiency Gas Fryers Solid State Thermostat Field Calibration If field calibration is necessary, follow these steps: Allow appliance to heat to set point, and allow 30 minutes to stabilize. Measure the vat center oil temperature. Compare this with the knob pointer scale. To reposition the knob, pry off the cap of the knob with a sharp knife blade. Without turning the shaft, loosen the 5/16-compression nut and pull the knob off.
Pitco Solstice and Solstice Supreme High Efficiency Gas Fryers Component Troubleshooting The following sections provide troubleshooting information for the fryer components. Probe The resistance of the probe changes as the temperature changes. The resistance decreases as the temperature rises. If the probe is suspect, check its resistance and the oil temperature (as close to the probe as possible) at which it was taken. Compare these values to the values in the probe resistance chart.
Pitco Solstice and Solstice Supreme High Efficiency Gas Fryers Drain Valve and Return Valve Switches These switches are a magnetically operated proximity switches. When the drain valve handle is moved to the open position, the actuator moves away from the switch causing the switch to open. When the drain valve is closed, the switch closes. Opening the RED return valve handle closes the proximity switch causing the “pump on” relay to be energized; the pump begins to pump.
Pitco Solstice and Solstice Supreme High Efficiency Gas Fryers Relay Board NOTE: J connectors are marked on the relay board. With 24 VAC supplied to pin #2 at connector J35 and a good F1 fuse, the relay board has a 24 VAC output at pin #2 on connectors J33 and J34 and the AC indicator is illuminated.
Pitco Solstice and Solstice Supreme High Efficiency Gas Fryers Digital Solid State Control NOTE: All controller test points are at connector P/J1 (closest connector to the controller). With 24 VAC supplied to pin #1(24VAC supply) and pin # 5(24VAC input from DVI), the display reads “OFF”. With the controller turned on, there is a 24 VDC output at pin #9 (side on). When the controller calls for heat, the display reads “HEAt”, there is a 24 VDC output at pin #8 (HD) and a 24 VAC input at pin #6 (HFB).
Pitco Solstice and Solstice Supreme High Efficiency Gas Fryers If none of the indicators illuminate when the controller is turned on, verify that the drain valve is closed and that the magnetic proximity switch has continuity when the drain valve is closed. Also verify that there is 24 VAC at pin #1 (24 VAC supply) and pin #5 (24 VAC input from DVI).
Pitco Solstice and Solstice Supreme High Efficiency Gas Fryers Probe Resistance Chart Probe Resistance in 5°F Increments. Probe Temp (°F) 10 15 20 25 30 35 40 45 50 55 60 65 70 75 80 85 90 95 100 105 110 115 120 125 130 135 140 145 150 155 160 165 170 Probe Temp (°C) -12.2 -9.4 -6.7 -3.9 -1.1 1.7 4.4 7.2 10.0 12.8 15.6 18.3 21.1 23.9 26.7 29.4 32.2 35.0 37.8 40.6 43.3 46.1 48.9 51.7 54.4 57.2 60.0 62.8 65.6 68.3 71.1 73.9 76.
Pitco Solstice and Solstice Supreme High Efficiency Gas Fryers Orifice Size Chart Model SGC SG14 SG14R SG14T SG18 SG18F SG6H MGII MGIIT SGH50 SGH50T SG18HP SGM1824 Gas Type Main Burner Orifice Nat LP Nat LP Nat LP Nat LP Nat LP Nat LP Nat LP Nat LP Nat LP Nat LP Nat LP Nat LP Nat LP #43 #54 #41 #53 #38 .062" #43 1.45 mm #41 #53 #41 #53 #41 #53 #46 #55 #46 #55 #46 #55 #46 #55 #45 1.35 mm #40 0.
Pitco Solstice and Solstice Supreme High Efficiency Gas Fryers Orifice Size at Sea Level Chart Orifice Size at Sea Level 2000 3000 4000 5000 6000 7000 8000 9000 10,000 30 31 32 33 34 35 36 37 38 39 40 41 42 43 44 45 46 47 48 49 50 51 52 0.062 53 54 55 56 57 58 59 60 30 32 33 35 35 36 37 38 39 40 41 42 42 44 45 46 47 48 49 50 51 51 52 0.
Pitco Solstice and Solstice Supreme High Efficiency Gas Fryers Wiring Diagrams SG/SSH Series Service Manual 88
Pitco Solstice and Solstice Supreme High Efficiency Gas Fryers Simplified Wiring Diagrams Wiring Diagram – Full Vat with SCB SG/SSH Series Service Manual 89
Pitco Solstice and Solstice Supreme High Efficiency Gas Fryers Wiring Diagram – Twin Vat with SCB SG/SSH Series Service Manual 90
Pitco Solstice and Solstice Supreme High Efficiency Gas Fryers Wiring Diagram – Basket Lifts SG/SSH Series Service Manual 91
Pitco Solstice and Solstice Supreme High Efficiency Gas Fryers Wiring Diagram – Filter Motor 115V‐60Hz SG/SSH Series Service Manual 92
Pitco Solstice and Solstice Supreme High Efficiency Gas Fryers Wiring Diagrams – Filter Motor 208‐240V SG/SSH Series Service Manual 93
Pitco Solstice and Solstice Supreme High Efficiency Gas Fryers Notes SG/SSH Series Service Manual L22-345 R0 94