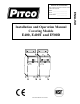
IMPORTANT FOR FUTURE REFERENCE Please complete this information and retain this manual for the life of the equipment: Model #: __________________________ Installation and Operation Manual Covering Models E400, E400T and E500D L20-258-UK Rev.
THIS MANUAL MUST BE RETAINED FOR FUTURE REFERENCE WARNING! FIRE HAZARD The shortening/oil level should not fall below the minimum indicated level at any time. The use of old shortening/oil can be dangerous as it will have a reduced flashpoint and be more prone to surge boiling. WARNING Installation and all connections must be made in accordance with National and Local regulations and codes in force.
Table of Contents Section Page Installation Checking your new Pitco Appliance . . . . . . . . . . . . . . . . . . . . . . . . . . . . . . . . Assembly and Leveling Leg and Caster Adjustment . . . . . . . . . . . . . . . . . . . . . . . . . . . . . . . . . Installation Clearances . . . . . . . . . . . . . . . . . . . . . . . . . . . . . . . . . . . . . Electrical Connection . . . . . . . . . . . . . . . . . . . . . . . . . . . . . . . . . . . . . . Ventilation and Fire Safety Systems . . . . . . . . . . .
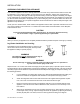
INSTALLATION CHECKING YOUR NEW PITCO APPLIANCE Your new Pitco appliance has been carefully packed into one crate. Every effort has been made to ensure that it is delivered to you in perfect condition. As you unpack your new appliance, inspect each of the pieces for damage. If something is damaged, DO NOT sign the bill of lading. Contact the shipper immediately; the shipper is only responsible for 15 days after delivery.
INSTALLATION INSTALLATION If you have completed the above steps that are applicable to the appliance you purchased, the appliance is now ready to be installed. Although it may be possible for you to install and set up your new appliance, it is STRONGLY recommended that you have this done by qualified professionals. A qualified professional will ensure that the installation is safe and meets local building and fire codes.
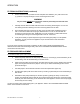
INSTALLATION Types of Fire Extinguishers and Detection Equipment Topic UL Document CO2 Type Extinguishers Dry Chemical Type Extinguishers Water Type Extinguishers Foam Type Extinguishers Sprinklers Smoke Detectors Fire Detection Thermostats ANSI/UL 154 ANSI/UL 299 ANSI/UL 626 ANSI/UL 8 ANSI/UL 199 ANSI/UL 268 ANSI/UL 521 National Fuel Gas Code Document ANSI/NFPA 12 ANSI/NFPA 17 ANSI/NFPA 13 ANSI/NFPA 11 ANSI/NFPA 13 ANSI/NFPA 72 ANSI/NFPA 72 It is essential that the appliance be operated only when adeq
OPERATION FILLING THE TANK Both liquid and solid shortening/oil can be used in this appliance, but liquid is preferred. If solid shortening/oil is used it is recommended that you melt the shortening/oil before adding it to the appliance. You can melt solid shortening/oil in the appliance, but you must be very careful not to scorch the shortening/oil. Filling the tank with liquid shortening/oil To fill the tank with liquid shortening/oil refer to the following procedure. a.
OPERATION WARNING This appliance must be installed using restraining devices to prevent accidental tipping or movement. DO NOT attempt to move the appliance when it is in use or has hot liquid in it. Splashing hot liquids can cause severe burns. WARNING Water and shortening/oil DO NOT mix. Keep liquids away from hot shortening/oil. Dropping liquid frozen foods into the hot shortening/oil will cause violent boiling.
OPERATION Appliance Shut-down For models with electric thermostat option refer to the following instructions. a. Turn the temperature control knob (thermostat) to the OFF ( O )position. b. Place the ON/OFF (I/O) rocker switch to the OFF ( O ) position. The light on the switch will extinguish. For models with Compact Computer Control refer to the following instructions. a. If the appliance is on, press the ON/OFF (I/O) key and hold for 3 seconds to turn the appliance off.
OPERATION FILTERING INSTRUCTIONS (continued) e. Ensure that flush hose is pointed into tank and place Filter ON/OFF ( I/O ) switch in the ON ( I ) position. The pump will begin to return shortening/oil to the tank. WARNING For your safety, NEVER allow flush hose nozzle to point away from the tank while filtering. f. Carefully rinse the tank back and sides with stream of returning shortening/oil. You can use the cleaning brush and cleaning rod to aid in removing debris from the tank. g.
CLEANING and MAINTENANCE DAILY CLEANING Your appliance should be cleaned every day to maintain peak performance, proper sanitation and appearance. Perform the following procedures daily. a. Wipe up any shortening/oil that spills onto the exterior of the appliance. This should be done with a clean soft cloth while the shortening/oil is still warm. DO NOT spray or pressure wash the appliance! b. Use warm water with a mild detergent to clean surfaces.
CLEANING and MAINTENANCE WARNING At operating temperatures, the shortening/oil in the appliance is VERY HOT and can cause severe burns. Do not let the hot shortening/oil touch your skin or clothing. ALWAYS wear insulated, shortening/oil proof gloves, protective clothing and eyewear when working on a hot appliance. For models with electric thermostat option refer to the following instructions. a. Drain the shortening/oil from the appliance and discard or save for reuse. Remove the element screen.
CLEANING and MAINTENANCE Thermostat Calibration Check NOTICE Thermostat calibration requires that the temperature of the appliance be raised above boiling. If you have water in the tank you will need to drain it, dry it and fill it with shortening/oil. Follow the filling instructions in this manual. To check the calibration of your appliance, refer to the following procedure. a. Remove the element screen from the tank. b.
TROUBLE SHOOTING TROUBLESHOOTING Should there be a problem with your appliance, use the following tables to isolate possible faults before calling your Authorized Service Agent. Check these items before calling your Authorized Service Company. ITEM TO CHECK HOW TO CHECK Power to appliance Check main power breaker to appliance. Hi-Limit reset Press Hi-Limit reset button.. Power switch on Power switch should be in the ON ( I ) position.
12 L20-258-UK Rev.
L20-258-UK Rev.
14 L20-258-UK Rev.
L20-258-UK Rev.
16 L20-258-UK Rev.
In the event of problems with or questions about your order, please contact the Pitco Frialator factory at: (800) 258-3708 US and Canada only or (603) 225-6684 World Wide In the event of problems with or questions about your equipment, please contact the Pitco Frialator Authorized Service and Parts representative (ASAP) covering your area, or contact Pitco at the numbers listed to the left. MAILING ADDRESS – P.O. BOX 501, CONCORD, NH 03302-0501 SHIPPING ADDRESS – 10 FERRY ST.