English Operation Manual Manual de instrucciones Multi-channel processor controller unit Controlador de procesador multicanal Español AXM-P7650
Contents Thank you for buying this Pioneer product. Please read through these operating instructions so you will know how to operate your model properly. After you have finished reading the instructions, keep this manual in a safe place for future reference.
Contents English Switching the telephone muting/ attenuation 34 Switching the auxiliary setting 34 Switching the digital source setting 35 Switching the analog input setting 35 Resetting the audio functions 35 Other Functions Turning the clock display on or off 36 Using different entertainment displays 36 Setting the digital source title 36 Setting the analog source title 36 Using the AUX source 36 Setting remote control code type 37 Title input 37 Using the PGM button 38 Additional Information Troublesho
Section 01 Before You Start About this manual This unit features a number of sophisticated functions ensuring superior reception and operation. All the functions have been designed for the easiest possible use, but many are not self-explanatory. This operation manual will help you benefit fully from this unit s potential and to maximize your listening enjoyment.
source is too high, sound may be produced incorrectly. Also, sound controls (e.g. loudness, equalizer and so on) should be off to prevent incorrect sound. Precautions ! Keep this manual handy as a reference for operating procedures and precautions. ! Always keep the volume low enough so that you can hear sounds from outside the vehicle. ! Protect this unit from moisture. ! If the battery is disconnected or discharged, the preset memory will be erased and must be reprogrammed.
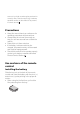
Section 01 Before You Start Using the remote control operation mode switch There are three remote control operation modes on the remote control. In order to control every function of connected equipment properly, be sure to change settings as follows: ! DVD mode This mode can control Pioneer DVD player. Every function of Pioneer DVD player can be controlled by this remote control.
Display unit 1 Power indicator
Section 02 What s What 3 TOP MENU button ! DVD mode Press to return to the top menu during DVD playback. ! DEQ mode Press to select the video source when you connect a Pioneer televison to this unit. ! AUDIO mode Press to select the video source when you connect a Pioneer television to this unit. a PLAY/PAUSE (f) button ! DVD mode Press to switch sequentially between play and pause. ! DEQ mode Not used. ! AUDIO mode Not used.
Section 02 What s What g Joystick This is effective only when controlling Pioneer DVD player. ! DVD mode Move to select the setting. Click to set the setting or select on or off. ! DEQ mode Move to select the setting. Click to set the setting or select on or off. ! AUDIO mode Not used. h EQ button Press to select various equalizer curves. i SFC button Press to select a sound field control. j Remote control operation mode switch Switches the operation mode between DVD mode, DEQ mode and AUDIO mode.
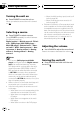
Section 03 Basic Operations Turning the unit on % Press SOURCE to turn the unit on. When you select a source the unit is turned on. Selecting a source % Press SOURCE to select a source.
Section 04 DVD Player Important You can use the following functions only when the remote control is set to DEQ mode. Function menu switching % During DVD playback, press o to display the function names. Press o repeatedly to switch between the following functions: Repeat (repeat play) Pause (pause) % During Video CD playback, press o to display the function names.
Section 04 DVD Player The Bookmark function lets you resume playback from a selected scene the next time the disc is loaded. ! This function can be operated only when the DVD disc is playing on the Pioneer DVD player which features Bookmark function. % During playback, press BOOK.M at the point you want to resume playback next time. The selected scene will be bookmarked so that playback resumes from that point next time. You can bookmark up to five discs.
Section 05 TV tuner Important The next time you press the same preset tuning button the station is recalled from memory. Notes English You can use this unit with a separately sold TV tuner. For details concerning operation, refer to the TV tuner s operation manuals. This section provides information on TV operations with this unit which differs from that described in the TV tuner s operation manual. ! Up to 12 stations, six for each of two TV bands can be stored in memory.
Playing a CD 1 2 3 You can use this unit to control a multi-CD player, which is sold separately. These are the basic steps necessary to play a CD with your multi-CD player. More advanced CD operation is explained starting on the next page.
Section 06 Multi-CD Player 2 Press m or n to select the repeat range. Press m or n until the desired repeat range appears in the display. ! MCD Repeat all discs in the multi-CD player ! TRK Repeat just the current track ! DISC Repeat the current disc 1 1 Function display Shows the function status. Important You can use the following functions only when the remote control is set to DEQ mode. % Press o to display the function names.
Section 06 Multi-CD Player Note If you turn random play on during DISC and then return to the playback display, D.RANDOM appears in the display. Scanning CDs and tracks While you are using DISC, the beginning of each track on the selected disc plays for about 10 seconds. When you are using MCD, the beginning of the first track of each disc is played for about 10 seconds. Pausing CD playback Pause lets you temporarily stop disc playback. 1 Press o to select Pause.
Section 06 Multi-CD Player 4 Press r to store the currently playing track in the playlist. ITS Input is displayed briefly and the currently playing selection is added to your playlist. The display then shows ITS again. 5 Press BAND to return to the playback display. Note After data for 100 discs has been stored in memory, data for a new disc will overwrite the oldest one. Playback from your ITS playlist ITS play lets you listen to the tracks that you have entered into your ITS playlist.
Section 06 Multi-CD Player 3 Press q to erase all tracks on the currently playing CD from your ITS playlist. All tracks on the currently playing CD are erased from your playlist and ITS Clear is displayed. 4 Press BAND to return to the playback display. Using disc title functions You can input CD titles and display the titles. Then you can easily search for and play a desired disc.
Section 06 Multi-CD Player Displaying titles on CD TEXT discs # If specific information has not been recorded on a CD TEXT disc, NO XXXX will be displayed (e.g., NO Disc Title). # If the multi-CD player does not support COMP/DBE, No Comp is displayed when you attempt to select it. English % Press DISPLAY.
Section 07 Digital Signal Processor Introduction of DSP adjustments Operating the DSP menu Important ! You can use the following functions only when the remote control is set to DEQ mode. ! Following functions are effective only when you connected a Pioneer multi-channel processor (DEQ-P7650) to this unit. By carrying out the following settings/adjustments in the order shown, you can create a finely-tuned sound field effortlessly.
Section 07 Digital Signal Processor Operating the DSP details menu 4 5 6 1 Front left speaker 2 Center speaker 3 Front right speaker 4 Rear left speaker 5 Subwoofer 6 Rear right speaker % Press p and hold until SP Set appears in the display, then press p to display the DSP function names. After SP Set is displayed, press p repeatedly, the following DSP functions appear in the display: SP Set (speaker setting) C.
Using the position selector One way to assure a more natural sound is to accurately position the stereo image, putting you right in the center of the sound field. The position selector function lets you automatically adjust the speaker output levels and inserts a delay time to match the number and position of occupied seats.
Section 07 Digital Signal Processor 1 Press p to select DIRECT. Press p until DIRECT appears in the display. 2 Press r to turn the direct control on. DIRECT ON appears in the display. Direct control is now on. English 2 Press q or r to adjust the source volume. Each press of q or r increases or decreases the source volume. SLA +4 SLA 4 is displayed as the source volume is increased or decreased. # To turn direct control off, press q.
Section 07 Digital Signal Processor Adjusting the Music mode You can adjust the Music mode with the following three controls. ! Panorama (Panorama) extends the front stereo image to include the surround speakers for an exciting wraparound effect. ! Dimension (Dimension) allows you to gradually adjust the sound field either towards the front or the rear. ! Center Width Control (Center W Control) allows center-channel sounds to be positioned between the center speaker and the left/right speakers.
Section 07 Digital Signal Processor 2 Press m or n to select the speaker to be adjusted. Each press of m or n selects the speaker in the following order: Front speakers Center speaker Rear speakers Subwoofer S.W (subwoofer setting) # You can switch to S.W only when the subwoofer has been set to ON. 3 Press q or r to select the correct size for the selected speaker.
Section 07 Digital Signal Processor 1 Press p and hold until SP Set appears in the display, then press p to select C.Over. After SP Set is displayed, press p until C.Over appears in the display. 2 Press m or n to select the speaker to be adjusted. Each press of m or n selects the speaker in the following order: Front speakers Center speaker Rear speakers Subwoofer 3 Press q or r to select cross-over frequency for the selected speaker.
Section 07 Digital Signal Processor # Check each speaker output level. If no adjustments are needed, perform step 4 to stop the test tone. # The settings do not appear for speakers whose size is set OFF. 3 Press q or r to adjust the speaker output level. Each press of q or r increases or decreases the speaker output level. +10 10 is displayed as the level is increased or decreased. # The test tone rotates to the next speaker after about two seconds from the last operation.
Digital Signal Processor 2 Press m or n to select the speaker to be adjusted. Each press of m or n selects the speaker in the following order: Front speaker left Center speaker Front speaker right Rear speaker right Rear speaker left Subwoofer # You cannot select speakers whose size is set at OFF. 3 Press q or r to adjust the distance between the selected speaker and the listening position. Each press of q or r increases or decreases the distance. 500.0 cm 0.
Before operating the auto TA and EQ function ! Carry out auto TA and EQ in as quiet a place as possible, with the car engine and air conditioning switched off. Also cut power to car phones or portable telephones in the car, or remove them from the car before carrying out auto TA and EQ. Sounds other than the measurement tone (surrounding sounds, engine sound, telephones ringing etc.) may prevent correct measurement of the car interior acoustic characteristics.
Section 07 Digital Signal Processor 3 Turn the ignition switch to ON or ACC. If the car s air conditioner or heater is turned on, turn it off. Noise from the fan in the air conditioner or heater may prevent correct auto TA and EQ. # Press SOURCE to turn the source on if this unit is turned off. 4 Select the position for the seat on which the microphone is placed. Refer to Using the position selector on page 22. # If no position is selected before you start auto TA and EQ, FL is selected automatically.
Section 07 Digital Signal Processor Equalizer curve VOCAL Vocal FLAT Flat CUSTOM1 Custom 1 CUSTOM2 Custom 2 ! CUSTOM1 and CUSTOM2 are adjusted equalizer curves. ! When FLAT is selected no supplement or correction is made to the sound. This is useful to check the effect of the equalizer curves by switching alternatively between FLAT and a set equalizer curve. % Press EQ to select the equalizer.
Section 07 Digital Signal Processor 7 Press n and then press q or r to select the desired Q factor. Each press q or r switches between the following Q factor: Q.WIDE (wide) Q.NAR. (narrow) # You can adjust parameters for each band of the other speakers in the same way. 8 Press BAND to return to the playback display. Note You can select a center frequency from among 26 frequencies for each band.
Adjusting initial settings Setting the clock Use these instructions to set the clock. 1 Press o to select clock. Press o repeatedly until clock appears in the display. 1 Initial settings lets you perform initial setup of different settings for this unit. Important You can use the following functions only when the remote control is set to DEQ mode. 1 Function display Shows the function status. 1 Press SOURCE and hold until the unit turns off. 2 Press o and hold until the clock appears in the display.
Section 08 Initial Settings Adjusting the brightness You can adjust the display brightness. Initially this mode is set to 12. 1 Press o to select Brightness. Press o repeatedly until Brightness appears in the display. 2 Press m or n to adjust the brightness level. Each press of m or n increases or decreases the brightness level. 0 15 is displayed as the level is increased or decreased. Correcting distorted sound You can minimize distortion that may be caused by the equalizer curve settings.
Section 08 Initial Settings It is possible to connect DVD player to this unit. Activate the digital source when using DVD player connected to this unit. Initially, both Digital1 and Digital2 are set to off. 1 Press o to select Digital. Press o until Digital (e.g., Digital1) appears in the display. 2 Press r to turn digital setting on. # To turn digital setting off, press q. Switching the analog input setting Resetting the audio functions You can reset all audio functions except volume.
Section 09 Other Functions Turning the clock display on or off You can turn the clock display on or off. % Press 0 to turn the clock display on or off. Each press of 0 turns the clock display on or off. # The clock display disappears temporarily when you perform other operations, but the clock display appears again after 25 seconds. Note Even when the sources are off, the clock display appears on the display. Pressing 0 turns the clock display on or off.
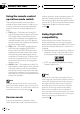
Section 09 Other Functions Setting the AUX title 1 After you have selected AUX as the source, press o and hold until TITLE appears in the display. 2 Input the title. To input the titles, refer to Title input on this page. Setting remote control code type When the remote control operation switch is set to DVD, changing the remote control code type enables you to operate the Pioneer DVD player by the supplied remote control. There are two remote codes, code type DVD A and code type DVD B.
Section 09 Other Functions Using the PGM button You can operate the preprogrammed functions for each source by using BOOK.M when controlling Pioneer head unit. % Press BOOK.M to turn pause on when selecting the following sources: ! DVD Built-in DVD player ! S-DVD DVD player/multi-DVD player ! Multi-CD Multi-CD player # To turn pause off, press BOOK.M again. % Press BOOK.M and hold to turn BSM on when selecting TUNER as the source. Press BOOK.M and hold until the BSM turns on.
Appendix Additional Information Troubleshooting Symptom Cause Action (See) Power doesn t turn on. The unit doesn t operate. Leads and connectors are incorrectly connected. Confirm once more that all connections are correct. The fuse is blown. Rectify the reason for the fuse blowing, then replace the fuse. Be very sure to install the correct fuse with the same rating. English Common Noise and other factors are causing Turn the unit off and then on.
Appendix Additional Information Message Cause Action (See) ERROR-05 Electrical or mechanical Turn the ignition ON and OFF, or switch to a different source, then back to the DVD player. Understanding auto TA and EQ error messages When correct measurement of car interior acoustic characteristics is not possible using the auto TA and EQ, an error message may appear on the display.
Appendix Additional Information Specifications English General Rated power source ............... 14.4 V DC (allowable voltage range: 12.0 14.4 V DC) Grounding system ................... Negative type Max. current consumption ..................................................... 0.25 A Display unit: Dimensions (W × H × D) ........................................... 119 × 37 × 20 mm Weight ................................ 0.1 kg Hideaway unit: Dimensions (W × H × D) ....................................
PIONEER CORPORATION 4-1, MEGURO 1-CHOME, MEGURO-KU, TOKYO 153-8654, JAPAN PIONEER ELECTRONICS (USA) INC. P.O. Box 1540, Long Beach, California 90801-1540, U.S.A. TEL: (800) 421-1404 PIONEER EUROPE NV Haven 1087, Keetberglaan 1, B-9120 Melsele, Belgium TEL: (0) 3/570.05.11 PIONEER ELECTRONICS ASIACENTRE PTE. LTD. 253 Alexandra Road, #04-01, Singapore 159936 TEL: 65-6472-7555 PIONEER ELECTRONICS AUSTRALIA PTY. LTD.