GP/EP SCALE 1:4 ARF HIS MANUAL lid o Ugh Sl STARTING wai ET Control throw Ailerons: Low: 15mm up/down, 10% expo; High: 20mm up/down, 10% expo Control throw Elevators: Low: 15mm up/down, 12% expo; High: 20mm up/down, 12% expo Control throw Rudder: Low: 30mm right/left, 15% expo; High: 45mm right/left, 15% expo Control throw Flaps: Mid: 25mm down; Landing: 35mm down SPECIFICATION Wingspan: 2567mm (101in) Length: 2190mm (86.
INSTRUCTION MANUAL pr If SIs] Introduction 1 Warranty... 2 2 Safety precaution 2 Important building 2 Suggestion... 2 Flight warnings. Flight wakings Covering tools. Adhesives and required tools . Academy of model aeronautics national model aircraft safety code.
INSTRUCTION MANUAL WARRANTY Phoenix Model guarantees the component parts in this kit to be free from defects in both material and workmanship at the date of purchase by the purchaser. This warranty does not cover cosmetic damage or damage due to acts of God, accident, misuse, abuse, negligence, commercial use, or modification of or to any part of the Product. This warranty does not cover damage due to improper installation, operation, maintenance, or attempted repair by anyone other than Phoenix Model.
ION MANUAL INSTR FLIGHT WARNINGS * When ready to fly, first extend the transmitter aerial. * Switch on the transmitter. * Switch on the receiver. * Check that the wings are correctly fitted to the fuselage. * Operate the control sticks on the transmitter and check that the control surfaces move freely and in the CORRECT directions. * Check that the transmitter batteries have adequate power. * ALWAYS take off into the wind.
INSTR 1ON MANUAL « Officially designated AMA Air Show Teams (AST) are authorized to use devices and practices as defined within the Team AMA Program Document. (AMA Document #718.) {i} Not operate a turbine-powered aircraft, unless in compliance with the AMA turbine regulations. (AMA Document #510-A) 3.
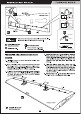
INSTRUCTION MANUAL INSTALLING THE LIGHT WINE Adhesive tape After J (2 Apply instant glue light wing < Wing Bottom > Remove the covering NG Light wing 24 J Decoration for light wing Adhesive tape 2] Zid instant glue (CA glue, super glue).
INSTRUCTION MANUAL Adhesive tape 0 Apply instant glue light wing < Wing Bottom > Light wing 2 Decoration for light wing < Wing Bottom > Adhesive tape Adhesive taps Apply instant glue 21 {CA glue, super glue).
INSTRUCTION MANUAL SUGGESTION FOR ENGINE AND SERVO + ENGINE: DLE 61 RA + SERVO: Two Options » Servo Option 1:Sport Performance Hittite 7985MG Servos may be used for sport flying. * 7 Hittite 7985MG Servos for flight surfaces PREPARATIONS Use a covering iron with a covering sock on high heat to tighten the covering if necessary. Apply pressure over sheered areas to thoroughly bond the covering to the wood.
INSTRUCTION MANUAL Main Wing < Bottom view > Assemble left and right z TH sides the same ry Cut off shaded portion Js) Ensure smooth, non-binding wi Apply epoxy glue. a movement when assembling > Make certain the hinges are adequately secured with glue. If they come Oases in flight accidents may result. INSTALLING THE AILERONS AND FLAPS SERVOS 1. Install the rubber grommets and brass eyelets onto the aileron serve. 2.
INSTRUCTION MANUAL > Set all screws securely.
INSTRUCTION MANUAL 3x10mm < top view > Z Assemble left and right Cut off shaded portion bel sides the same ay.
INSTRUCTION MANUAL 2x 10mm TP Screw Aluminum ball < Right Wing > < Left Wing > Lgl Assemble left and right Must be purchased "4 sides the same way separately!
INSTRUCTION MANUAL INSTALLING THE PLASTIC COVER Plastic cover < Bottom view > |Z] Apply Instant glue {CA glue, super glue). = Cut off shaded portion 4 Assemble left and right "43 sides the same way INSTALLING THE MAIN LANDING GEAR 6 x 45mm Cap Screw 6mm Washer Aluminum ball 100mm [fe] co 3 x 30mm Push rod Apply threadlike 4 Assemble left and right (screw cement).
INSTRUCTION MANUAL < Wheel well Cut off shaded portion 4 Assemble left and right 4 Pay close attention here "43 sides the same way
INSTRUCTION MANUAL Aluminum Pal ~cx LD wl Apply epoxy glue 4 Assemble left and right "41 sides the same way
INSTRUCTION MANUAL es a ELECTRIC RETRACT SYSTEM Main Whee! (ON) Power led orm) Front / Back Whee! Oo I Jr POWER 7 4v (ON) TeV O H Controller Box EM Receiver orm) 0 J r/min Wheel Q = Tv ec) Handle \ J
Plate of plywood 1 4mm Washer 4 x 20mm Cap Screw 4mm Washer 4 x 20mm Cap Screw 4mm Plastic Screw © 4mm Spring Washer Apply Instant glue = Cut off shaded portion (CA glue, super glue).
SECURE THE WING TO THE FUSELAGE 6mm Plastic Screw Attach the wings to the joiner tube and secure | WARY 4 the wing panels to the fuselage. Assemble left and right oA sides the same way. GLUING THE PLASTIC COVER | | Cut off shaded portion EE Apply instant glue (CA glue, super glue).
INSTRUCTION MANUAL INSTALLING THE ELEVATOR SERVO INSTALLING THE ELEVATOR LINKAGES 1. Remove the covering from the horizontal . Repeat these step as installing the aileron stabilizer. linkages. 2. Install two servo to the horizontal stabilizer as shown. 3mm Nylon Nut 3. Repeat these step as installing the aileron Co) [| 5 control horn.
Aluminum ball Cut off shaded portion Assemble left and right Must be purchased separately! BH des the same way.
INSTRUCTION MANUAL HORIZONTAL STABILIZER INSTALLATION [A] Main wing must be inserted and attached completely before fixing with screw. Cut off shaded portion ) Assemble left and right bel sides the same way.
INSTRUCTION MANUAL e » Make certain plane is aligned accurately per the diagram. A sim-aligned plane can fly erratically and causes accidents. Take off the main wing after put a rudder. Rudder 3x15mm Please notch that C.A glue must be apply to these AJB iN holes before screw the control hom to the rudder. If not, It comes off during flights, you may lose =~ control of your airplane, resulting In an accident | ALB Cutoff shaded portion Drill holes with the specified diameter.
INSTRUCTION MANUAL INSTALLING THE RUDDER PUSH ROD 1. Locate the push rod exit slot on the left side of the fuselage. 2. Carefully cut away the covering material from the slot. 3. Working from inside the fuselage, slide the threaded end of the remaining push rod down the inside of the fuselage until the push rod reaches the exit slot. Carefully reach in with a small screw driver and guide the push rod out of the exit slot. 4. Install the nylon clevis on the rudder push rod.
INSTALLING THE NOSE GEAR RETRACT 6x 45mm Cap Screw I — 6mm Washer Aluminum ball H Apply threadlike (screw cement).
INSTRUCTION MANUAL r 2 ELECTRIC RETRACT SYSTEM Main Wheel aki Power led Pvvewy Front / Back Wheel 0 3 POWER Controller Box MW Receiver spins lo—a) Handle L J Assemble left and right Cut off excess.
INSTRUCTION MANUAL INSTALLING THE ENGINE May bs you also need to trim ‘some wood from the tree-angle Using plate of plywood (supplied with the kit) mark the holes onto the fire wall for Installing the engine mount for DLE-61CC or OS-GT O DLE6ICC oO Throttle Lever wood for the installation is easy.
(pos S Apply epoxy glue or CA glue Fiberglass plate. < Important notes > Apply epoxy glue or CA glue 2] Apply Instant glue (CA glue, super glue). Note the direction wy Assemble left and right "AY sides the same way [ll Drill holes with the 5mm specified diameter.
INSTRUCTION MANUAL TUCUMAN Sacco Metal Wiki link (M2) = Apply instant glue (CA glue, super glue).
INSTRUCTION MANUAL TUCUMAN Sacco INSTALLING THE FUEL TANK Fuel Tank 700cc < Front View > 1 Fuel Tank uP < Top View > 205.0 163.0 69.
INSTRUCTION MANUAL Fuel Tank TOUCAN 60ICC INSTALLING THE THROTTLE 1. Plug the throttle servo into the receiver and tum on the radio system. Check to ensure that the throttle servo output shaft is moving in the correct direction. When the throttle stick is moved forward from idle to full throttle, the throttle barrel should also open and close using this motion. If not, reverse the direction of the servo, using the transmitter.
INSTRUCTION MANUAL o Axum Linkage Stopper TOUCAN 60ICC Throttle Servo Apply thread locker {screw cement). a Cut off shaded portion pd Must be purchased separately! = Ensure smooth, non-binding movement when assembling MOUNTING THE COWL 1. Remove the muffler and needle valve assembly from the engine. Slide the fiberglass cowl over the engine. . Measure and mark the locations to be cut out for engine head clearance, needle valve, muffler.
INSTRUCTION MANUAL 3 x 15mm TP Screw (ws Cut off shaded portion Apply instant glue C1 (CA glue, super glue) Lg Assemble left and right sides the same way. [Al Drill holes with the (2mm| specified diameter.
INSTRUCTION MANUAL TUCUMAN Sacco Must be purchased separately! INSTALLING THE SPINNER ANE Install the spinner back-plate, propeller and spinner cone. = Securely tighten the nut holding the propeller for It not come off ‘when the mater is spinning. If coming off, thees is a high risk of The propeller should not touch any part of the injury! spinner cone. If it dose, use a sharp modeling P Always ensure propeller and spinner are balanced.
INSTRUCTION MANUAL TOUCAN 60CC INSTALLING THE RECEIVER AND BATTERY 1. Plug the servo leads and the switch lead into the receiver. You may want to plug an aileron extension into the receiver to make plugging in the aileron servo lead easier when you are installing the wing. Plug the battery pack lead into the switch. 2. Wrap the receiver and battery pack in the protective foam to protect them from vibration. Use a rubber band or masking tape to hold the foam in place.
TOUCAN 60CC INSTRUCTION MANUAL When rotating clock wise, change the connection of 2 wires.
INSTRUCTION MANUAL TUCUMAN sludge BALANCING 2. If the nose of the plane falls, the plane is nose Co . heavy. To correct this first move the battery pack 1. Iris critical that your airplane be balanced correctly. further back in the fuselage. If this is not possible Improper balance will cause your plane to lose or does not correct it, stick small amounts of lead control and crash. weight on the fuselage under the horizontal stabilizer.
TOUCAN 60CC = » In order to obtain the CG specified, reposition the receiver and other equipment. » If not obtain the CG specified, add a weight and adjust. ANI » Do not fly before confirming the correct location of the CG. If the CG is incorrect, you lose control of your airplane which leads to accidents. LATERAL BALANCE After you have balanced a plane on the C.G. You should laterally balance it. Doing this will help the airplane track straighter. 1. Turn the airplane upside down.
INSTRUCTION MANUAL DECORATION < Top view > TUCUMAN 60C0 COVERAGE #042 Light Green #50 Blue France #030 Cub Yellow #071 Black #white 44 < Side view >