SW6700 Tripleheader shaver © & ™ Lucasfilm Ltd.
English 4
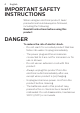
English IMPORTANT SAFETY INSTRUCTIONS When using an electrical product, basic precautions should always be followed, including the following: Read all instructions before using this product. DANGER To reduce the risk of electric shock: -- Do not reach for a corded product that has fallen into water. Unplug immediately. -- The power plug and the accessories connected to it are not for immersion or for use in shower. -- Do not use an extension cord with this product.
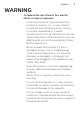
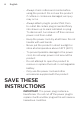
English 5 WARNING To reduce the risk of burns, fire, electric shock, or injury to persons: -- Close supervision is required when this product is used by, on, or near children, or persons with limited physical, sensory, or mental capabilities or invalids. -- Use this product for its intended household use as described in this manual. Do not use attachments not recommended by Philips North America LLC.
English -- Always check cutters and combs before using the product. Do not use the product if cutters or combs are damaged, as injury may occur. -- Always attach plug to product first, then to outlet. Be certain plug is inserted firmly into shaver up to mark indicated on plug. To disconnect, turn shaver off then remove power cord from outlet. -- Keep the power cord dry at all times. Do not handle with wet hands. -- Never put the product in direct sunlight or store at a temperature above 140°F (60°C).
English 7 Contents Important safety instructions _________ General description (Fig.
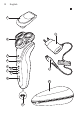
English 1 1 11 2 3 4 5 7 6 12 8 9 13 10
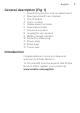
English General description (Fig. 1) 1 2 3 4 5 6 7 8 9 10 11 12 13 SmartClick precision trimmer attachment Shaving unit with hair chamber On/off button Turbo+ button Replacement reminder Cleaning reminder Travel lock symbol 'Unplug for use' symbol Battery charge indicator Socket for small plug Power plug Small plug Travel case Introduction Congratulations on your purchase and welcome to Philips Norelco! To fully benefit from the support that Philips Norelco offers, register your product at www.norelco.
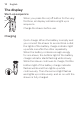
English The display Start-up sequence When you press the on/off button for the very first time, all display indications light up in sequence. Charge the shaver before use. Charging Quick charge: When the battery is empty and you connect the shaver to an electrical outlet, the lights of the battery charge indicator light up white one after the other repeatedly. When the battery contains enough energy for one shave, the bottom light of the battery charge indicator starts flashing white slowly.
English 11 Battery fully charged Note: This shaver can only be used without a cord. When the battery is fully charged, all lights of the battery charge indicator light up white continuously. Note: When you press the on/off button during or after charging, the 'unplug for use' symbol lights up to indicate that the shaver is still connected to the power outlet. Note: When the battery is full, the display switches off automatically after 30 minutes.
English ’Unplug for use’ reminder The ‘unplug for use’ symbol flashes to remind you to disconnect the shaver from the power outlet before you can switch it on. Cleaning reminder Clean the shaver after every shave for optimal performance (see 'Cleaning and maintenance'). When you switch off the shaver, the cleaning reminder flashes to remind you to clean the shaver. Travel lock You can lock the shaver when you are going to travel.
English 13 Replacing shaving heads For maximum shaving performance, replace the shaving heads every year. The shaver is equipped with a replacement reminder which reminds you to replace the shaving heads. The replacement reminder flashes to indicate that you have to replace the shaving heads. (see ‘Replacing the shaving heads’) Note: After replacing the shaving heads, you need to reset the replacement reminder by pressing the on/off button for 7 seconds.
English Charge the shaver before you use it for the first time and when the display indicates that the battery is almost empty. Charging takes approx. 1 hour. A fully charged shaver has a shaving time of up to 60 minutes. Note: You cannot use the shaver while it is charging. Charging with the power cord 1 Make sure the shaver is switched off. 2 Put the small plug in the shaver and connect the power plug to any 100V to 240V AC outlet. Use only the power cord provided.
English 15 Using the shaver Always check the shaver and all accessories before using. Do not use the shaver or any accessory if it is damaged, as this may cause injury. Always replace a damaged part with one of the original type. This symbol indicates that the shaver can be used in the bath or shower. -- Use this shaver for its intended household use as described in this manual. -- For hygienic reasons, the shaver should only be used by one person. -- Trimming is easier when the skin and hair are dry.
English -- Stick with it! If you alternate shaving methods during the adjustment period, it may make it more difficult to adapt to the Philips Norelco shaving system. -- If you are still not convinced after 21 days, Philips Norelco will refund you the full purchase price as long as the request is received within 45 days of purchase. Switching the shaver on and off 1 To switch the shaver on or off, press the on/off button once.
English 17 Dry shaving 1 Switch the shaver on. 2 Stretch your skin with your free hand so blades can lift and cut whiskers. Gently press shaver to skin so the floating heads can follow the contours of your face Note: Do not press too hard. Too much pressure can pinch the skin into the combs. 3 Switch off and clean the shaver after each use.The display lights up for a few seconds to show the battery status.
English 2 Apply shaving foam or shaving gel to your skin. 3 Rinse the shaving unit under the tap to ensure that the shaving unit glides smoothly over your skin. 4 Switch the shaver on. 5 Move the shaving heads over your skin in circular movements to catch all hairs growing in different directions. Exert gentle pressure for a close, comfortable shave. Note: Do not press too hard, this can cause skin irritation.
English 19 Shaving with Turbo+ setting 1 Switch on the shaver. 2 Press the Turbo+ button once if you want to shave areas with dense hair more quickly. Note: The Turbo+ button flashes irregularly to indicate that Turbo+ setting is activated. 3 Stretch your skin with your free hand so blades can lift and cut whiskers. Gently press shaver to skin so the floating heads can follow the contours of your face. Note: Do not press too hard. Too much pressure can pinch the skin into the combs.
English Using the precision trimmer attachment You can use the precision trimmer to groom your beard, sideburns and moustache. 1 Attach the trimmer to the shaver ('click'). 2 Switch on the shaver. 3 Hold the trimmer perpendicular to the skin and move it downwards while exerting gentle pressure. 4 Switch off and clean the trimmer after use. Travel lock You can lock the shaver when you are going to travel. The travel lock prevents the shaver from being switched on by accident.
English 21 Deactivating the travel lock 1 Press the on/off button for 3 seconds. While you deactivate the travel lock, the indications on the display light up briefly. When the travel lock is deactivated, the travel lock symbol flashes and goes out. The shaver switches on and is now ready for use again. Note: The shaver unlocks automatically when it is connected to an electrical outlet. Cleaning and maintenance -- Regular cleaning guarantees better shaving results.
English Cleaning the shaver under the tap Clean the shaver after every shave for optimal performance. Always check if the water is too hot, to prevent burning your hands. Never dry the shaving unit with a towel or tissue, as this may damage the shaving heads. While rinsing shaving unit, water may drip out of the base of shaver. This is a normal occurrence. 1 Switch the shaver on. 2 Rinse the shaving unit under a warm tap. 3 Switch off the shaver.
English 23 5 Rinse the shaving head holder under a warm tap. 6 Carefully shake off excess water and let the shaving head holder air dry completely. 7 Attach the shaving head holder to the bottom part of the shaving unit (‘click’). Cleaning the precision trimmer attachment Never dry the trimmer with a towel or tissue, as this may damage the trimming teeth. Clean the trimmer after each use. 1 Switch the shaver on. 2 Rinse the trimmer under a warm tap. 3 After cleaning, switch off the shaver.
English Replacement Replacing the shaving heads For maximum shaving performance, replace the shaving heads once a year. Replace damaged shaving heads immediately. Always replace the shaving heads with original Philips Norelco shaving heads only (see 'Accessories'). Replacement reminder The replacement reminder indicates that the shaving heads need to be replaced.The replacement reminder flashes when you switch the shaver off. 1 Switch the shaver off.
English 25 4 Remove the shaving heads from the shaving head holder.Discard the used shaving heads immediately to avoid mixing them with the new shaving heads. 5 Place the new shaving heads in the shaving head holder. 2 1 Note: Make sure the notches on both sides of the shaving heads fit exactly onto the projections in the shaving head holder. 6 Place the retaining ring on the shaving head and turn it clockwise to reattach the retaining ring. Repeat this process for the other retaining rings.
English 7 Attach the shaving head holder to the bottom part of the shaving unit (‘click’). 7 sec. 8 To reset the replacement reminder, press and hold the on/off button for approx. 7 seconds. This product has no other user-serviceable parts. For assistance call 1-800-243-3050. Storage Store the shaver in the travel case. Note: Always let the shaver dry before you store it in the travel case. -- Be sure the product is turned off.
English 27 Accessories Replacement parts and accessories may be purchased at a store near you or on our website www.philips.com/store. -- The following accessories are available: -- SH90 Philips Norelco shaving heads -- RQ111 Philips Norelco SmartClick beard styler -- RQ585 Philips Norelco SmartClick cleansing brush Assistance For assistance, visit our website: www.philips.com/support or call toll free 1-800-243-3050. Online information is available 24 hours a day, 7 days a week.
English -- Contact your local town or city officials for battery disposal information. You can also call 1-800-822-8837 or visit www.call2recycle.org for battery drop-off locations.For assistance, visit our website www.philips.com/support or call 1-800-243-3050 toll free. -- Your product is designed and manufactured with high quality materials and components, which can be recycled and reused. For recycling information, please contact your local waste management facilities or visit www.recycle.philips.
English 29 Full Two-Year Warranty Philips North America LLC warrants this new product (except cutters and combs) against defects in materials or workmanship for a period of two years from the date of purchase, and agrees to repair or replace any defective product without charge.
English 45-DAY MONEY-BACK GUARANTEE To enjoy the closest and most comfortable shave from your new Philips Norelco Men’s Shaver, the shaver should be used exclusively for 3 weeks. This allows your hair and skin enough time to adapt to the Philips Norelco Shaving System. If, after that period of time, you are not fully satisfied with your Philips Norelco Men’s Shaver, send the product back along with dated sales receipt and we’ll refund you the full purchase price.
Manufactured for: Philips Personal Health a division of Philips North America LLC P.O. Box 10313, Stamford, CT 06904 USA This symbol on the product’s nameplate means it is listed by Underwriters’ Laboratories, Inc. Norelco and Tripleheader are registered trademarks of Philips North America LLC. PHILIPS and Philips shield are registered trademarks of Koninklijke Philips N.V. ©2017 Philips North America LLC. All rights reserved. www.philips.com 4222.002.7383.