
User manual
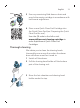
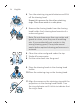
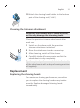
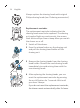
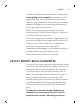
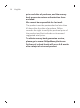
Table Of Contents
- Introduction
- General description (Fig. 1)
- IMPORTANT SAFETY INSTRUCTIONS
- The display
- Charging
- Using the shaver
- Using click-on attachments
- Travel lock
- Cleaning and maintenance
- Replacement
- Storage
- Ordering accessories
- Assistance
- Disposal
- Full Two-Year Warranty
- 45-DAY MONEY-BACK GUARANTEE
- Introducción
- Descripción general (Fig. 1)
- INSTRUCCIONES IMPORTANTES DE SEGURIDAD
- La pantalla
- Carga
- Uso de la afeitadora
- Uso de los accesorios de ajuste de clic
- Bloqueo para viajes
- Limpieza y mantenimiento
- Sustitución
- Almacenamiento
- Pedido de accesorios
- Asistencia
- Desecho
- Garantía Total de Dos Años
- GARANTÍA DE DEVOLUCIÓN DE SU DINERO POR 45 DÍAS

24
English
2
1
4 Turn the retaining ring anticlockwise and lift it
off the shaving head.
Repeat this process for the other retaining
rings. Place them aside in a safe place.
5 Remove the shaving heads from the shaving
head holder. Each shaving head consists of a
cutter and guard.
Note: Do not clean more than one cutter and
guard at a time, since they are all matching
sets. If you accidentally put a cutter in the
wrong shaving guard, it may take several
weeks before optimal shaving performance is
restored.
6 Clean the cutter and guard under the tap.
7 Shake off excess water.
8 Put the cutter back into the guard.
9 Place the shaving heads in the shaving head
holder.
10Place the retaining ring on the shaving head.
11Align the arrows on the retaining ring with the
projections in the shaving head holder. Turn
the ring clockwise until it clicks to indicate that
the ring is fixed.