
User manual
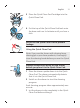
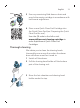
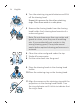
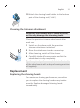
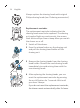
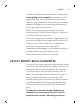
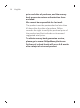
Table Of Contents
- Introduction
- General description (Fig. 1)
- IMPORTANT SAFETY INSTRUCTIONS
- The display
- Charging
- Using the shaver
- Using click-on attachments
- Travel lock
- Cleaning and maintenance
- Replacement
- Storage
- Ordering accessories
- Assistance
- Disposal
- Full Two-Year Warranty
- 45-DAY MONEY-BACK GUARANTEE
- Introducción
- Descripción general (Fig. 1)
- INSTRUCCIONES IMPORTANTES DE SEGURIDAD
- La pantalla
- Carga
- Uso de la afeitadora
- Uso de los accesorios de ajuste de clic
- Bloqueo para viajes
- Limpieza y mantenimiento
- Sustitución
- Almacenamiento
- Pedido de accesorios
- Asistencia
- Desecho
- Garantía Total de Dos Años
- GARANTÍA DE DEVOLUCIÓN DE SU DINERO POR 45 DÍAS

21
English
5 Place the Quick Clean Pod Cartridge into the
Quick Clean Pod.
6 Put the top of the Quick Clean Pod back onto
the base and turn it clockwise until you hear a
click.
Do not tilt the Quick Clean Pod to prevent
leakage.
Using the Quick Clean Pod
Note: If you use the shaver with shaving foam,
shaving gel or pre-shave products, thoroughly
rinse the shaving heads before you use the Quick
Clean Pod.
Always shake excess water off the shaver
before you place it in the Quick Clean Pod.
1 Place the shaver upside down into the Quick
Clean Pod. The shaver automatically detects
that it is in the Quick Clean Pod.
2 Switch on the shaver to start the cleaning
program.
Each cleaning program takes approximately one
minute.
1 Let the shaver air-dry completely in the Quick
Clean Pod before storing it.