
Operation Manual


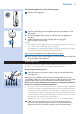


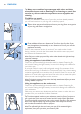

6 Press the safety ring fully onto the skin with slight pressure.
Note: The safety ring has contact switches that together are the safety system
of the appliance. This safety ring prevents unintentional ashing without skin
contact.
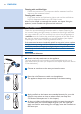
, The ‘ready to ash’ light on the back of the appliance lights up green
when all contact switches of the safety ring are in contact with the
skin and the device is charged. This may take a few seconds.
Tip: For easier use, stretch the area of skin you want to treat. On areas with
softer skin, you may need to exert more pressure on the appliance to push in
all contact switches.
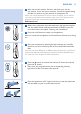
7 Press the ash button to release a ash. Now you have 2 options to
release the next ash:
A Keep the ash button pressed. The appliance releases one ash
after another as long as the safety ring is in full contact with the skin.
Immediately after the appliance has ashed, slide the appliance to the
next area. Make sure the safety ring is fully pressed onto the skin.
This ‘Slide & Flash mode’ is especially convenient for treatment of larger
areas like the legs.
B Let go of the ash button after each ash. For the next ash, place the
appliance on the area right next to the previously ashed area. Make
sure the safety ring is fully pressed onto the skin.
This ‘Step & Flash mode’ guarantees a precise treatment of e.g. the knees
or ankles.
Note: After a few seconds, the appliance is ready to ash again, so make sure
that you move it to the next area immediately after it has ashed.
Do not treat exactly the same area multiple times during one session.
This does not improve the effectiveness of the treatment, but increases
the risk of skin reactions.
Note: The visible light produced by the appliance is the reection of the ash
on the skin and is harmless to your eyes. It is not necessary to wear goggles
during use.
ENGLISH18