
User manual
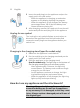
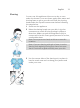
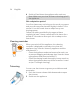
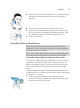
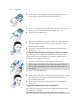
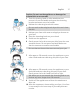
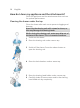
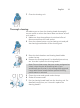
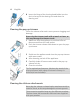
Table Of Contents
- Contents
- General description
- Introduction - Identify your shaver
- Fig. A
- Fig. B
- Important safety information
- What do the icons on the display mean? (Fig. A)
- What do the icons on the display mean? (Fig. B)
- Main menu (Fig. A)
- Main menu (Fig. B)
- How do I connect my shaver and smartphone? (Fig. A)
- How do I connect my shaver and smartphone? (Fig. B)
- What is my shaver telling me? (Fig. A)
- What is my shaver telling me? (Fig. B)
- How do I charge my appliance?
- How do I use my appliance and the attachments?
- How do I clean my appliance and the attachments?
- Storage
- How do I replace the shaving heads?
- Ordering accessories
- Troubleshooting
- Further guidance
- Recycling
- Trademarks

39
English
7
Close the shaving unit.
Thorough cleaning
We advise you to clean the shaving heads thoroughly
once a month or when the shaver does not shave as well
as it used to.
1
Make sure that the appliance is switched off and
disconnected from the wall socket.
2
Press the release button on the shaving unit and pull
the shaving head holder off the shaving unit.
3
Rinse the hair chamber and shaving head holder
under the tap.
4
Remove the shaving heads. For detailed instructions,
see 'How do I replace the shaving heads?'.
Note: Do not clean more than one cutter and guard at
a time, since they are all matching sets. If you
accidentally put a cutter in the wrong shaving guard,
it may take several weeks before optimal shaving
performance is restored.
5
Clean the cutter and guard under the tap.
6
Shake off excess water.
7
Put the shaving heads back into the shaving unit. For
detailed instructions, see 'How do I replace the
shaving heads?'.