
User manual

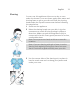
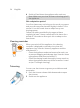
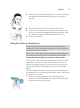
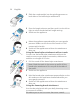
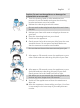
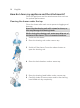
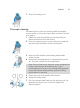
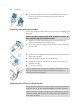
Table Of Contents
- Contents
- General description
- Introduction - Identify your shaver
- Fig. A
- Fig. B
- Important safety information
- What do the icons on the display mean? (Fig. A)
- What do the icons on the display mean? (Fig. B)
- Main menu (Fig. A)
- Main menu (Fig. B)
- How do I connect my shaver and smartphone? (Fig. A)
- How do I connect my shaver and smartphone? (Fig. B)
- What is my shaver telling me? (Fig. A)
- What is my shaver telling me? (Fig. B)
- How do I charge my appliance?
- How do I use my appliance and the attachments?
- How do I clean my appliance and the attachments?
- Storage
- How do I replace the shaving heads?
- Ordering accessories
- Troubleshooting
- Further guidance
- Recycling
- Trademarks

37
English
Caution: Do not use the appliance on damaged or
irritated skin or on wounds.
1
Twist the shaving head or other attachment to
remove it from the handle and press the cleansing
brush attachment onto the handle.
2
Moisten the cleansing brush with water.
Do not use the cleansing brush dry as this can irritate
the skin.
3
Moisten your face with water and apply a cleanser to
your face.
4
Place the cleansing brush on your cheek.
5
Switch on the appliance.
6
Gently move the brush across your skin from the nose
towards the ear. Do not press too hard. Make sure
that the treatment remains comfortable.
Do not cleanse the sensitive area around your eyes.
7
After approx. 20 seconds, move the appliance to your
other cheek and start cleansing this part of your face.
8
After approx. 20 seconds, move the appliance to your
forehead and start cleansing this part of your face.
Gently move the brush head from left to right.
We advise you to not overdo the cleansing and to not
cleanse any zone longer than 20 seconds.
9
Switch off the appliance and clean the attachment
after use.
10
After the treatment, rinse and dry your face. Your face
is now ready for the next step of your daily skincare
routine.