
User manual
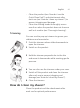
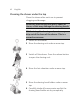
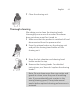

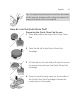
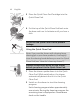
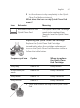
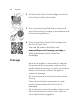

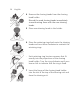
Table Of Contents
- Contents
- IMPORTANT SAFETY INSTRUCTIONS
- General description
- Introduction - Identify your shaver
- Fig. A
- Fig. B
- What do the icons on the display mean? (Fig. A)
- What do the icons on the display mean? (Fig. B)
- Main menu (Fig. A)
- Main menu (Fig. B)
- How do I connect my shaver and smartphone? (Fig. A)
- How do I connect my shaver and smartphone? (Fig. B)
- What is my shaver telling me? (Fig. A)
- What is my shaver telling me? (Fig. B)
- How do I charge my product?
- How do I use my product?
- How do I clean my shaver?
- Storage
- How do I replace the shaving heads?
- Accessories
- Assistance
- Further guidance
- Disposal
- Full Two-Year Warranty
- 45-DAY MONEY-BACK GUARANTEE
- Trademarks
- Contenido
- INSTRUCCIONES IMPORTANTES DE SEGURIDAD
- Información general
- Introducción: identifica tu afeitadora
- Fig. A
- Fig. B
- ¿Qué significan los íconos de la pantalla? (Fig. A)
- ¿Qué significan los íconos de la pantalla? (Fig. B)
- Menú principal (Fig. A)
- Menú principal (Fig. B)
- ¿Cómo conecto la afeitadora con mi smartphone? (Fig. A)
- ¿Cómo conecto la afeitadora con mi smartphone? (Fig. B)
- ¿Qué indica la afeitadora? (Fig. A)
- ¿Qué indica la afeitadora? (Fig. B)
- ¿Cómo se carga el producto?
- ¿Cómo se usa el producto?
- ¿Cómo se limpia la afeitadora?
- Almacenamiento
- ¿Cómo se reemplazan los cabezales de afeitado?
- Accesorios
- Asistencia
- Orientación adicional
- Desecho
- Garantía Total de Dos Años
- GARANTÍA DE DEVOLUCIÓN DE SU DINERO POR 45 DÍAS
- Marcas registradas

42
English
Cleaning the shaver under the tap
Clean the shaver after each use to prevent
clogging and damage.
Never dry the shaving unit with a towel or
tissue, as this may damage the shaving heads.
While rinsing the shaving unit, water may
drip out of the base of the shaver. This is a
normal occurrence.
1 Switch on the shaver.
2 Rinse the shaving unit under a warm tap.
3 Switch off the shaver. Press the release button
to open the shaving unit.
4 Rinse the hair chamber under a warm tap.
5 Rinse the shaving head holder under a warm
tap.
6 Carefully shake off excess water and let the
shaving head holder air-dry completely.