
User manual
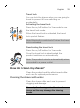
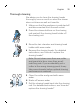
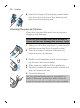
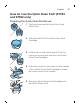
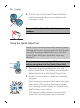
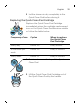
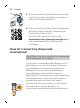
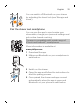
Table Of Contents
- Contents
- IMPORTANT SAFETY INSTRUCTIONS
- General description
- Introduction
- What do the icons on my product handle mean?
- What does the icon on my Quick Clean Pod mean?
- How do I charge my product?
- How do I use my product?
- How do I clean my shaver?
- How do I use the Quick Clean Pod? (S7783 and S7782 only)
- How do I connect my shaver and smartphone?
- How do I replace the shaving heads?
- Accessories
- Assistance
- Disposal
- Full Two-Year Warranty
- 45-DAY MONEY-BACK GUARANTEE
- Trademarks
- Contenido
- INSTRUCCIONES IMPORTANTES DE SEGURIDAD
- Información general
- Introducción
- ¿Qué significan los íconos que están en el mango del producto?
- ¿Qué significa el ícono que está en mi Quick Clean Pod?
- ¿Cómo se carga el producto?
- ¿Cómo se usa el producto?
- ¿Cómo se limpia la afeitadora?
- ¿Cómo uso el Quick Clean Pod? (S7783 y S7782 solamente)
- ¿Cómo conecto la afeitadora con mi smartphone?
- ¿Cómo se reemplazan los cabezales de afeitado?
- Accesorios
- Asistencia
- Desecho
- Garantía Total de Dos Años
- GARANTÍA DE DEVOLUCIÓN DE SU DINERO POR 45 DÍAS
- Marcas registradas

3 Let the shaver air-dry completely in the
Quick Clean Pod before storing it.
Replacing the Quick Clean Pod Cartridge
Replace the Quick Clean Pod Cartridge
immediately when the cartridge replacement
icon on the Quick Clean Pod becomes visible
or follow the table below.
Frequency of use Cycles When to replace
the Quick Clean
Pod Cartridge
Every day About 30 Every month
A few times per
week
About 20 Every 2 months
Every week About 13 Every 3 months
1 Twist and remove the top of the Quick
Clean Pod.
2 Lift the Quick Clean Pod Cartridge out of
the Quick Clean Pod by the handle.
29
English