
User manual
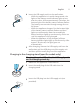
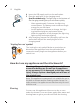
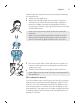
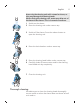
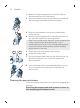
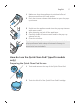
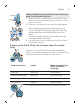
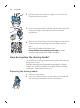
Table Of Contents
- Introduction
- General description
- Important safety information
- What do the icons on my appliance handle mean?
- What does the icon on my Quick Clean Pod mean? (specific models only)
- How do I charge my appliance?
- How do I use my appliance and the attachments?
- How do I clean my appliance and the attachments?
- How do I use the Quick Clean Pod? (specific models only)
- How do I replace the shaving heads?
- Ordering accessories
- Disposal
- Full Two-Year Warranty
- Introduction
- Description générale
- Renseignements importants sur la sécurité
- Que signifient les icônes sur le manche de mon appareil?
- Que signifie l’icône sur mon Quick Clean Pod? (certains modèles uniquement)
- Comment dois-je recharger mon appareil?
- Comment dois-je utiliser mon appareil et ses accessoires?
- Comment dois-je nettoyer mon appareil et ses accessoires?
- Comment dois-je utiliser le Quick Clean Pod? (Certains modèles uniquement)
- Comment dois-je remplacer les têtes de rasage?
- Commande d’accessoires
- Mise au rebut
- Garantie complète de deux ans

18
English
3
Lift the tab on the seal and pull it by the corner to
remove the seal from the Quick Clean Pod Cartridge.
4
Press the small circular piece on the handle of the
Quick Clean Pod Cartridge to break the snap hook on
the handle.
5
Place the Quick Clean Pod Cartridge into the Quick
Clean Pod.
6
Put the top of the Quick Clean Pod back onto the base
and turn it clockwise until you hear a click.
Do not tilt the Quick Clean Pod to prevent leakage.
Using the Quick Clean Pod (specific models only)
Note: If you use the shaver with shaving foam, shaving
gel or pre-shave products, thoroughly rinse the shaving
heads before you use the Quick Clean Pod (see 'How do I
clean my appliance and the attachments?').