
User manual
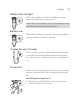

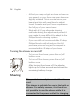
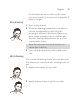
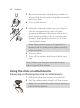
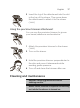


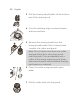
Table Of Contents
- Contents
- IMPORTANT SAFETY INSTRUCTIONS
- General description (Fig. 1)
- Introduction
- The display
- Charging
- Charging with the power cord
- Using the product
- Shaving
- Using the click-on attachments
- Cleaning and maintenance
- Storage
- Replacement
- Accessories
- Assistance
- Disposal
- Full Two-Year Warranty
- 45-DAY MONEY-BACK GUARANTEE
- Contenido
- INSTRUCCIONES IMPORTANTES DE SEGURIDAD
- Descripción general (Fig. 1)
- Introducción
- La pantalla
- Carga
- Carga con el cable de alimentación
- Uso del producto
- Afeitado
- Uso de los accesorios de ajuste de clic.
- Limpieza y mantenimiento
- Almacenamiento
- Sustitución
- Accesorios
- Asistencia
- Desecho
- Garantía Total de Dos Años
- GARANTÍA DE DEVOLUCIÓN DE SU DINERO POR 45 DÍAS

3 Rinse the shaving unit with warm water to
ensure that the shaving unit glides smoothly
over your skin.
4 Turn on the shaver.
5 Move the shaving heads over your skin in
circular movements to catch all hairs
growing in different directions. Make sure
each shaving head is fully in contact with
the skin. Exert gentle pressure for a close,
comfortable shave.
Note: Rinse the shaving unit regularly to
ensure that it continues to glide smoothly
over your skin.
6 Dry your face.
7 Turn off the shaver and clean it after each
use.
Note: Make sure that you rinse all shaving
foam or gel off the shaver.
Using the click-on attachments
Removing or attaching the click-on attachments
1 Make sure that the shaver is turned off.
2 Pull the attachment straight off the shaver.
Note: Do not twist the attachment while you
pull it off the shaver.
16
English