
User manual
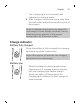
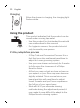
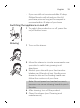
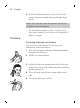
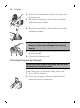
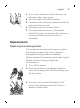
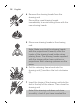
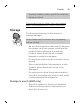
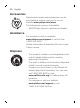
Table Of Contents
- Contents
- IMPORTANT SAFETY INSTRUCTIONS
- General description (Fig. 1)
- Introduction
- Charging
- Charge indicator
- Using the product
- Cleaning and maintenance
- Replacement
- Storage
- Accessories
- Assistance
- Disposal
- Full Two-Year Warranty
- 45-DAY MONEY-BACK GUARANTEE
- Contenido
- INSTRUCCIONES IMPORTANTES DE SEGURIDAD
- Descripción general (Fig. 1)
- Introducción
- Carga
- Indicador de carga
- Uso del producto
- Limpieza y mantenimiento
- Sustitución
- Almacenamiento
- Accesorios
- Asistencia
- Desecho
- Garantía Total de Dos Años
- GARANTÍA DE DEVOLUCIÓN DE SU DINERO POR 45 DÍAS

18
English
4 Remove the shaving heads from the
shaving unit.
Discard the used shaving heads
immediately to avoid mixing them with the
new shaving heads.
5 Place new shaving heads in the shaving
unit.
Note: Make sure that the shaving heads
with the projections fit exactly onto the
hooks of the shaving head holder when
placing them. The shaving heads supplied
with the shaver either have notches or
projections. Both shaving systems are the
same.
1
2
6 Put the retaining frame back into the
shaving unit (1) and turn the lock clockwise
(2).
7 Insert the hinge of the shaving unit into the
slot in the top of the shaver. Then close the
shaving unit.
Note:If the shaving unit does not close
smoothly, check if you have inserted the