
operation manual


13
RFX9600 Starter’s Guide
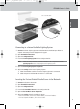
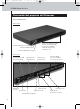
3 Set the Configuration switch to 2 for configuration:
The Extender will restart. After start-up, the Power and Ethernet LEDs are green and the Busy
LED is red/green blinking.
4 Open the browser.
5 Type the IP address of the Extender in the address bar of the browser: 192.168.8.80.
(This is also printed on the back of the Extender.)
You may have to refresh the browser before the Configuration Tool appears.
6 Select Firmware Update in the left navigation pane.
The Firmware Update page opens.
7 Follow the onscreen instructions.
Updating the Extender through a Router
If the Extender is already installed and connected to equipment, it may be more convenient to
update it through the router.
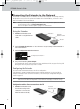
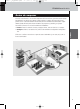
1 The Extender is already connected to the router. Connect the router to the PC as well.
2 Set the Configuration switch to 3 for configuration:
The Extender will restart. After start-up, the Power and Ethernet LEDs are green and the Busy
LED is red/green blinking.
3 Open ProntoEdit Professional on the PC.
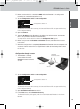
4 In the Tools menu, select Extender Discovery.
The Extender Discovery tool appears, with a list of all the detected Extenders in the Pronto
Network.
5 Select the Extender that you want to configure and click on the Configure button.
The Configuration Tool opens in the browser.
6 Select Firmware Update in the left navigation pane.
The Firmware Update page opens.
7 Follow the onscreen instructions.
Configuration switch: 3
Configuration switch: 2
RFX9600_SG_ESFv3.qxd 07-09-2006 15:38 Pagina 16