
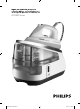
Operation Manual


the iron after a short while.
Note: When you switch on the appliance, the steam generator may produce a
pumping sound. This is normal; the sound tells you that water is pumped into
the steam generator.
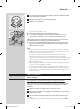
1 Remove any sticker or protective foil from the soleplate and clean
the soleplate with a soft cloth.
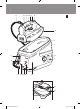
1 Place the steam generator on a stable and level surface, e.g. on the
hard part of the ironing board or on a table.
You can ll the water tank at any time during use.
Do not put hot water, perfume, vinegar, starch, descaling agents, ironing
aids or other chemicals in the water tank.
Do not overll the water tank, otherwise water may spill out of the
lling opening when you reinsert the water tank.
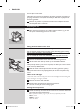
1 Remove the detachable water tank from the steam generator.
2 Fill the water tank with tap water up to the MAX indication.
Note: If the tap water in your area is very hard, we advise you to mix it with an
equal amount of distilled water.
3 Slide the water tank rmly back into the steam generator (‘click’).
Note: If the water tank is not properly placed, the iron does not produce any
steam.
When the water tank is empty, the water tank rell light starts ashing and
steam ironing is no longer possible.
1 Remove the water tank and ll it.
2 Put the water tank back into the steam generator.
, The iron is ready for steam ironing again.
1 Check the laundry care label of the article to be ironed to determine
the required ironing temperature.
- 1 for synthetic fabrics ( e.g. acrylic, viscose, polyamide) and silk
- 2 for wool
- 3 for cotton
- MAX for linen
8
4239.000.7594.1.indd 8 04-01-10 09:31