
User manual


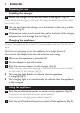

3 Empty the dust compartment by shaking it with your free
hand (Fig. 15).
4 If necessary, clean the dust compartment with a damp cloth.
5 If necessary, clean the lter unit. See section ‘Cleaning the lter
unit’.
6 To reattach the dust compartment, align the slot on the dust
compartment with the projection on the appliance. First attach the
bottom of the dust compartment (1). Then push the top of the dust
compartment towards the appliance (2) until it locks into place
(‘click’) (Fig. 16).
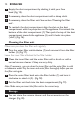
Make sure you clean the lter unit regularly.
1 Turn the outer lter anticlockwise (1) and remove it from the lter
holder (2) (Fig. 17).
Leave the inner lter attached to the lter holder.
2 Clean the inner lter and the outer lter with a brush or with a
normal vacuum cleaner if they are very dirty.
Note: If necessary , you can clean the inner lter and the outer lter in cold
or lukewarm water. Dry the inner and outer lter thoroughly before you use
the lter unit again.
3 Place the outer lter back onto the lter holder (1) and turn it
clockwise to attach it (2). (Fig. 18)
4 Put the lter unit back into the dust compartment (Fig. 19).
Note: Make sure you insert the lter unit in the correct way.
1 You can store the vacuum cleaner and the accessories on the
charger (Fig. 20).
10