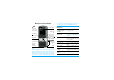
Discover Your Phone user guide and the product described. The device is meant to be connected to GSM/GPRS networks. Main screen Back of the phone: speaker & camera lens Left softkey Navigation key Right softkey Center key Pick up key Hang up, cancel and on/off key Alphanumeric keypad Headset/ Charger connector Stylus Philips continuously strives to improve its products. Therefore, Philips reserves the rights to revise this user guide or withdraw it at any time without prior notice.
Access Dual SIM menu Press + in idle mode. Access SMS editor Press > in idle mode. Access Quickcall Press < in idle mode. Access the Call list Press ( in idle mode. The Call list displays the Calls missed, the Calls received and the Calls dialled. Access the Main Menu Press L Menu in idle mode. Return to previous menu Press R. Quickly return to idle Press ).
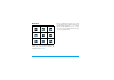
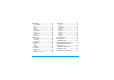
Main Menu Entertainment Op. Services Camera page 18 Tools page 20 Messaging page 23 My Files page 27 Call Info page 32 page 40 Contacts Settings page 42 page 45 page 49 Presented in the form of a grid, the Main Menu enables access to the various features available in your mobile phone. The table above summarises the arrangement of the Main Menu.
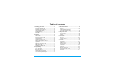
Table of contents 1. Getting Started ............................................5 4. Entertainment ........................................... 18 Inserting the SIM card ......................................5 Switching on the phone ...................................6 Charging the battery ........................................7 Setting Hotkeys .................................................8 Dual SIM ..............................................................8 Calling .............................
8. Messaging ..................................................... 32 12. Settings ....................................................... 49 Create Message .............................................. 32 Inbox ................................................................. 34 Outbox ............................................................. 35 Drafts ................................................................ 35 Templates ........................................................
1. Getting Started Congratulations on your purchase and welcome to Philips! To fully benefit from the support that Philips offers, register your product at www.philips.com/welcome. Please read the safety instructions in the "Precautions" section before use. To use your phone, you must insert a valid SIM card supplied by a GSM operator or retailer.
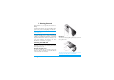
Insert the SIM card Replace the back cover Insert the SIM card into one of the two SIM card slots. If you only have one SIM card, insert it into SIM 1 slot (default slot). Make sure that the clipped corner of the card is in the correct corner and that the gold contacts are facing down. Replace the back cover by sliding it down into its slot, until it stops. Replace the battery Slide the battery into its slot, metallic connectors facing downwards, until it stops. Then lock it by pushing it downwards.
If you enter an incorrect PIN code three times, your SIM card will be blocked. To unblock it, you must request the PUK code from your operator. connector as shown below. Then plug the other end into a main AC power socket. When you switch on your mobile phone with your new SIM for the first time, you will be asked for the following: Set date To set the current date. Set time To set the current time. See “Settings” on page 49 for details on these two items.
The only way to turn off the charger is to unplug it, so use an easily accessible AC power socket. Setting Hotkeys You can configure the numeric keys 2 to 9 to access your favourite features simply by long-pressing on the numeric key. A number of hotkey shortcuts are pre-configured. For more information, see “Hotkeys” on page 52. Dual SIM The dual SIM feature in 9@9v mobile phone allows you to install two different SIM cards into one mobile phone. You can switch between two numbers/ networks.
2. Calling Make a call From the idle screen 1. In idle mode, enter the phone number using the keypad. To correct an error, press R Cancel. 2. Press ( to dial. 3. Press ) or R End call to hang up. To make an international call, long press * to enter the "+" sign for the international prefix. Using the phonebook 1. Press - in idle mode. 2. Select a contact from the list and press (: the selected number is dialled.
Call handsfree For your own comfort and safety, ensure that you move the phone away from your ear when calling handsfree, especially when increasing the volume. 1. In idle mode, enter the phone number using the keypad or select a contact from the phonebook. 2. Press ( to switch to handsfree mode and back. Options during a call During a call, press L Options to access the following options.
2. Press L Set. Select a name from the contacts list, and select a picture from the Picture album. Proceed the same way for each thumbnail. Calling a Quickcall contact To make a call, press < when in idle mode, go to the Quickcall menu, then select the thumbnail of your choice and press (. To reconfigure a thumbnail, select it and press L Options to Change the name and/or picture.
number (or select a contact from the phonebook) and press (. The first call is put on hold (the number is displayed at the bottom of the screen) and the second number is dialled. You can then press L Options to access the following options: • Switch calls to toggle between calls. • Transfer to connect the two calls. You are disconnected when the transfer is completed. • Conference to introduce the caller into a conference call.
Select Remove party to disconnect a member of the conference, or select Private call to have a private call with this member only (other members are put on hold). 4. Press ) to disconnect all calls at once. If there is an incoming call during the conference call and there are less than five members, you can accept this new call and add this member to the Conference call (if five members are already connected, you can answer the call, but not add it to the conference). 3.
3. Text Entry Your mobile phone supports a number of text editing modes, including Handwriting input, Pinyin input, Stroke input, English input, Numeric input and Symbol input. You can toggle between handwriting recognition mode, on-screen keyboard input mode and keypad input mode. Tap to enter the handwriting recognition mode. Tap to enter the on-screen keyboard input mode. Tap to enter the keypad input mode.
Language You can switch input language while writing a message. Press L OK and select input language from the options list. The available languages will depend on where you purchased your mobile phone. Short press Long press 1 space 1. , @ / : ; " ’ ! ¡ ? ¿ # + -*=%<>()&£$¥ 1 2 abc2àäåæç 2 3 def3éè∆Φ 3 Long press * to switch from T9® to basic text input.
Handwriting recognition In handwriting recognition mode, you can enter Chinese characters, English letters, numbers, symbols (including punctuations) by means of handwriting recognition. 1. Tap the hard icon on the on-screen keypad. 2. Tap on the top right corner of the touch screen to enter the handwriting recognition mode. 3. Write the text with your stylus pen.
3. 4. You will see the recognized result on the input area. To check for other English letters, press or on-screen icon. Choose one of the candidates from the input line and tap it to replace the one in the input area. Input symbols and numbers 1. 2. 3. Tap to enter symbols and numbers input mode. Tap to go back to the message. Tap a symbol or number on the touch screen with your stylus pen. You will see the recognized result in the input area. Space Input Tap to insert a space after the cursor.
4. Entertainment Western Horoscope, Lunar Calendar and Chinese Festival features are available only in the Chinese language menu (see page 19). Your phone may or may not have the Chinese Language menu depending on where the phone was purchased. Games This phone features games that are pre-installed in your mobile phone. Press L to enter the main menu from idle mode and select Entertainment > Games. Brick Game The goal of this game is to destroy bricks by hitting them with a ball.
Chinese Characteristics (for China and HK only) Lunar Calendar This menu gives you the correspondence between Gregorian and Chinese calendars by displaying the corresponding date in lunar mode from a selected Gregorian date. Features requiring date & time information (e.g. organizer events) depend on Gregorian dates only. Lunar in idle This option allows you to display the lunar calendar in idle screen. Select On or Off to activate or deactivate this option.
5. Op. Services This menu contains the services and features provided by your operator. Consequently, the menus described below may vary or may not be available, depending on your subscription. Contact your network operator for more details. The services provided may involve making a phone call or sending a SMS for which you may be charged. Op. Services This menu option is reserved for operator-specific services. Please contact your operator for more information about these options.
Press L Options while browsing, then select Bookmarks: the name and URL fields will be automatically filled in with the information of the page you are browsing. Select Add bookmark and start entering the new name for the edit screen to appear. Press L OK, then proceed the same way to enter the URL address. The Manage bookmarks menu allows you to Delete or Edit the selected bookmark.
Rename profile To rename the currently selected profile (start entering the new name for the edit screen to appear). Options While browsing, press L Options to access: Homepage To access the default homepage. To empty an area of the phone’s memory where the pages browsed during a WAP session are stored. Back To go back to the previously browsed page. Push inbox Forward To go to the next browsed page. Refresh To reload the currently browsed page from its original server.
6. Camera The table below details the operations of the various keys in camera mode. +- Your Xenium 9@9v mobile phone features a built-in digital camera. You can take pictures, store them in your phone or transfer them to your PC via Infrared, use them as wallpaper or send them to your friends via MMS. This chapter describes in detail how to use the camera.
The number of pictures you can save varies according to the settings: the higher the resolution, the bigger the file size. A message will warn you if there isn’t enough memory left. In this case, you must delete data before storing a new picture. • VGA (640 x 480) • Medium (320 x 240) • Screensize - Wallpaper (128 x 160) Please note that the higher the resolution, the larger the file size. Using the self-timer Picture quality 1. 2.
Set as wallpaper To set the selected photo as the image to be displayed in the background of your screen. Modify This option launches the image editing program (see “Picture album” on page 40). Properties Choosing this option displays the following properties of the selected image: Name, Size (in Kb), Resolution, and Format. Rotate This option allows you to rotate an image; the options are: - 90 degrees, + 90 degrees, + 180 degrees. Changes are automatically applied.
Slide show be set to Screensize (for more information, see “Picture resolution” on page 24). When the camera has finished processing the images, they are displayed on the screen as thumbnails. You may then press L Options to access the options described below. Selecting this option will launch a slide show of the contents in My pictures folder. During the slide show, each photo will be displayed briefly on the screen. Press R or to end the slide show and return to the previous screen.
7. Tools This menu contains features and options designed to keep you organised and informed while on the move. Organizer This menu allows to create, store and manage events in your organizer. When the organizer alert is On (see “Display” on page 50), a beep alerts you when an event is due. The reminder only applies to Meeting and To Do events. It will be updated when changing time zones (see “World clock” below).
events will be deleted and press L OK twice to delete all events preceding this date. To delete all events set in your organizer, enter a start date several years ahead (e.g. 31st of December 2015) to make sure all events preceding this date are deleted at once. Alarm clock Your mobile phone has a built-in alarm clock with a snooze feature. You can set up to three separate alarms and choose whether or not the alarm should repeat. To set an alarm, follow the steps below: 1. Select an alarm and set it to On.
When On, the new menu item Switch local and foreign allows you to display the zone of your choice. with the keypad and operators with the navigation keys as indicated in the table below: Foreign settings Addition Press > or the * key. Subtraction Press < or the * key twice. Multiplication Press + or the * key 3 times. Division Press - or the * key 4 times. Equal Press L. Foreign zone Move + or - to select the time zone of your choice.
Files that are copyright protected cannot be sent. When connecting with a PC, make sure you have activated its infrared option. Position of devices Before transmitting data between two devices, they must be correctly positioned in relation to one another. Make sure that: • the infrared ports are facing each other, • they are at a less than 30 cm away from each other. • nothing obstructs the infrared beam.
amount in either the Local or Foreign fields: the sum is calculated automatically. Activation Auto Switch On / Off These two separate menus allow you to set your mobile phone to switch itself on or off at pre-set times. To set Auto switch on sound, select On and press L OK. Enter the time at which you want your mobile phone to switch itself on and press L OK. Select the desired frequency from Once, Daily, or On weekdays and press L OK. A message appears to confirm activation.
8. Messaging Send To add recipient and send your message. Send to multiple To add several recipients and send your message. Save as draft To store the current message and its attachments in the archive menu. Add sound To attach a melody. Add graphic To attach an image. Create Message Input Languages To change the language for typing. When writing messages, you can toggle between T9 input, multitap by long pressing *.
from one option to the next and press L to access the menu. 1. Design your message: Add picture, Add text and/ or Add sound. Press > to create more slides. 2. The last icon on the left-hand side lets you access the MMS options (see below). 3. Select Send to select the contact from the contact list and send the MMS to the selected recipient(s). Pictures are chosen from the Picture album. Copyright protected pictures cannot be sent via MMS. Sounds can be chosen from the Sound Album melodies.
Inbox This menu allows you to read SMS/MMS messages you have received. The messages are displayed in a list. At the end of the list, the item allows you to delete all the messages at once. Deleting old messages is useful to free memory space in order to receive new messages. When an SMS is displayed, press L Options to access the menu options listed below: Move to archive To store messages in the phone memory. You can then consult them in Messages > SMS > Archive.
Next / previous slide Save picture To move to the next or previous slide. You can also press < or > when viewing the MMS in manual mode. Note that this option only appears if the MMS contains more than one slide. To detach the picture of the current slide and save it in the Picture album. Save sound To detach the sound of the current slide and save it in the Sound album. Close To close the MMS and go back to the list of options.
on this feature). Select a message in the list and press L Options to access the following items: Add to blacklist To add the sender’s phone number to the Firewall blacklist. This option isn’t available if his identity (i.e. phone number) is hidden. Move to inbox To move the selected message to the SMS Inbox (this will delete it from the Spam Box). Delete To delete the selected message.
Settings Reply path This menu allows you to configure the SMS/MMS settings. Select SMS or MMS. When you select SMS you can access the following options include: SMS center To select your default SMS centre. If not available on your SIM card, you must enter your SMS centre number. Auto save SMS When On, this option will automatically save messages sent in the Outbox menu. Signature When On, allows you to add a signature at the end of your message. You can Edit, Change or Save the signature.
Delivery report When On, this option will inform you via SMS whether your own SMS was received or not. This feature dependent. is Allows you to choose from: • Manual: you connect to the server manually by selecting a notification in the Inbox, selecting Read to download, then Play. • Automatic: new MMS are directly placed in the Inbox. Select the MMS and press > to play it. This mode is deactivated when roaming. 38 To select how long your MMS will be stored on the server, from 1 hour to maximum.
Network settings Network access To choose a connection profile from the ones you have set (see “Access settings” on page 55). Bearer To select the type of network used when launching a connection: GSM, GPRS or GPRS first. MMS center To enter the MMS address of the server you will connect to. Gateway address Gateway port To enter the IP and Port numbers of the server’s gateway. My dictionary This feature allows you to enrich the T9 dictionary used for writing messages.
9. My Files This menu and its sub-menus contain options related to the multimedia features of your Xenium 9@9v mobile phone. Inside the folders, images are displayed as a text list. Select an image and press > to view the image. Press Ltto access the menu options listed below. Rename To rename the picture. Send by... To send the selected image file via Infrared (see page 29) or MMS (see page 32). Note that you cannot send pictures that are copyright protected.
or WAP. The maximum size for downloading MIDI or AMR audio files by MMS/infrared/WAP is 50kb. Protected To access the list of copyright melodies protected sample sounds. Once in a list, you can then select a sound file and press L to access the menu options listed below. Rename To Rename the selected sound file. Send by.. To send the selected sound file via Infrared (see page 29) or MMS (see page 32). Set as ringtone . To set the selected sound as ringer.
10. Call Info The menus described in this section are used for managing how your Xenium 9@9v mobile phone handles calls and their related costs. Call list Your mobile phone can provide you with a list of outgoing and incoming calls, attempts at auto redialling, as well as call details. The different types of calls (All Calls, Missed calls, Received calls and Outgoing calls) are displayed in chronological order with the most recent call on top.
Auto redial Call forward When On, if the person you are calling is busy, your phone will automatically redial the number until a successful connection is made or until the maximum number of attempts is reached (10). The phone beeps at the beginning of each attempt and emits a special beep if the connection is successful. The time between redials increases with each attempt.
IP Prefix GPRS counters To set the prefix provided by your operator (up to 10 digits can be stored) in order to make IP calls. This function is subscription and network dependent. Contact your operator for configuration parameters. The GPRS counter allows you to monitor the amount of data received via GPRS sessions. This feature is subscription and network dependent. Info at call end To set On or Off the systematic display of the length and/or cost of each call when hanging up.
11. Contacts Contacts are stored in one of the two available phonebooks: on your SIM card (number of entries depending on capacity) or on your phone (up to 999 names). When entering new names, they will only be added to the phonebook you have selected. Contacts list It is in this menu that you can manage the names and telephone numbers. You can also access the Contacts list directly from the home screen by pressing -. Adding contacts to the SIM phonebook 1. 2. Select in the list.
In Europe the standard emergency number is 112, in the UK it is 999. Settings Selecting this option twice will duplicate all the names. Delete all This menu contains the settings for configuring the phonebooks of your mobile phone. To delete all contacts at once. This option only applies to the onboard phonebook, not to the SIM phonebook. Select contacts Edit and manage contacts This menu allows you to select the phonebook to use, In SIM, In phone or SIM + phone. Press + or - to select a phonebook.
In the SIM phonebook Choose a contact in your SIM phonebook and press Options to access the following options: • • • • Details Call IP call Send SMS • Send MMS • Flash dial • Copy to phone • Delete • Add to blacklist • Change In the onboard phonebook Choose a contact in your onboard phonebook and press OK or Options to access the following options: • Send MMS • Delete • Show • Call • Select picture • Add to blacklist • Change name • IP call • Select sound • Send SMS • Copy to SIM Select Show to access t
This function is only available when you select the onboard phonebook. Select a contact and press L Options. In the list, choose Select picture to add a picture from the Picture album and choose Select melody to open the list of ringers and add a melody. When the contact calls, the picture and/or sound associated with this contact will be displayed/played. 1. 2. The picture associated with a contact is also used for the Quickcall feature.When you change it, it is also updated in the Quickcall settings.
12. Settings Messages ringer Allows you to set On or Off an alert for each time you receive a new message. When On, you can select the alert of your choice from the ringers list. This menu allows you to change the settings related to each available option (sounds, time and date, security, etc.) and to customise your phone.
Vibra alert Allows you to set the vibra alert On or Off when receiving a call, when an event set in the organizer is due, when you receive a message and when the alarm rings. The vibra alert is always Off when you connect the charger or the Cigarette Lighter Adapter. Switch on sound Allows you to setthe welcome sound of your mobile phone to On when you switch the phone on. Equalizer This option allows you to choose from different audio settings. It is only available while a call is in progress.
Set date Allows you to set the date by pressing the appropriate numeric keys or the navigation keys. Local zone Allows you to select your current time zone. When you enter the menu, you are presented with a map of the world that you can navigate with the up and down navigation keys. Each time zone is identified according to its position relative to Greenwich Mean Time (GMT) and by the main cities within that time zone.
pressing the same key deactivates it and returns you to your Personal settings. For more information, see “Hotkeys” on page 52. Personal Autonomy Headset Car Outdoors 52 The information that appears here will depend on how your mobile phone has been configured.
Security 0 Meeting mode. 1 Call voice mailbox. * Dial international call. This menu allows you access the features relating to the security of your mobile phone and the data you store there. # Key lock. PIN protection Depending on your service provider, other hotkeys may be predefined and locked. 1. 2. 3. In the list, select a key from 2 to 9 and press L. If the key was already programmed, select Change.
by pressing the # key, it will be automatically locked again according to the delay you have selected. In all cases, the keypad is automatically unlocked when you receive a call. Public names Allows you to manage a specific names list called Public Names list, and restrict calls to this list via the Call restriction option. This feature is subscription dependent and requires a PIN2 code (see page 53). Public names Allows you to consult, edit and modify your Public Names list via a PIN2 code.
Access settings This menu allows you to create different data profiles that can be used for connecting to various services: for example, when using WAP or when sending MMS, the selected profile will be used to connect to the GSM or GPRS network. Options described below are operator and/or subscription dependent.
GPRS connect This menu allows you to define how your mobile phone connects to the GPRS service. For data calls Your phone will connect to the GPRS service only when required. This option reduces energy consumption, but increases the connection delay. Always on Your phone automatically connects to the GPRS service (if available). This option allows quicker access to GPRS features, but increases energy consumption.
Icons & symbols SMS full - Memory for messages is full. Delete In idle mode, several symbols can be displayed simultaneously on the main screen. Call Forward Unconditional to number - All If the network symbol isn’t displayed, the network is not currently available. You may be in a bad reception area, moving to a different location may help. Silent - Your phone will not ring when receiving a call. Vibra - Your phone will vibrate when receiving a call.
Precautions Radio Waves Your cellular mobile phone is a low power radio transmitter and receiver. When it is operating, it sends and receives radio waves. The radio waves carry your voice or data signal to a base station that is connected to the telephone network. The network controls the power at which the phone transmits. • Your phone transmits/receives radio waves in the GSM frequency (900 / 1800 MHz). • The GSM network controls transmission power (0.01 to 2 watts).
Always switch off your phone... Inadequately protected or sensitive electronic equipment may be affected by radio energy. This interference can lead to accidents. Before boarding an aircraft and/or when packing the phone in your luggage: the use of mobile phones in an aircraft may be dangerous for the operation of the aircraft, disrupt the mobile phones network and may be illegal. In hospitals, clinics, other health care centres and anywhere else where you may be in the close vicinity of medical equipment.
• • • • • For the optimal and satisfactory operation of the phone you are recommended to use the phone in the normal operating position (when not using in hands-free mode or with a hands-free accessory). Do not expose your phone to extreme temperatures. Treat the phone with care. Any misuse will void the International Guarantee. Do not immerse the phone in any liquid; if your phone is damp, switch it off, remove the battery and let them dry for 24hrs before using them again.
• Give your full attention to driving. Pull off the road and park before using the phone. • Respect the local regulations in countries where you drive and use your GSM phone. • If you want to use your phone in a vehicle, install the hands-free car kit which is designed for that purpose. • Ensure that your phone and car kit do not block any air bags or other security devices fitted in your car.
When this crossed-out wheeled bin symbol is attached to a product it means the product is covered by the European Directive 2002/96/EC Please inform yourself about the local separate collection system for electrical and electronic products. Please act according to your local rules and do not dispose of your old products with your normal household waste. The correct disposal of your old product will help prevent potential negative consequences for the environment and human health.
Troubleshooting The phone does not switch on Remove/reinstall the battery. Then charge the phone until the battery icon stops scrolling. Unplug from charger and try to switch the mobile on. The display shows BLOCKED when you switch on Somebody tried to use your phone but didn’t know the PIN code nor the unblocking code (PUK). Contact your service provider. The display shows IMSI failure place if your mobile has an external antenna, or contact your network operator for assistance/ information.
You can’t receive and/or store JPEG pictures The display shows INSERT YOUR SIM CARD A picture may not be accepted by your mobile phone if it is too large, if its name is too long, or if it doesn’t have the correct file format. Check that the SIM card has been inserted in the right position. If the problem remains, your SIM card might be damaged. Contact your operator.
Philips Authentic Accessories Some accessories, such as a battery and a charger, are included as standard in the package of your mobile phone. Additional accessories may also be provided or sold separately. Package contents may therefore vary. To maximise the performance of your Philips mobile phone and not to void the warranty, always purchase Philips Authentic Accessories that are specially designed for use with your phone.
Specific Absorption Rate Information International standards THIS MOBILE PHONE MEETS THE INTERNATIONAL RECOMMENDATIONS FOR EXPOSURE TO RADIO WAVES Your mobile phone is a radio transmitter and receiver. It is designed and manufactured not to exceed the limits for exposure to radio frequency (RF) energy defined by the international standards.
Trademark declaration Tegic Euro. Pat. App. 0842463 T9 ® is a trademark of Tegic Communications Inc.
Limited warranty 1. Workmanship During The Limited Warranty Period? What Does This Limited Warranty Cover? During the limited warranty period, Philips or its authorized service representative will, at its option either repair or replace, without charge for parts or labour, a materially defective Product with new or refurbished parts or Product and return such repaired or replaced Product to the Consumer in working condition. Philips will retain defective parts, modules or equipment.
b) Product that has been damaged due to repair, alteration, or modification by anyone not authorized by Philips; or c) Product that has reception or operation problems caused by signal conditions, network reliability or cable or antenna systems; or d) Product defects or problems caused by uses with non-Philips products or accessories; or e) Product which warranty/quality stickers, product serial number or electronic serial number has been removed, altered or rendered illegible; or f) Product purchased, used
ANY WARRANTY OF SATISFACTORY QUALITY MERCHANTABILITY OR FITNESS FOR A PARTICULAR PURPOSE. PHILIPS’ TOTAL LIABILITY FOR DAMAGES RELATING TO OR ARISING OUT OF THE PURCHASE OR USE OF THE PRODUCT, REGARDLESS OF THE TYPE OR CAUSE OF SUCH DAMAGE OR THE FORM OR CHARACTERISATION OF THE CLAIM ASSERTED (E.G. CONTRACT OR TOPIT), SHALL NOT EXCEED THE ORIGINAL PURCHASE PRICE PAID FOR THE PRODUCT.
Declaration of conformity We, Shenzhen Sang Fei Consumer Communications Co., Ltd. 11 Science and Technology Road, Shenzhen Hi-tech Industrial Park, Nanshan District, Shenzhen 518057 China declare under our sole responsibility that the product Xenium 9@9v Cellular Mobile Radio GSM 900/1800 TAC: 35175902 to which this declaration relates, is in conformity with the following Standards: SAFETY : EN 60950-1: 2001+A11:2004 HEALTH: EN50360:2001; EN50361:2001-7 EMC: ETSI EN301 489-7 v 1.2.