
2012 (Macintosh)


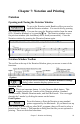


Table Of Contents
- PG Music Inc. License Agreement
- Table of Contents
- Chapter 1: Introduction
- Chapter 2: QuickStart Tutorial
- Chapter 3: Summary of New Features
- _
- All New 32-bit PPC Carbonized Engine.
- Odd-Time Signature Support.
- Maximum Number of Soloists increased
- New Count-In Options
- Harmony – Low Root Feature.
- Strauss-in-a-Box
- Transform 4/4 Melody to a Waltz 3 /4 \(“Strauss-
- Transform “Waltz” Melody to 4/4 \(“De-Strauss” t
- Bass player plays better “5ths
- Load Previous Style, Load Next Style.
- “Chase Volumes” added for playback.
- Drum count-in options
- StylePicker Enhancements.
- StylePicker Dialog “show all” button
- Mono/Stereo menu options
- Video and Audio Memo support
- Soloist “Note-Density” option.
- Dedicated menu items added on GM Menu
- New Hot Keys
- Configuration Files
- About Hot Key Names on the Menus
- New Program Hints Added
- _
- Chapter 4: Guided Tour of Band-in-a-Box
- Chapter 5: The Main Screen
- Chapter 6: Band-in-a-Box PowerGuide
- Chapter 7: Notation and Printing
- Chapter 8: Automatic Music Features
- Chapter 9: Recording Tracks
- Chapter 10: Built-in Drums
- Chapter 11: User Programmable Functions
- Chapter 12: Tutors and Wizards
- Chapter 13: CoreMIDI and QuickTime OS X
- Chapter 14: Reference
- PG Music Inc.
- Index
- Registration Form

Chapter 6: Band-in-a-Box PowerGuide 92
choose a Saxophone solo for the first chorus, a Trumpet for the next, and a Guitar or
Piano for the last chorus.
- When you select [Play Juke Box] the Select Soloist dialog will pop up with a
suggestion to use a Soloist for the first song in the jukebox list. This is normal. Press
[OK] to accept the Soloist suggestion. (The Jukebox will not bother you with the
Select Soloist dialog again; it will simply choose an appropriate Soloist for any given
song in the Jukebox song list.)
(Preview) Switch to next song after ____ Bars
Use this setting to preview the songs in a Jukebox list. Band-in-a-Box will play
each song in the folder for the number of bars you enter into the box. Use a
setting of 99 bars to play one chorus of each song.
Set Cue/Tap Options: The Cue Song Setup dialog has two parts. One part
defines the Tap Input device, the other part determines whether you would like
the Tap Input device to just “Start” the song or if you would like it to “SET
TEMPO/ START song.”
Accept Tap Input From options:
SPACEBAR: If this option is checked, your computer keyboard's [Spacebar]
would be used as the Tap Input device.
MIDI Keyboard: If this option is checked, your MIDI Keyboard would be
used as the Tap Input Device. The other options here allow you to select a
channel and a MIDI note number as the key to start the song. (This is usually
defined as the Rim Shot note number.)
Mouse click: If this option is checked, your Mouse will be used as the Tap Input
Device.
Any MIDI Event: If this option is checked, any MIDI Event will be used as the
Tap Input Device, i.e. Keyboard Metronome, pressing a key on your MIDI
Keyboard.
Start Song/Start Song and Set Tempo:
Tap ONCE to START song: If this option is checked, the song will start after
one tap from the selected Tap Input Device.
Tap 4 x's to SET TEMPO/ START song: If this option is checked the song
will start after tapping 4 times on the selected Tap Input Device. The Tempo
will be set automatically according to your tapped in value.