
2011 (Windows)

Chapter 8: Audio Rendering Enhancements44
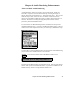
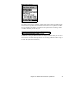
Once launched, you'll see the 2 panes of the Roland VSC3. If you only see one
of the panes, then you need to open up the “Player” section by
pressing the
Player button
. Then you'll see the “Player” section, which has the MIDI file
already prepared and ready to be converted to a .WAV file.
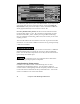
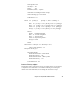
Press the [AUDIO-CONV] button
, and then choose the location and name
for the wavefile (.WAV) to save. By convention, we suggest that you name
the files with the suffix _VSC3, so that if your song is called “Violet Song”
then you could name it Violet Song_VSC3.WAV, but of course you can call it
anything you want.
The .WAV file will then be saved within 5-10 seconds. It gets saved as a 44K
stereo WAV. You can choose a different conversion rate by pressing the Setup
| Audio Conversion Rate.
Once you've saved the .WAV file, you can then convert the file to a WMA file
(Windows Media Audio) by pressing the “Convert any WAV to WMA file”
button. You can then select compression rates so that your file could stream on
typical dial-up web modem speed.
You could then convert your composition from a WAV file to
Burn to a CD by pressing the [Burn to CD] button.
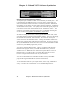
Audio Rendering Enhancements
In addition to the “Direct-to-Disk” Audio Rendering, there are other
enhancements to the Rendering function. You can specify a number of
seconds of silence at the beginning of the file and specify a number of seconds
to wait at the end to accommodate the decay of the final sound. You can also
choose to exclude the 2 bar count-in from the file.