
OPERATOR'S MANUAL


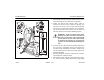
Table Of Contents
- How to Use This Manual
- Safety Signals
- Vehicle Safety
- How to Find What You Want
- A Special Word About Repairs
- Shop Manuals
- Preventive Maintenance Section
- Additional Sources of Information
- Start–Up
- Instruments and Controls
- Introduction
- Warning Lights and Buzzer
- Self Test
- Speedometer and Odometer
- Tachometer
- Coolant (Water) Temperature Gauge
- Engine Oil Pressure Gauge
- Dual Air Pressure Gauge (Air Reservoir)
- Fuel Gauge
- Voltmeter (option)
- Transmission Temperature Gauge (option)
- Air Filter Restriction Indicator (option)
- Headlight Switch
- Daytime Running Lights (option)
- Panel Lights
- ID and Clearance Lights
- Windshield Wipers/Washer
- Ignition Key Switch
- Parking Brake
- Cruise Control Switch
- Hand Throttle Control
- Heating and Air Conditioning
- Accessories
- Seats
- Steering Column and Mirrors
- Operating the Engine
- Operating the Transmission
- Using the Brake System
- Operating the Rear/Drive Axle
- More Driving Tips and Techniques
- Vehicle Recovery and Spring Brakes
- Shut–Down
- Introduction
- Maintenance Schedule and Lubrication
- Engine Maintenance
- Cooling System
- Brake System
- Air System
- Tires and Wheels
- Heater and Air Conditioner
- Electrical System
- Cab Maintenance
- Transmission and Clutch
- Steering and Driveline
- Front Axle and Suspension
- Rear Axle and Suspension
- Frame and Fifth Wheel
- Noise and Emission Control
- Consumer Information and Vehicle Identification

Preventive Maintenance Cab Maintenance
Model 330 PB1318 3/01
– 197 –
CAUTION: Do not aim the water jet directly at
door locks or latch. Tape the key holes to pre-
vent water from seeping into the lock cylinders.
Water in lock cylinders should be removed with
compressed air. To prevent locks from freezing
in the winter, squirt glycerin or lock deicer into
the lock cylinders.
Washing the Exterior
1. Begin by spraying water over the dry surface to remove
all loose dirt before applying the car wash and wax solu-
tion.
• Do not wash the vehicle in direct sunshine.
• Do not spray water directly into any vents.
2. Using soapy water, wash the vehicle with a clean soft
cloth or a soft brush made for automotive cleaning.
• Use cool or warm water and a mild, household type
soap. Strong industrial detergents and cleaning
agents are not recommended.
• Do not use stiff brushes, paper towels, steel wool, or
abrasive cleaning compounds because they will
scratch painted, plated, and polished metal sur-
faces.
3. Rinse surfaces frequently while washing to flush away
dirt that might scratch the finishes during the washing
operation.
4. Wipe everything dry with a chamois to avoid water spots.
• To prevent water spotting, dry off the cosmetic sur-
faces with a clean cloth or chamois.
5. Remove road tar with an automotive type tar remover or
mineral spirits.
6. After cleaning and drying, apply a quality automotive
wax.
NOTE: To allow enough time for your truck’s finish to
cure, wait at least thirty days after the date of manufac-
ture before waxing.
• Do not apply wax in the hot sun
• Never dust off dry surfaces with a cloth because it will
scratch the finishes.
Cleaning the Chassis
• Hose dirt and grime from the entire chassis. Then, if an
oil leak develops, you will be able to detect it easier.
• Corrosive materials used for ice and snow removal and
dust control can collect on the underbody. If these mate-
rials are not removed, accelerated corrosion (rust) can
occur on underbody parts such as fuel lines, frames,
floor pan, and exhaust system—even though they have
been provided with corrosion protection.