
OPERATOR'S MANUAL
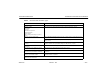


Table Of Contents
- How to Use This Manual
- Safety Signals
- Vehicle Safety
- How to Find What You Want
- A Special Word About Repairs
- Shop Manuals
- Preventive Maintenance Section
- Additional Sources of Information
- Start–Up
- Instruments and Controls
- Introduction
- Warning Lights and Buzzer
- Self Test
- Speedometer and Odometer
- Tachometer
- Coolant (Water) Temperature Gauge
- Engine Oil Pressure Gauge
- Dual Air Pressure Gauge (Air Reservoir)
- Fuel Gauge
- Voltmeter (option)
- Transmission Temperature Gauge (option)
- Air Filter Restriction Indicator (option)
- Headlight Switch
- Daytime Running Lights (option)
- Panel Lights
- ID and Clearance Lights
- Windshield Wipers/Washer
- Ignition Key Switch
- Parking Brake
- Cruise Control Switch
- Hand Throttle Control
- Heating and Air Conditioning
- Accessories
- Seats
- Steering Column and Mirrors
- Operating the Engine
- Operating the Transmission
- Using the Brake System
- Operating the Rear/Drive Axle
- More Driving Tips and Techniques
- Vehicle Recovery and Spring Brakes
- Shut–Down
- Introduction
- Maintenance Schedule and Lubrication
- Engine Maintenance
- Cooling System
- Brake System
- Air System
- Tires and Wheels
- Heater and Air Conditioner
- Electrical System
- Cab Maintenance
- Transmission and Clutch
- Steering and Driveline
- Front Axle and Suspension
- Rear Axle and Suspension
- Frame and Fifth Wheel
- Noise and Emission Control
- Consumer Information and Vehicle Identification

Preventive Maintenance Engine Maintenance
Model 330 PB1318 3/01
– 141 –
NOTE: To expel air from density-type strainer
elements, soak them in clean fuel before install-
ing them.
• Throw away old gaskets. Replace them with new ones to
ensure a positive seal.
• Position the shell and gasket properly. Then tighten the
cover nut or bolt just enough to prevent fuel leakage.
• After starting the engine, check for leaks around the fil-
ter.
Filter Draining
Check fuel filter/water separator daily. Check with engine
OFF. Depending on the fuel storage facility, more frequent
draining may be required.
1. Open drain valve (by hand only): turn valve screw
counter-clockwise approximately 1 1/2 to 2 turns until
draining occurs. Drain filter sump of water until clear fuel
is visible.
If entrapped water exceeds sump volume, you can
either:
A. Close valve and run engine until smooth idle is
established, then repeat drain procedures, or
B. Remove filter from mounting head, completely drain
all fluid, and reassemble filter assembly. Be sure to
follow new filter assembly instructions.
2. Close drain valve by turning valve screw clockwise
approximately 1 1/2 to 2 turns.
CAUTION: Do not overtighten the valve. Over-
tightening can damage the threads.
Fuel Tanks
1. Inspect fuel tanks, fuel hoses, and fittings to ensure
proper positioning and fastening; check for leaks.
2. Inspect mounting brackets, straps, and pins to ensure
proper positioning & fastening every 15,000 miles/
24,000 km (see label on fuel tank and data below):
Type of Tank Tank Strap T-Bolt Nut Torque
Aluminum 30 Lb. ft. (41 Nm)
Cylindrical Steel 8 Lb. ft. (11 Nm)