
User Guide


© 2008
7
15" Signature Series Operation / Installation Manual
0"
27/32"
A
2"
0”
13
23
/32”
13
/64”
13
3
/16”
10
5
/64”
8
25
/64”
5
25
/32”
3
11
/16”
1
25
/32”
27
/32”
3
11
/16”
1
/2” deep
typical
13
39
/64”
15
7
/64” locking
doors only
16
39
/64”
3
/4”
29
13
/16”
Ref
These (2) holes
not to be drilled
for a door with lock
Rearview
25
35
/64”
29
3
/8”
30
15
/64”
13
/64”
19
/64”
7
/16”
Ø
11
/32”
15
/32” deep hole drilled at both ends
All features called out
in this detail view apply
only to panels being used
on locking doors
11
/64”
27
/64”
19
/32”
Detail A
Ø
1
/8”
1
/4” deep
Ø
3
/4”
thru
R 1
11
/16”
17
/32”
27
/64”
1
25
/32”
3
/64”
2
1
/8”
13
/16”
11
/16”
3
7
/32”
1
13
/64”
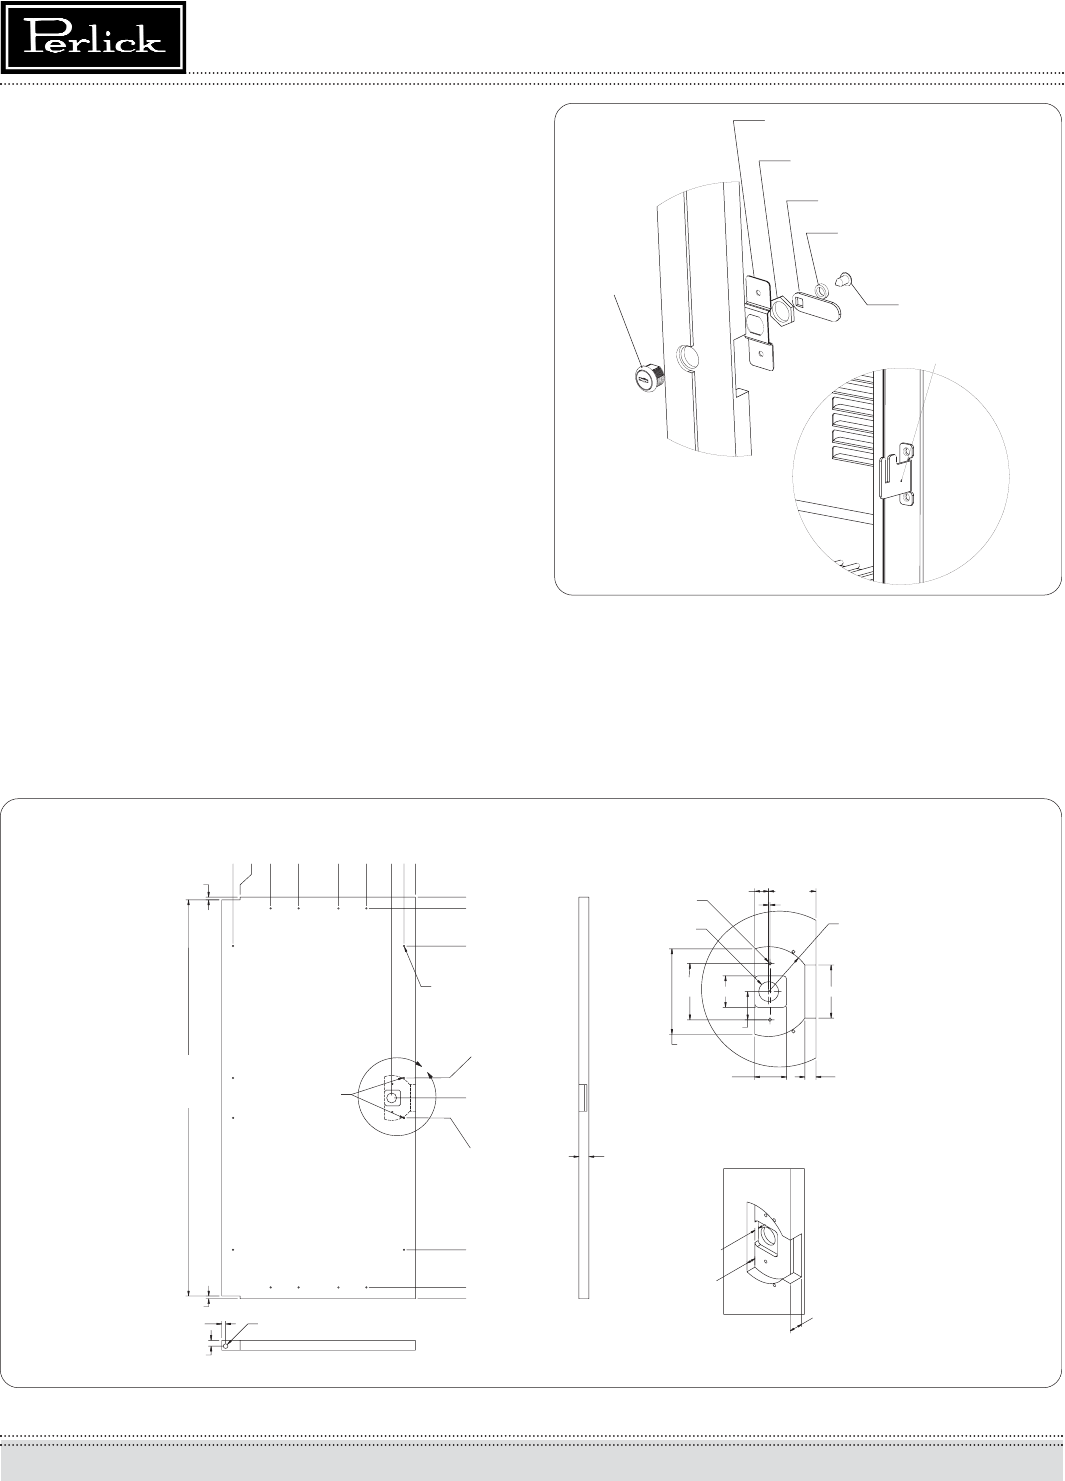
Figure 7. Solid Wood Overlay Panel
Mounting bracket
Screw
Lockwasher
Lock strike
Nut
Lock bracket
Lock body
Figure 6. Door Lock - Optional
Handle Installation
CAUTION
Handle mounting on wood overlay door should be mounted on
overlay panel only (not the door) to avoid damage to the fac-
tory door.
1. Handle must be attached to overlay before mounting overlay onto
door. Mark rear of wood overlay panel with handle fastening loca-
tions.
2. Drill through wood overlay panel at marked locations taking care not
to damage the wood overlay panel.
3. Countersink screw heads so screw heads are flush with backside of
panel. Attach handle to overlay panel.
CAUTION
Proper wood working tools should be used to avoid damage or
errors in workmanship.
4. With the unit secured in position, open the door and make sure panel
pre-drilled holes align with door frame holes.
5. Loosely attach four corners of the overlay panel to the door using #10
x 1" wood screws, installed through the door frame from the rear.
6. Check for overall wood overlay panel fit, position and function. Make
minor adjustments as necessary. When panel is properly aligned,
tighten mounting screws securely. Install the rest of the mounting
screws and tighten securely.
CAUTION
Do not overtighten wood overlay attachment screws as this
may damage factory supplied door frame.