
Disassembly and assembly


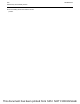

Illustration 353 g02827145
2. If necessary, remove nuts (5) from studs (6).
3. Remove the alternator belt. Refer to Disassembly
and Assembly, “Alternator Belt - Remove and
Install” for the correct procedure.
4. Remove fan drive pulley (4).
5. Remove the alternator belt tensioning bracket.
Refer to Disassembly and Assembly, “Alternator -
Remove and Install” for the correct procedure.
6. Remove bolts (3) and remove the fan drive
assembly (7) from the cylinder head.
7. If necessary, follow Step 7.a through Step 7.b in
order to disassemble the fan drive assembly.
a. Remove studs (6) from the fan drive (7).
b. Remove bolts (2) and remove lifting bracket (1).
Installation Procedure
1. Check all components for wear and damage. If
necessary, replace any components that are worn
or damaged.
Illustration 354 g02827145
2. If necessary, follow Step 2.a through Step 2.b in
order to assemble the fan drive.
a. Install studs (6) to fan drive (7). Tighten the
studs to a torque of 18 N·m (159 lb in)
b. Position lifting bracket (1) onto fan drive (7).
Install bolts (2) to lifting bracket (1). Tighten the
bolts to a torque of 45 N·m (33 lb ft).
3. Position fan drive (7) onto the cylinder head. Install
bolts (3) and tighten the bolts to a torque of
25 N·m (221 lb in).
4. Position fan drive pulley (4) onto studs (6).
5. If necessary, install the fan. Refer to Disassembly
and Assembly, “Fan - Remove and Install” for the
correct procedure.
6. Install the alternator belt tensioning bracket. Refer
to Disassembly and Assembly, “Alternator -
Remove and Install” for the correct procedure.
7. Install nuts (5) and tighten the nuts to a torque of
25 N·m (221 lb in).
UENR0624-03 195
Disassembly and Assembly Section
This document has been printed from SPI2. NOT FOR RESALE