
Installation Guide

Pergo Solid Installation Instructions 02172016
Page 4
Step 2 – INSTALL FIRST ROW
• Using the string as a straight edge lay the
first row of flooring in place with the tongue
facing the center of the room. Leaving a ¾”
gap at the wall, pre-drill and face nail using
10D nails. Continue nailing the entire length
of the room.
• Leave a ¾” expansion gap at each end.
Set nails and fill holes with matching putty. Remove strings and nails.
Step 3 – INSTALL REMAINING ROWS
Continue the laying process using a mechanical fastener until
the room is complete (See section – Recommended Pneumatic
Floor Stapler or Nailer).
Helpful Hint: Use flooring lengths that offset or stagger the end joints
at least 6” or more for a professional look.
• Carefully cut the last row to leave a ¾” expansion space
• Replace / install trim moldings
STAPLE OR NAIL DOWN INSTALLATIONS:
3/4” Solid Hardwood Flooring may be installed over wood sub-floors
using staples or flooring cleats. When installing 3/4” solid wood planks
or strips by nailing or stapling it is necessary to use the proper type of
flooring stapler or nailer made for the thickness of the hardwood
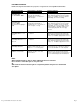
flooring that is being installed. (See fastener schedule)
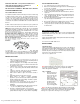
Step 1
NOTE: It is extremely important to use the proper adapters, face plates,
staples or cleats. Improper fasteners, Stapler, Nailer or air pressure
can damage flooring. Flooring manufacturer is not responsible for
damage caused by improper installation tools, methods or misuse.
Adjustments of the air pressure may be necessary to provide adequate
penetration of the nail or staple into the nail bed, allowing the nail to be
countersunk into the tongue, flush with the nail pocket. The nail or cleat
must be flush in the nail pocket. Use a scrap piece of flooring to
properly adjust stapler or nail gun before beginning installation.
Note: An expansion space of ¾” is required along the perimeter
walls and at all vertical structures to allow the flooring to expand.
Place the planks with the tongue facing away from the wall and along
your chalk line. Use 10D nails to secure the starter row along the wall
edge 2” to 3” from the ends and every 6” along the side. Counter sink
the nails and fill with the appropriate filler that blends with the flooring.
Place the nails in a dark grain spot in the board when possible. The
base or quarter round will cover the nails when installed after
completion of the installation.
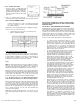
Blind nail at a 45° angle through the tongue. You can also use a 16
gauge finish nail gun. Nails should be 2” to 3” from end, 6“ along the
side.
NOTE: DO NOT USE A RUBBER MALLET TO INSTALL FLOORING. STRIKING
THE SURFACE WITH A RUBBER MALLET MAY “BURN” THE FINISH CAUSING
IRREPARABLE DAMAGE
INSTALLING ¾” SOLID HARDWOOD OVER CONCRETE
Solid Hardwood Flooring can be installed on concrete slabs (minimum
3,000 psi) that are on or above grade. The moisture content of the
slab should be tested with a Calcium Chloride Test and emit less than
3 pounds per 1000 square feet per 24 hours, then the appropriate
subfloor (nailing surface) can be installed. A Installer should record
moisture test results in the space provided on the last page of this
document and leave with the owner as part of their records.
There are several methods by which this can be accomplished:
• ¾” or thicker Exterior Grade Plywood laid over a vapor
retarder of 6 mil poly or two layers of 15# felt and power
nailed into the concrete slab. The ends of the plywood
panels should be staggered ½ panel in alternating rows and
an expansion space of ½” should be left around the
perimeter of the room. An expansion gap of ⅛” must be left
between the panels. The flooring may then be nailed to the
plywood surface using 1½” fasteners.
• ¾” or thicker Exterior Grade Plywood may also be glued to
the vapor retarder that has been glued to the concrete
floor. The vapor retarder and plywood should be glued
using cutback adhesive or other approved adhesive,
• applied according to the manufacturer’s directions. The
plywood panels should be cut down to 4’ X 4’ or 16” X8’
and the panel joints should be staggered by 2’. Score the
backs of the panels 3/8” deep on a 12” grid, laying the
scored side into the adhesive observing a 1/8” gap
between the panels and a ½” space around the perimeter.
• As an alternative a floating plywood base can be installed.
In this method a 6 mil poly vapor retarder is laid on the
floor lapping the seams at least 6”. Loose lay 3/8” exterior
grade plywood panels on the floor, allowing 1/8” between
panels and ½” between the panels and walls or other
vertical surfaces and offsetting the ends by ½ panel. Lay a
second layer of plywood at 90º angles to the first layer
allowing 1/8” between the panels and ½” between the
panels and walls or other vertical surfaces and offsetting
the ends ½ panel. Staple the panels together with staples
that have crowns at least ¼” and that do not penetrate the
bottom layer in a pattern not exceeding 6” X 6”. Lay an
additional vapor retardant barrier over the plywood panels
and begin installation of the flooring.
• Flat, dry Screeds or 2” X 4” boards of Group 1 softwood in
random lengths from 18” to 48” may be used as a nailing
base. The boards must be preservative treated (suitable for
interior use) and dried to no more than 12% moisture. The
screeds should be adhered to the floor using suitable mastic
adhesive at 12” on center. A 6 mil poly vapor retarder is
draped over the screeds and the flooring is nailed directly to
the screeds, provided the flooring is less that 4” wide. For
flooring 4” wide and over a wood subfloor must be applied
over the screeds to provide adequate nailing surface. 5/8”
CDX plywood or ¾” OSB are recommended for this
application. In high moisture conditions such as coastal
areas an additional vapor retarder should be glued directly to
the slab before the screeds are installed in addition to the
vapor retarder over the screed.