
Installation Manual
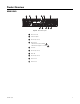
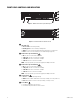

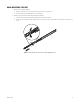
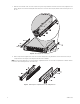
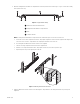
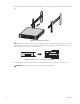
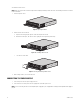
Table Of Contents

14 C4687M-C (7/13)
Installation
INSTALLING THE UNIT ON A DESKTOP
To install the unit on a desktop:
1. Secure rubber feet (included) to the unit’s bottom panel.
2. Position the unit to allow for cable and power cord clearance.
RACK-MOUNTING REQUIREMENTS
The unit occupies 2 rack units (RU) of vertical rack space (8.9 cm or 3.5 inches) in an industry standard 48 cm (19-inch) equipment rack. The
hardware required for rack-mounting is included with the unit.
The rack must meet the following requirements:
• Rack standard: 48 cm (19 inches), EIA-310-D compliant (rear column required)
• Rack column depth: 50.8 to 76.2 cm (20 to 30 inches)
• Column mounting hole provisions: 10-32 UNF-2B threaded holes or square window holes on front and rear columns
• Door systems (optional): Front doors must have at least 5.1 cm (2 inches) between the unit bezel and the inside of the door; rear doors
may be used only on rack columns that are more than 66 cm (26 inches) deep
NOTE: Refer to Figure 3 on page 9 for the description of the hardware used in this installation.
WARNING: Do not place the unit on its side
WARNINGS:
• Make sure the unit is level in the rack.
• Do not attach the unit’s rubber feet when rack-mounting the unit.
• Provide proper ventilation when mounting the unit in a rack. Slots and openings in the cabinet provide ventilation to prevent the unit
from overheating. Do not block these openings. Never place the unit near or over a radiator or heat register.