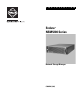
I N S T A L L A T I O N Endura NSM5200 Series ® Network Storage Manager C3683M (3/09)
Contents Regulatory Notices . . . . . . . . . . . . . . . . . . . . . . . . . . . . . . . . . . . . . . . . . . . . . . . . . . . . . . . . . . . . . . . . . . . . . . . . . . . . . . . . . . . . . . . . . . . . . . . . . . . . 5 Video Quality Caution . . . . . . . . . . . . . . . . . . . . . . . . . . . . . . . . . . . . . . . . . . . . . . . . . . . . . . . . . . . . . . . . . . . . . . . . . . . . . . . . . . . . . . . . . . . . . . . . . . 5 Description. . . . . . . . . . . . . . . . . . . . . . . . . .
List of Illustrations 1 2 3 4 5 6 7 8 9 10 11 12 13 14 15 16 17 18 19 20 21 22 Major Package Components. . . . . . . . . . . . . . . . . . . . . . . . . . . . . . . . . . . . . . . . . . . . . . . . . . . . . . . . . . . . . . . . . . . . . . . . . . . . . . . . . . . . . . . . 10 Accessory Pack . . . . . . . . . . . . . . . . . . . . . . . . . . . . . . . . . . . . . . . . . . . . . . . . . . . . . . . . . . . . . . . . . . . . . . . . . . . . . . . . . . . . . . . . . . . . . . . . . .
Regulatory Notices This device complies with Part 15 of the FCC Rules. Operation is subject to the following two conditions: (1) this device may not cause harmful interference, and (2) this device must accept any interference received, including interference that may cause undesired operation. RADIO AND TELEVISION INTERFERENCE This equipment has been tested and found to comply with the limits of a Class A digital device, pursuant to Part 15 of the FCC Rules.
Description The NSM5200 Series network storage manager (NSM) delivers industry leading performance and innovation for mission-critical storage needs. The combination of high performance, scalable hardware design and advanced software capabilities enables the NSM5200 to meet the unique storage needs of physical security and video surveillance applications.
the rigors of video recording applications than an NTFS file system, which is standard with Windows®-based recorders. Although XFS is superior, fragmentation can build up over prolonged periods of active use. To compensate, the software incorporates defragmentation routines that run in the background. These routines mitigate the performance degradation and the potential for corruption that result from fragmentation errors.
MODELS Table A. NSM5200 Model Numbers Model Storage* Country Code 3 TB US = North America EU = Europe UK = United Kingdom CN - China AU = Australia AR = Argentina 6 TB NSM5200 9 TB 12 TB *NOTE: Storage capacities subject to change. Contact Pelco Product Support for current capacity information. OPTIONAL ACCESSORIES DAS5200 Series Each DAS5200 Series storage expansion box adds additional storage to each NSM5200.
Before You Begin Endura is a network system that requires a continuous amount of bandwidth to transmit true, live video; therefore, always include your network administrator when planning and installing Endura components.
USER-SUPPLIED PARTS In addition to the standard tools and cables required for a video security installation, you will need to provide the following items: Qty 1 1 1 1 Description Cat5e (or better) cable and connectors for connecting the NSM5200 to the Endura network Power source (110/220 VAC) Small flat-tip screwdriver, if mounting the unit into a rack Small Phillips screwdriver, if mounting the unit into a rack You also need to provide all network equipment, such as switches, for the Endura network.
ACCESSORY PACK SHOWN ACTUAL SIZE PHILLIPS PAN HEAD SCREW, 8-32 X 0. 375-INCH 5 EA. (INSTALLED) STANDARD POWER CORD 2 EA. RACK MOUNT KIT ESD DISPOSABLE WRIST STRAP 1 EA. FRONT BEZEL KEY 2 EA. RUBBER FEET 5 EA. (INSTALLED) Figure 2. Accessory Pack RACK MOUNT KIT CHASSIS MOUNTING BRACKETS PHILLIPS PAN HEAD SCREW, 6-32 X 0.25- INCH 2 EA. PHILLIPS PAN HEAD SCREW, 10-32 X 0.25- INCH 12 EA. (INSTALLED) PHILLIPS TRUSS HEAD SCREW, 8-32 X 0.375-INCH 8 EA. PHILLIPS FLAT HEAD SCREW, 10-32 X 0.5-INCH 8 EA.
PRODUCT SERIAL NUMBER LABEL PLACEMENT Product serial number labels help identify your system and its factory configuration in the event that your NSM5200 or its components require service. Three labels citing your product’s serial number are attached to the unit. One large label is attached to the right side panel of the unit. A smaller label is attached to the unit’s front panel on the lower-left side, behind the front bezel.
Equipment Placement and Rack Mounting The NSM5200 can be placed on a flat surface, such as a desktop, or mounted in an equipment rack. DESKTOP INSTALLATION WARNING: Do not place the NSM5200 on its side; in this position, the unit is likely to fall over and may cause equipment damage or personal injury. To install the NSM5200 on a desktop: 1. Make sure the rubber feet are installed to prevent surface damage. If not, secure each rubber foot to the bottom panel of the unit (refer to Figure 5).
RACK MOUNTING The NSM5200 mounts into an industry-standard 19-inch (48 cm) equipment rack. The NSM5200 occupies three rack units (5.25 in. or 13.3 cm) of vertical rack space. The hardware necessary to mount the NSM5200 into a rack is supplied with the unit.
3. Attach one front-mount rail to one rear-mount rail. Make sure the rails are mounted back to back, as shown in Figure 7. Depending on rack depth, use either three or four 8-32 x 0.375-inch Phillips truss head screws for each rail set. Leave the screws loose until step 10. (4) SCREWS 8-32 X 0.375 PHILLIPS TRUSS HEAD Figure 7. Assembling a Support Rail 4. Repeat step 3 for the other rail set. 5.
6. Attach one support rail assembly to the equipment rack in the desired location (refer to Figure 9): NOTE: The support rail assemblies are identical and may be used on either the right or left side of the rack. a. Position the ear of the front-mount rail against the front of the equipment rack. Align the top and bottom holes in the ear of the rail with the threaded holes (or cage nuts) in the rack. b. Using two 10-32 x 0.
c. Tighten the two screws to secure the spacer to the rack. 10-32 X 0.5 PHILLIPS FLATHEAD SPACER Figure 10. Attaching Rack Rail Spacers 9. Repeat step 8 for the second spacer. 10. Tighten the 8-32 x 0.375-inch Phillips truss head screws that were attached to the front- and rear-mount rails in steps 3 and 4. 11. Place the unit onto the mount rails by sliding the chassis brackets onto the rails. This step may require two people to lift and slide the unit into place.
12. After the unit is in place, tighten the two thumbscrews to secure the unit to the rack. THUMBSCREW Figure 12. Tightening the Thumbscrews 13. Install the cable management bracket on the rear panel as follows (refer to Figure 13): a. Position the bracket so that the screw holes on the unit and bracket are aligned. b. Insert two 6-32 x 0.25-inch Phillips pan head screws (supplied) into the screw holes located on each side of the unit. c. Tighten the two screws. d.
Hard Drive Array Installation The NSM5200 stores data using RAID (Redundant Array of Independent Disks) technology. All NSM5200 Series recorders operate in a RAID 6 configuration to maximize fault tolerance and enhance disk-access performance. The NSM5200 has a single RAID controller that manages a single array of 12 drives. The RAID 6 configuration allows any 2 out of the 12 drives to fail without any data loss. On any drive failure, the user is notified of the failure and the unit continues to operate.
4. Install each hard drive carrier as follows: a. Open the hard drive latch (press down and pull the spring latch). b. With the hard drive latch open, slide the hard drive carrier gently into an open hard drive bay (refer to Figure 15). Figure 15. Installing the Hard Drive Carrier c. Close the hard drive latch; make sure the hard drive carrier locks into place. 5. After all 12 hard drive carriers are inserted, close and lock the front bezel.
Connections Familiarize yourself with the NSM5200 rear panel before connecting any equipment to the unit. Figure 16. Rear Panel Layout ì î ï ñ ó r s Power Supply Connectors (hot-swappable) Power Supplies (hot-swappable) Power Supply LEDs (status) Mute button Fibre Channel Connector Mini-SAS Connector Ethernet Port 2 (reserved for future use) t u ~í ~â ~ä ~ã ~å Ethernet Port 1 VGA Port Serial Port USB 2.
CONNECTING TO THE NETWORK The NSM5200 supports remote administration from an Endura workstation. The NSM5200 is compatible with the entire family of Endura-ready devices using TCP/IP and UPnP protocols. Consult your network administrator before installing the NSM5200 to avoid possible network conflicts. Use the left Gigabit Ethernet adapter port to connect the NSM5200 to the Endura network. This is required for Endura operation.
Operation Refer to the Web Browser manual that was shipped with the unit for details on how to access and configure the NSM5200. NOTE: To make sure that all diagnostic messages will appear to a system operator, leave at least one Endura workstation or VCD5000 running at all times. During operation, monitor the unit status and power supply indicator lights to make sure that all drives are operating properly.
s Software Status • Green: The software is operating normally. • Amber: A minor software malfunction is detected (for example, an excessive network packet loss). • Red: A fatal software error has occurred: for example, ceasing to record. t Network Port 1 Speed and Activity Network status (connection and speed) is indicated by one of the following conditions: • Off: The unit is not connected to the network. • Solid Green: The unit is connected to the network using the 1000Base-T standard.
UNIT STARTUP To start the unit: 1. Unlock and open the front bezel. 2. Press the power button. The power indicator glows white. 3. Close and lock the front bezel. The Pelco badge now glows blue. POWER BUTTON 1 2 3 4 5 6 7 8 9 10 11 12 Figure 20. Opening the Front Bezel UNIT SHUTDOWN You can shut down the NSM5200 by performing one of the following options: • An orderly shutdown lets the unit close its files and shut down without affecting the data files. Use the orderly shutdown in most cases.
Troubleshooting If the following instructions fail to solve your problem, contact Pelco’s Product Support at 1-800-289-9100 (USA and Canada) or +1-559-292-1981 (international) for assistance. Access the properties dialog boxes for the NSM5200 on the Endura workstation.
Specifications SYSTEM Operating System Linux RAID Level CompactFlash system drive, RAID 6 for storage drives Effective Capacity Up to 9.082 TB, expandable with DAS5200s Drive Interface SAS/SATA II User Interface Remote operation from Endura workstation or VCD5000 Minimum Requirements Microsoft® Internet Explorer® 6.x or higher with Adobe® Flash® Player 10 or later NETWORK Interface 2, 1 Gbps Ethernet RJ-45 ports (1000Base-T) Auxiliary Interfaces USB 2.
PHYSICAL Construction Steel cabinet Finish Front bezel Chassis Gray metallic with black end caps Black matte finish Dimensions 24.3" D x 17.0" W x 5.2" H (61.8 x 43.2 x 13.
Appendices APPENDIX A: EXPANDING VIDEO STORAGE You can increase the video storage capacity of the NSM5200 by adding one or more DAS5200 direct attached storage (DAS). Each DAS5200 adds up to 12.0 TB of total capacity (up to 9.08 TB of video storage). You can add up to seven DAS5200 units to expand the total capacity for each NSM5200 up to 81 TB of total capacity (up to 72.6 TB of video storage). NOTES: • You do not have to shut down the NSM5200 to add a DAS5200.
APPENDIX B: INSTALLING AN UNINTERRUPTIBLE POWER SUPPLY (UPS) You should connect each NSM5200 to a UPS (not supplied). UPS devices maintain a limited amount of backup battery power if the main power fails. WARNING: Most UPS devices can be used to supply backup battery power. However, the NSM5200 does not support intelligent UPS devices since they usually include power management software. If you install an intelligent UPS device, do not install the power management software on the NSM5200.
PRODUCT WARRANTY AND RETURN INFORMATION WARRANTY Pelco will repair or replace, without charge, any merchandise proved defective in material or workmanship for a period of one year after the date of shipment.
www.pelco.com Pelco, Inc.