
User's Manual


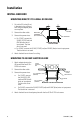
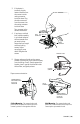
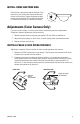
Table Of Contents
- Important Safety Instructions
- Regulatory Notices
- Description
- Installation
- Install Back Box
- Mounting Directly to a Wall or Ceiling
- Mounting to 4S Deep Electrical Box
- Mounting to Ceiling Tile
- Install Camera
- Install Dome and Trim Ring
- Vertical Phase (24 VAC Operation Only)
- Auto Iris Level Adjustment
- Focus Adjustment for Fixed Focal Length Lens with Auto Iris
- Switch Settings for Fixed Focal Length Lens with Auto Iris
- Switch Settings for Fixed Focal Length Lens Without Auto Iris
- Switch Settings for Varifocal Lens
- Specifications
- General
- Electrical
8 C2410M-I (1/06)
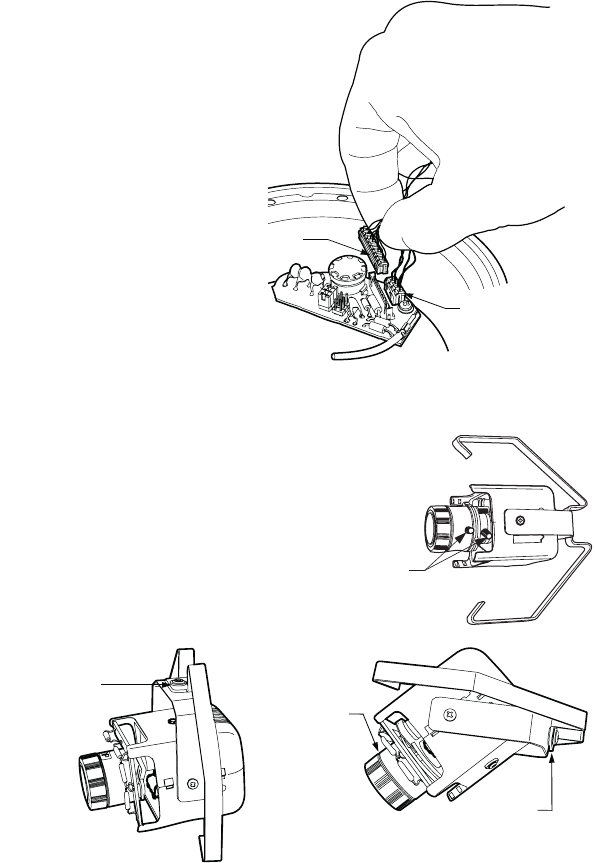
3. If the heater is
installed, plug the
heater connector from
the camera into the
mating connector
inside the base. Plug
the video connector
from the camera into
the mating connector
inside the base.
Turn on power to the
camera and monitor.
4. If you have a varifocal
lens, hold the assembly
in your hand and point
the lens toward what
you want to view.
Loosen the focal length
and focus locking
screws. Adjust
according to scene
detail. Retighten the
screws.
5. Always make sure the tab on the camera
bracket is pointing out of the enclosure (away
from the ceiling or wall). Gently squeeze the
bracket, place it against the shoulder inside
the back box, and gently release.
Proper camera orientation:
VIDEO
CONNECTOR
HEATER
CONNECTOR
VARIFOCAL LENS
LOCKING
SCREWS
CAMERA BRACKET
TAB ALWAYS POINTS
OUT OF THE
ENCLOSURE
CAMERA BRACKET
TAB ALWAYS POINTS
OUT OF THE
ENCLOSURE
TOP OF
CAMERA
Ceiling Mounting: The camera bracket tab
points out of the enclosure and the top of the
camera is pointed in the opposite direction.
Wall Mounting: The camera bracket tab
points out of the enclosure and the top of the
camera points up towards the tab.