
Install Instructions


29
BOILER OPERATION
8. BOILER OPERATION
A. SYSTEM INSPECTION
1. Confirm that all water, gas, and electricity are
turned off.
2. Inspect the boiler combustion chamber for
obstructions. Clear any debris from the combustion
chamber.
3. Check the condition of the burners and pilot
assembly. Make certain that there are no unusual
bends. Replace components if necessary.
4. Verify that water piping, gas piping and electrical
wiring are installed properly. Be sure that all
components are installed correctly. Refer to these
instructions as well as to component manufacturer’s
instructions.
B1. FILL THE BOILER (WATER BOILERS)
1. Fill the boiler and system with water making certain
to vent air from all high points in the system. Water
should bleed from each air vent when it is opened.
2. The pressure reducing valve on the fill line will
typically allow the system to be filled and pressurized
to 12 psi. Consult the valve and expansion tank
manufacturer for more detailed information.
3. Check all joints and fittings throughout the system for
leaks. If leaks are found, drain the system and repair
as required.
4. If the water hardness is high, use water treatment to
reduce the deposition of minerals in the boiler.
5. If the system requires antifreeze protection, use only
propylene glycol specially formulated for hydronic
systems. These contain inhibitors that prevent
corrosion of the boiler and system components. Do
not use ethylene glycol or automotive antifreezes.
a. Make sure that the antifreeze supplier can
provide periodic testing of antifreeze
concentration and inhibitor level.
b. If an automatic fill valve is used, the solution
strength in the system must be checked to assure
that the antifreeze concentration has not been
overly diluted.
c. Local codes may require the addition of a
backflow preventer or manual fill only with
separation from the city water supply.
d. Consider the minimum temperature of potential
exposure in the system when deciding on the
antifreeze concentration. A concentration of
50% generally provides protection from freezing
to -30°F.
B2. FILL THE BOILER (STEAM BOILERS)
1. Gravity Systems and Pumped Return with
Condensate Units – Fill the boiler to the normal
water line as indicated on the boiler jacket. The
normal water level is about 25-7/8" above the boiler
foundation (about 2/3 of the gauge glass).
2. Pumped Return Systems with Boiler Feed Unit -
Fill the boiler using the boiler feed unit. The fill level
will depend on the control being used but should be
roughly 25-7/8" above the boiler foundation (about
2/3 of the gauge glass) when the feed pump stops.
3. Check all joints and fittings in system piping below
the water line for leaks and repair as necessary.
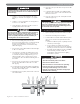
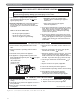
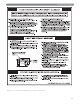
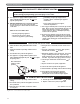
C. STUDY OPERATING INSTRUCTIONS
Before starting the boiler, study the Operating
Instructions supplied with the boiler. Figure 8.2 to 8.4
show typical Lighting Instructions for typical boilers.
D. RUN PILOT CHECK-OUT
1. Shut off all electrical power to the boiler.
2. Close Main and Pilot gas shut-off valves. Wait for
five (5) minutes.
3. Set the Operating and Limit Temperature Controls to
minimum setting so they will not call for heat.
4. Perform Pilot Check:
a. Turn main electric disconnect switch to the “ON”
position.
b. Turn up the settings on the Operating and Limit
Temperature Controls so they will call for heat.
c. Check for a continuous spark at the electronic
spark-ignited pilot.
d. The control will spark for 90 seconds (trial for
ignition), then shut down for a 5 to 6 minute wait
period before attempting another ignition.
e. Turn down the Operating Temperature Control to
stop the call for heat.
f. Wait 60 seconds to allow the control to reset
before proceeding with the next step.
5. Spark-Ignited Pilot Ignition Check
a. Turn up the Operating Temperature Control for a
call for heat.
b. The spark-ignited pilot should ignite.
c. Turn down the Operating Temperature Control to
stop the call for heat.
d. The spark-ignited pilot should shut off.