
User's Manual

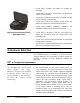
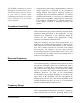
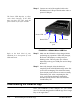
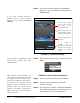
Table Of Contents
- Introduction
- Getting Started
- Making a Measurement
- Technical Specifications
- Functions Measured
- General Characteristics
- Physical Characteristics
- Data Communication Characteristics
- Electrical Characteristics
- Adaptor Resonances and Frequency Responses
- Reference Values
- Typical Measurement Ranges
- Frequency Weighting Curves
- Fa (Flat 0.4 Hz to 100 Hz)
- Fb (Flat 0.4 Hz to 1260 Hz) Frequency Weighting
- Fc (Flat 6.3 Hz to 1260 Hz), Wh, and Wf Frequency Weighting.
- Wm, Wc, and Wd Frequency Weightings
- We, Wj, and Wk Frequency Weighting
- Wg Frequency Weighting (Defined in BS6841:1987)
- Wm (Whole Body) Frequency Weighting
- Typical Measurements Ranges
- Standards Met
- Glossary
- RMS Acceleration
- RMS Acceleration in Decibels
- Allowed Exposure Time
- Energy Equivalent RMS Acceleration
- Running RMS Acceleration LINEAR
- Running RMS Acceleration EXPONENTIAL
- Vibration Dose Value
- Maximum Transient Vibration Value
- Minimum Transient Vibration Value
- Long Term Maximum Peak
- Short Term Maximum Peak
- Long Term Crest Factor
- Short Term Crest Factor
- Summed Instantaneous Acceleration
- Regulatory Compliance Statement
HVM200 Manual Getting Started 2-1
CHAPTER
2
Getting Started
This chapter provides instructions for setting up and
configuring HVM200 meters for use with the G4App.
Unpacking the HVM200
The HVM200 package includes a USB to mirco-USB cable
with the meter. After removing the HVM200 and cable from
the packaging, record the serial number and date of purchase
in a safe place where it can be retrieved, in case you require
customer support.
Powering the HVM200
Before using your HVM200, you should charge the battery
completely by following these steps:
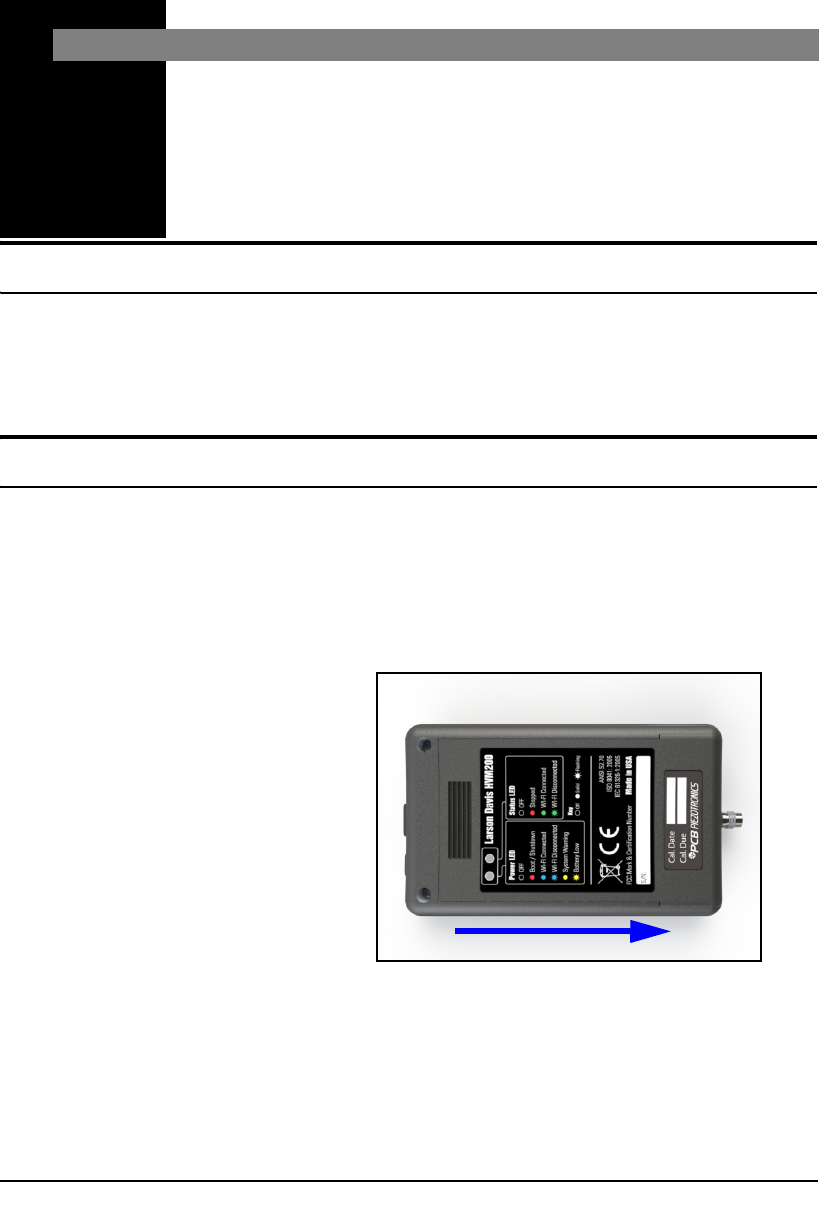
Step 1 Slide and remove the back battery cover from the
HVM200 meter.
FIGURE 2-1 Remove Battery Cover
Step 2 Insert the supplied battery into the HVM200 so that
the battery contacts align with the power contacts
in the device.
Step 3 Slide the back battery cover onto the HVM200.