
Integration Guide
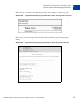
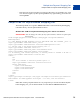
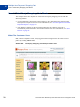
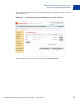
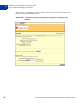
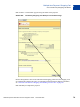
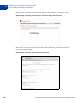
Table Of Contents
- Preface
- How Website Payments Standard Works
- Using Your Merchant Account Profile and Tools
- The Account Profile Summary
- Branding PayPal’s Payment Pages
- Streamlining Purchases with Website Payment Preferences
- Blocking Certain Kinds of Payment
- Adding Your Credit Card Statement Name
- Getting Customer Contact Telephone Numbers
- Language Encoding Your Data
- Multi-User Access to Your PayPal Account
- PayPal-Supported Currencies
- Issuing Refunds
- Single-Item Payment: Buy Now and Donations
- Multiple-Item Payment: Shopping Cart
- Encrypted Website Payments
- Testing in the PayPal Sandbox
- Website Payments Standard HTML FORM Basics
- Website Payments Standard HTML Variables
- Country Codes
- Index

Website Payments Standard Checkout Integration Guide November 2005 73
Multiple-Item Payment: Shopping Cart
Button Factory for PayPal-Hosted Shopping Cart
4
1. Calculate shipping and tax.
If you have specified shipping rates or tax calculations in your Profile, they are listed under
Shipping Cost Calculation and Sales Tax Calculation. For more information, see
“Automatic Calculation of Shipping and Handling Cost and Tax” on page 45.”
2. Add option fields to your button.
Creating an option field lets your customers specify information about their purchases. Option
fields can specify information such as color, size, or gift wrapping. Options must not change
the price of an item. A shopping cart button can have up to two option fields, and you can use
a drop-down menu or a text box to collect the information.
– Option Field Type: Choose the type of option field: drop-down menu or text box. If you
choose drop-down menu, you will enter the different choices. If you choose text box,
your customer will enter his choice.
– Option Name: Enter the name of your option. There is a 60-character limit on option
names.
– Drop-Down Menu Choices: If you are using a drop-down menu, enter your menu
choices. There is a 30-character limit per choice, with a maximum of 10 choices. Use a
carriage return (press Enter) to separate each choice.
3. Select a View Cart button.
Choose the button image you would like your customers to click when they check out and
complete their purchases. To display your own image, enter the URL of the image’s location
in the URL field.
4. Customize your payment pages.
– Custom Payment Page Style: Give your customers a seamless payment experience by
customizing PayPal's payment pages to match the style of your website. If you have
already added Custom Payment Page Styles in your Profile, they will be listed here.
Choose the page style you would like to appear when your customer clicks your
Shopping Cart button. For more information about adding, selecting, or changing custom
page styles, see “Branding PayPal’s Payment Pages” on page 29.”
5. Customize your customer’s experience.
– Successful Payment URL: Enter the URL where you would like to send your customers
after they have completed payment. Once customer has completes the payment, he sees
a payment confirmation page. From this page, he will click Continue and return to the
Successful Payment URL you have specified. If you do not enter a Successful Payment
URL, customers who click this link will be taken to a PayPal web page.
– Cancel Payment URL: Enter the URL where you would like to send your customers if
they cancel their payment at any point in the PayPal Shopping Cart payment flow. If you
do not enter a Cancel Payment URL, customers who click this link will be taken to a
PayPal web page.
6. Select other options.