
Integration Guide
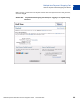
Table Of Contents
- Preface
- How Website Payments Standard Works
- Using Your Merchant Account Profile and Tools
- The Account Profile Summary
- Branding PayPal’s Payment Pages
- Streamlining Purchases with Website Payment Preferences
- Blocking Certain Kinds of Payment
- Adding Your Credit Card Statement Name
- Getting Customer Contact Telephone Numbers
- Language Encoding Your Data
- Multi-User Access to Your PayPal Account
- PayPal-Supported Currencies
- Issuing Refunds
- Single-Item Payment: Buy Now and Donations
- Multiple-Item Payment: Shopping Cart
- Encrypted Website Payments
- Testing in the PayPal Sandbox
- Website Payments Standard HTML FORM Basics
- Website Payments Standard HTML Variables
- Country Codes
- Index

Single-Item Payment: Buy Now and Donations
Using Buy Now or Donations Button Factory
3
62 November 2005 Website Payments Standard Checkout Integration Guide
Donations Button Fields
– Donation Name/Service: Enter the reason for payment or the name of your
organization/charity here. If you do not enter anything in this field, your donors can
complete this field.
– Donation ID/Number: You can use this field to differentiate payments (e.g. to enter a
campaign name). This field is not displayed to your donors at the time of payment, but
they see it in their transaction details on the PayPal website.
– Donation Amount: If you would like to collect a pre-determined amount, you can enter
it in the Donation Amount field. If you would like your donors to choose their donation
amounts, do not enter a price in this field. Users are prompted to enter a donation amount
when they make payment.
Common Fields
– Currency: Choose the currency in which you would like this payment to be
denominated. This field defaults to the currency of your primary balance.
– Buyer’s Country: To display the PayPal login or sign-up page in a certain language,
select a country where that language is spoken from the pull-down menu.
5. Choose a image for your button.
If you are going to receive payments or donations from your website, choose the image for the
button you would like your customers to click to make their purchase. To display your own
image, enter the URL of the image’s location in the URL field.
NOTE: PayPal recommends that you enter an image URL only if the image is stored on a
secure (https) server. Otherwise, your customer’s web browser displays a message that
the payment page contains insecure items.
If you are creating an email link, go to “Adding More Details to the Button” on page 63.
6. Security Settings
PayPal offers the option to encrypt your button’s HTML code. Encryption ensures that an
item’s price and other details cannot be altered by a third party, thus increasing the security of
your transactions. Select Yes to encrypt your code, or No to leave it editable.
PayPal highly recommends encrypting your button code. However, there are three limitations:
– Encrypted button HTML is not editable. If you want to modify your button code
manually, select No for this option.
– You cannot encrypt your button if it has dynamically-generated code from the Add
More Options page, such as drop-down Options fields (see step 5). If you need Option
fields for your products, select No to turn encryption off.
– If you choose to encrypt your button, you cannot create an email link.