
Integration Guide
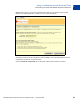
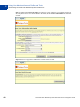
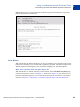
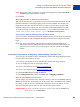
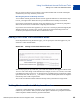
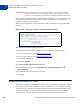
Table Of Contents
- Preface
- How Website Payments Standard Works
- Using Your Merchant Account Profile and Tools
- The Account Profile Summary
- Branding PayPal’s Payment Pages
- Streamlining Purchases with Website Payment Preferences
- Blocking Certain Kinds of Payment
- Adding Your Credit Card Statement Name
- Getting Customer Contact Telephone Numbers
- Language Encoding Your Data
- Multi-User Access to Your PayPal Account
- PayPal-Supported Currencies
- Issuing Refunds
- Single-Item Payment: Buy Now and Donations
- Multiple-Item Payment: Shopping Cart
- Encrypted Website Payments
- Testing in the PayPal Sandbox
- Website Payments Standard HTML FORM Basics
- Website Payments Standard HTML Variables
- Country Codes
- Index

Using Your Merchant Account Profile and Tools
Streamlining Purchases with Website Payment Preferences
2
44 November 2005 Website Payments Standard Checkout Integration Guide
FIGURE 2.7 Momentary “You Made a Payment Page” with Auto Return On
Turning On Auto Return
To turn Auto Return on:
1. Log in to your PayPal account at
https://www.paypal.com.
2. Click the Profile subtab.
3. Under the Selling Preferences column, click Website Payment Preferences. See
Figure 2.5, “Website Payment Preferences on the Profile Summary Page” on page 34.
4. Under Auto Return for Website Payments, click the On radio button to enable Auto
Return.
5. In the Return URL field, enter the URL to which you want your buyers redirected after
payment completion.