
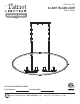
Installation Instructions


4
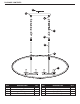
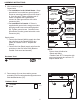
ASSEMBLY INSTRUCTIONS
Note: The electrical cable will need to get pulled
through the individual parts as they are installed
on this and later steps.
Note: The hanging height for this fixture is
adjustable. Add or subtract threaded pipes to
achieve the desired height.
K
K
K
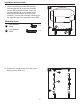
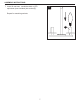
2. To open chain links:
Locate the split in the chain link (K) you're
removing. Put one pair of pliers (not included) on
each side of the split and rotate the pliers in
opposite directions to open the link's split. The open
link should be shaped like the letter "C".
Do not twist the ends of the link sideways so that
the open link cannot lay flat.
2b
CORRECT
INCORRECT
2a
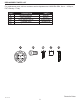
1. Screw threaded pipes (D) onto couplings (F).
Next, screw fixure loops (H) onto threaded pipes
(D).
1
F
H
D